When it comes to official LEGO sets the last thing on my mind is to tamper with them, even if it doesn’t look quite right. Usually what LEGO says & does goes, after all their design team are amazing and pretty much everything that comes out of the LEGO factory is spot on!
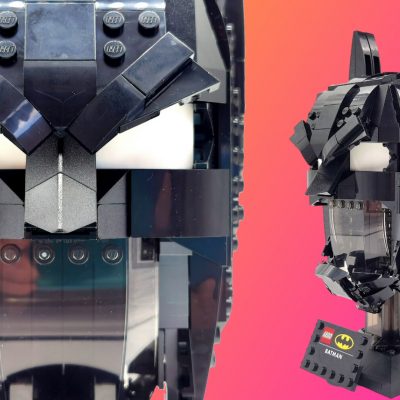
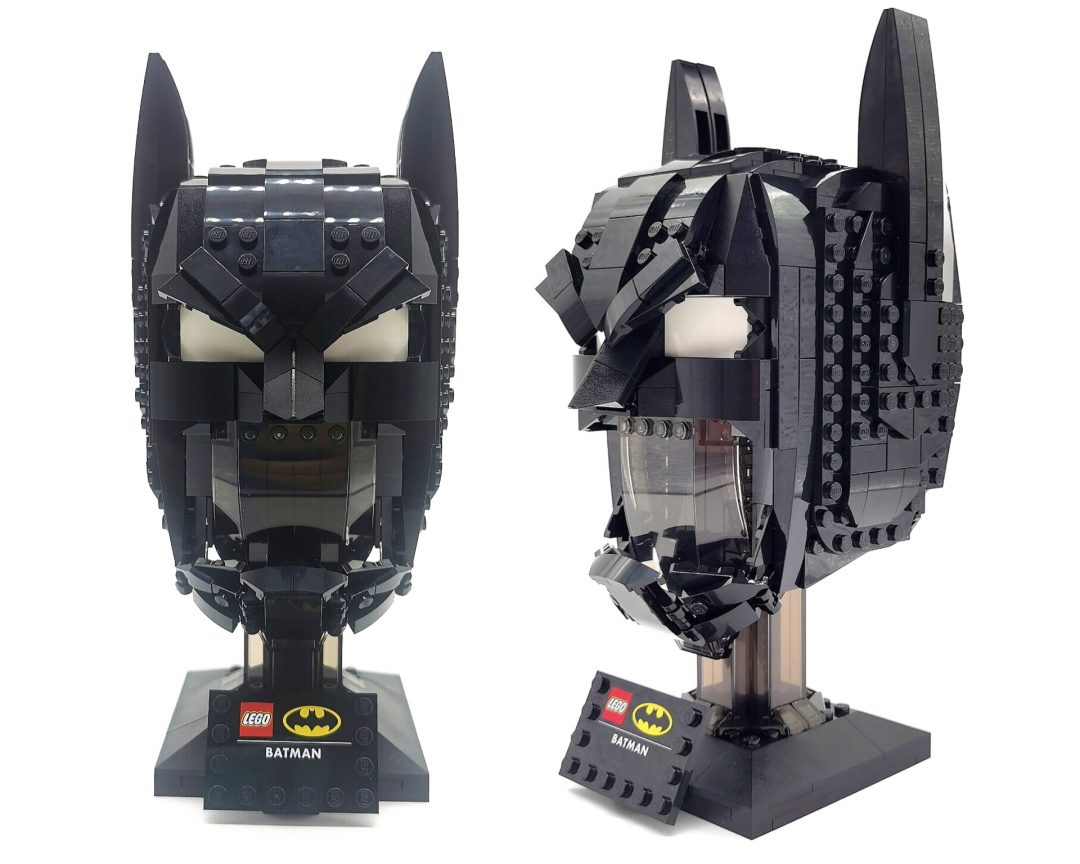
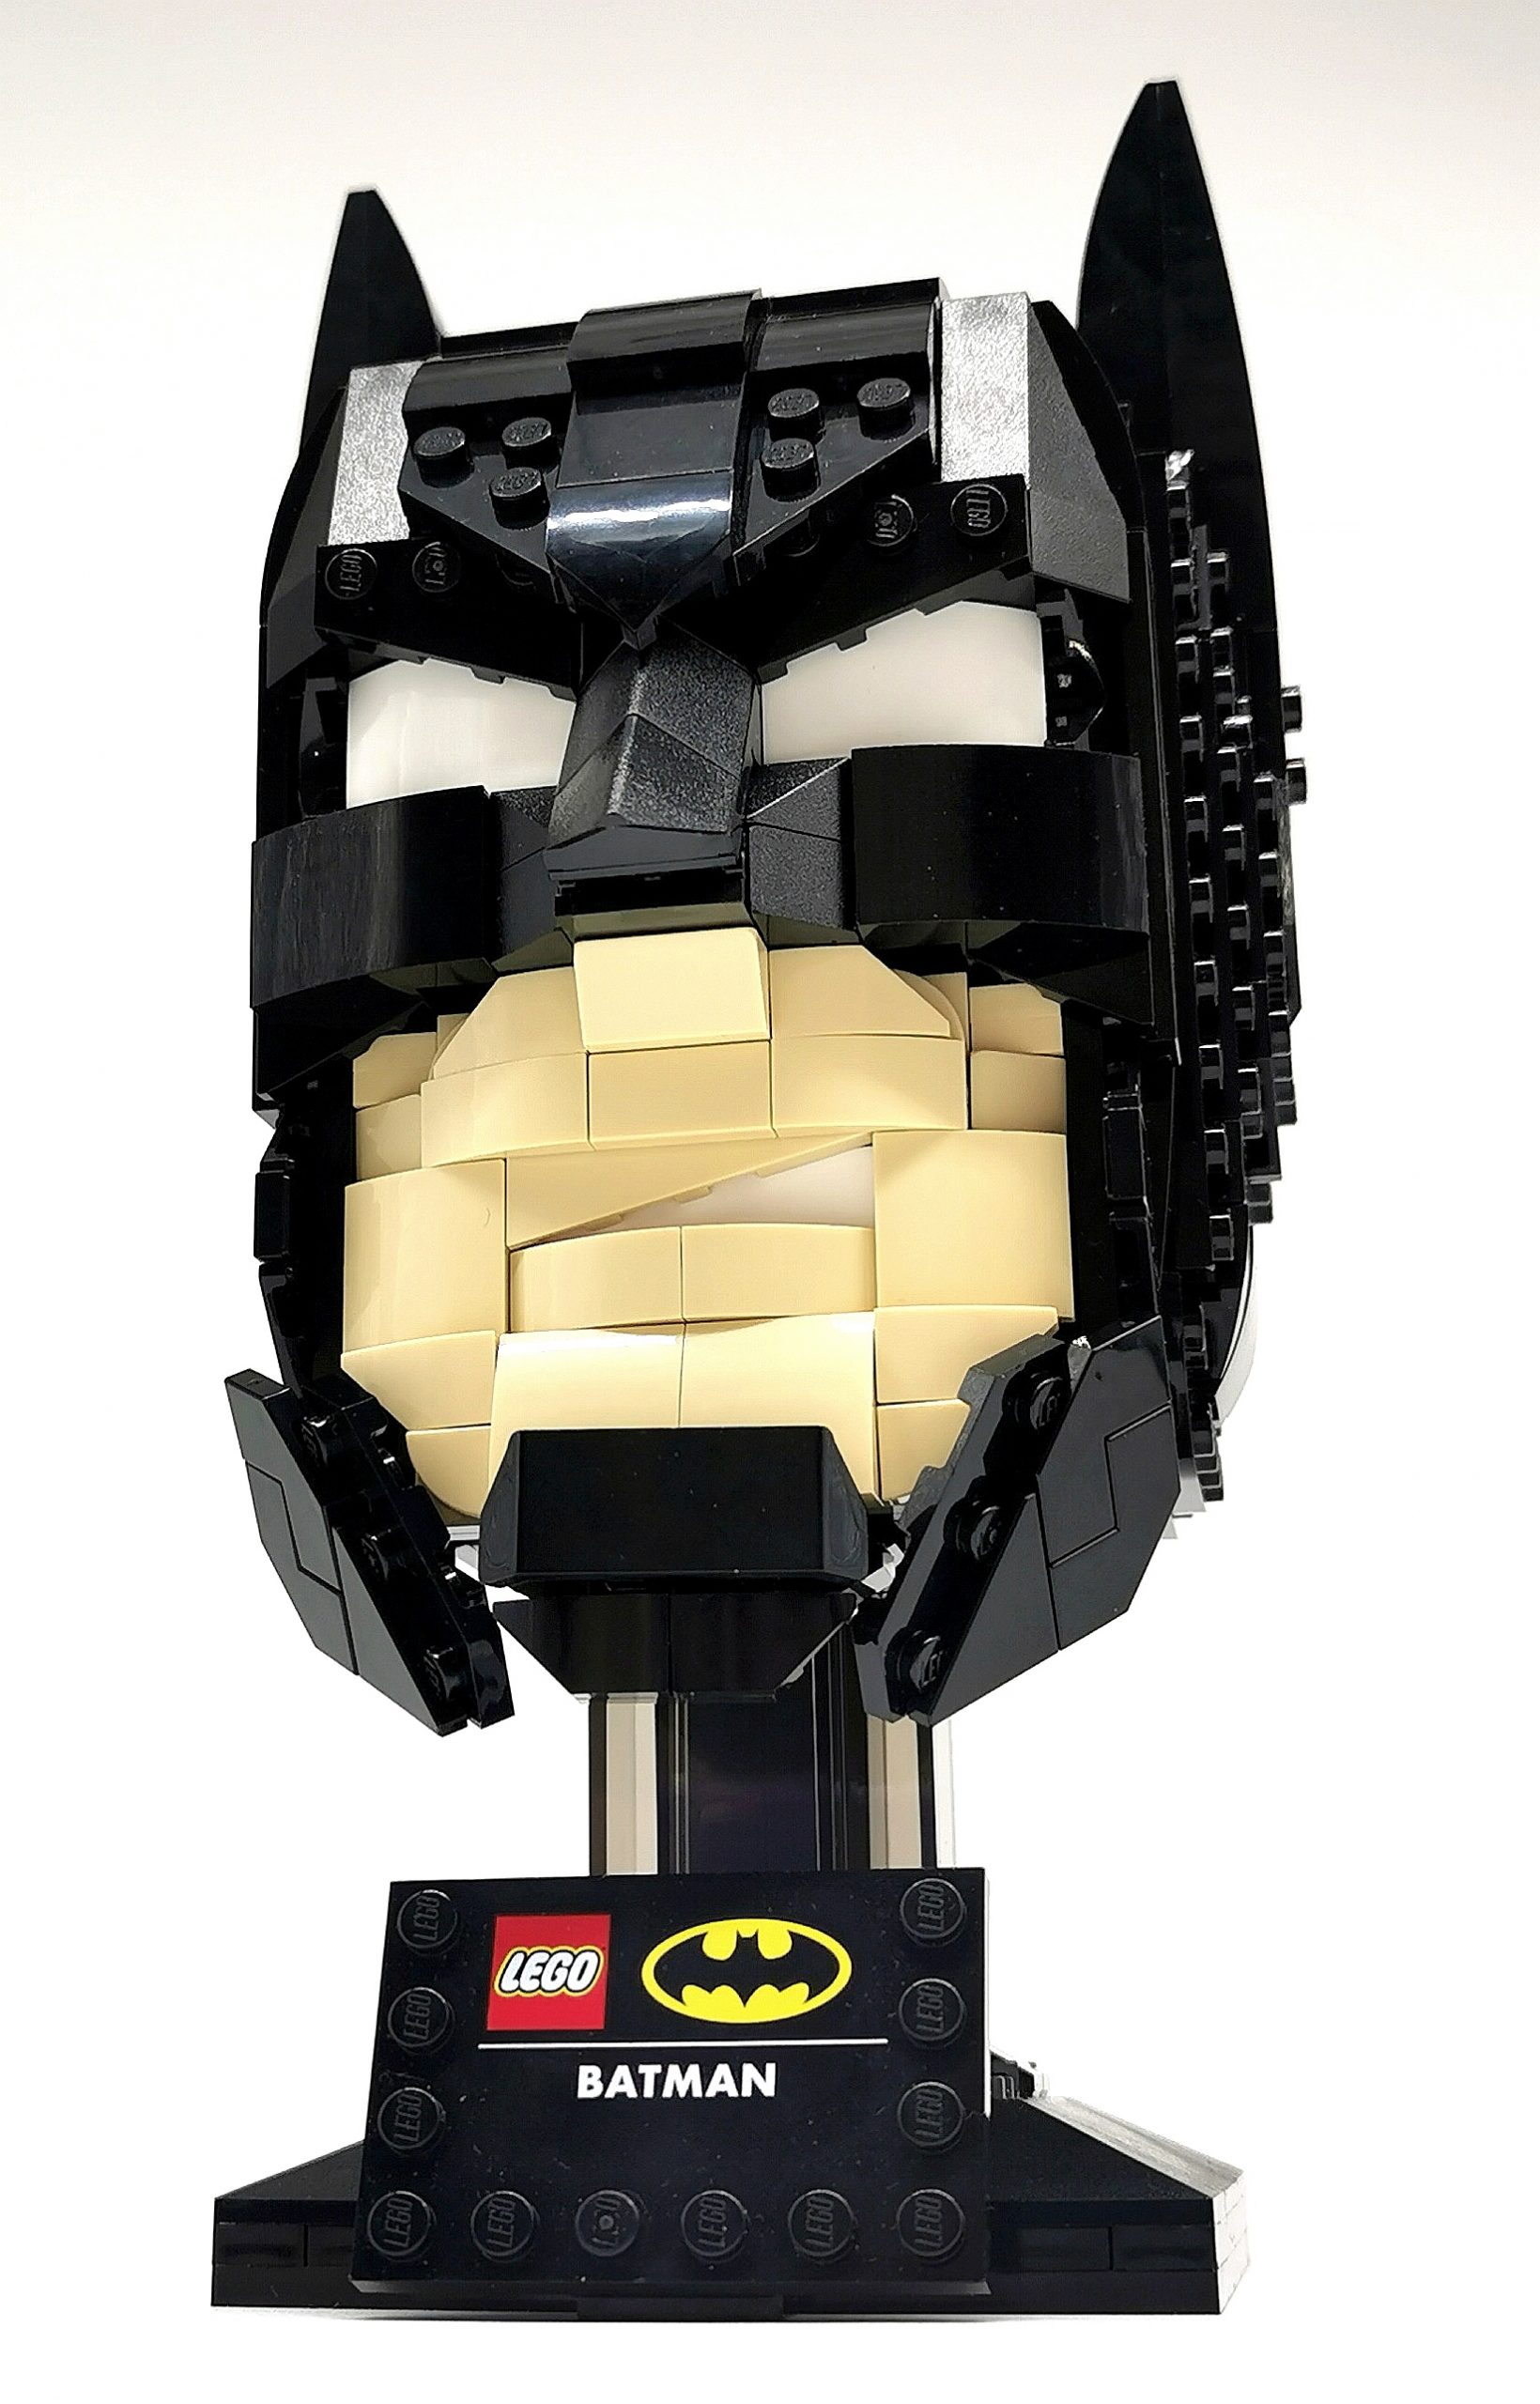
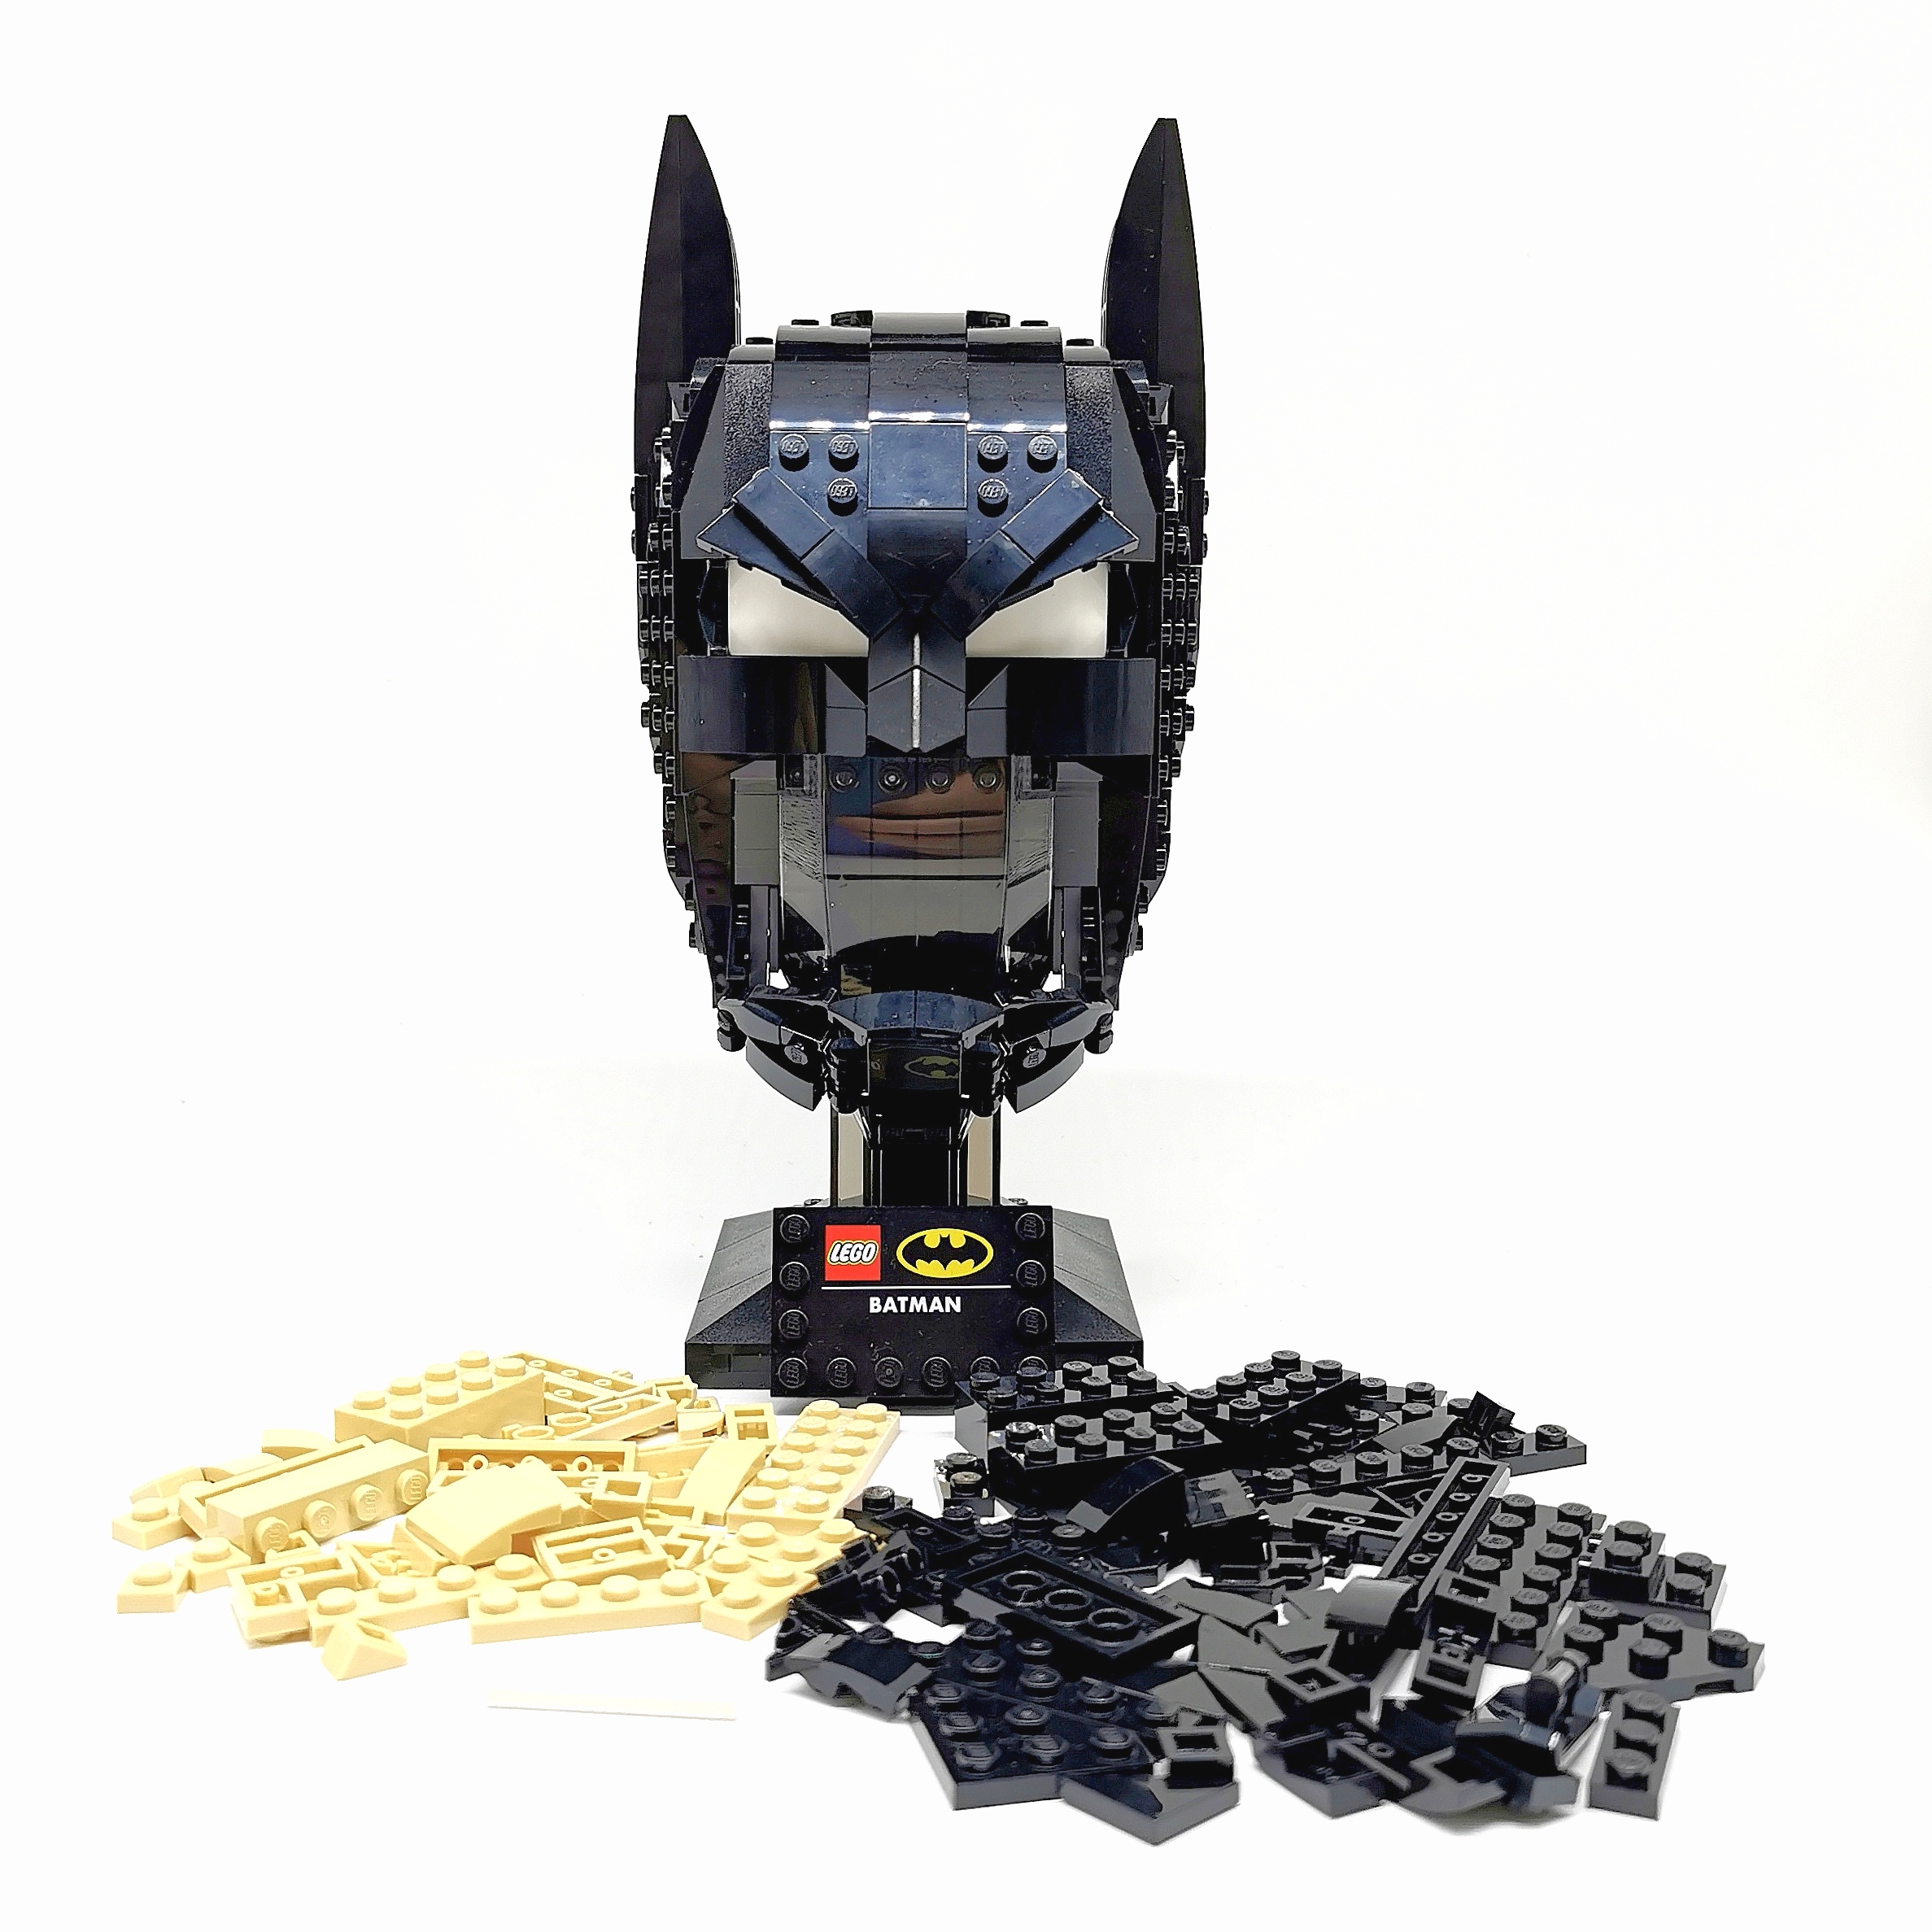
However when it comes to the LEGO DC Batman Cowl (76182), which is a great set in its own right, you can read our review here. There was something not quite right about it, I think you know which part I’m referring too… Yep the transparent mouth cover piece!
LEGO DC Batman Cowl 76182
Don’t get me wrong I know exactly what they were going for and it does look good, but I knew something had to be done about it.
I remembered seeing a modification on Instagram, a guy called @let_them_fly_lego to be precise. He had created the prefect Batman face mod that I knew I had to implement, luckily he had documented the whole procedure and very generously offered the entire additional parts list (PDF and Bricklink XML file) for free, which can be found via the link in his Instagram bio or here.
The mod itself replaces the large transparent piece for part of Batman’s jaw, chin, and mouth, it also rearranges two narrow parts on each side of the Cowl. This is all achieved quite easily with the help of @let_them_fly_lego’s handy instruction guide, which he also shared for free via his Tiktok and Instagram Reels!
Sourcing the parts was also quite straightforward, if you use the XML file. Simply head over to Bricklink, login (or register) to your account and upload the file to your ‘wanted’ list. From there you can search for sellers, please be weary and take notice of how much the total is and how many parts they have in stock, with the top few usually being the ones to go for.
When I sourced the parts for myself I went for a seller that had 36 out of the 40 unique elements needed, as I carry a few spares and I rummaged around before hand to see what I had already. With the mod consisting of 90 parts, the price varies somewhat from as low as £7 up to £30+, so it really pays to try a few first. Even spreading the parts over multiple sellers may work out cheaper!

Once the parts turned up I sorted them into colours and made sure everything was present & correct before I got started. Laying the parts out on the table in a somewhat organised fashion works a treat especially when working from Tiktok instructions.
Luckily you can pause each video and take your time building, there’s nothing worse than feeling rushed.
The instructions were quite straightforward and easy to follow, although I personally prefer paper copies, although reading from a screen worked just at well.
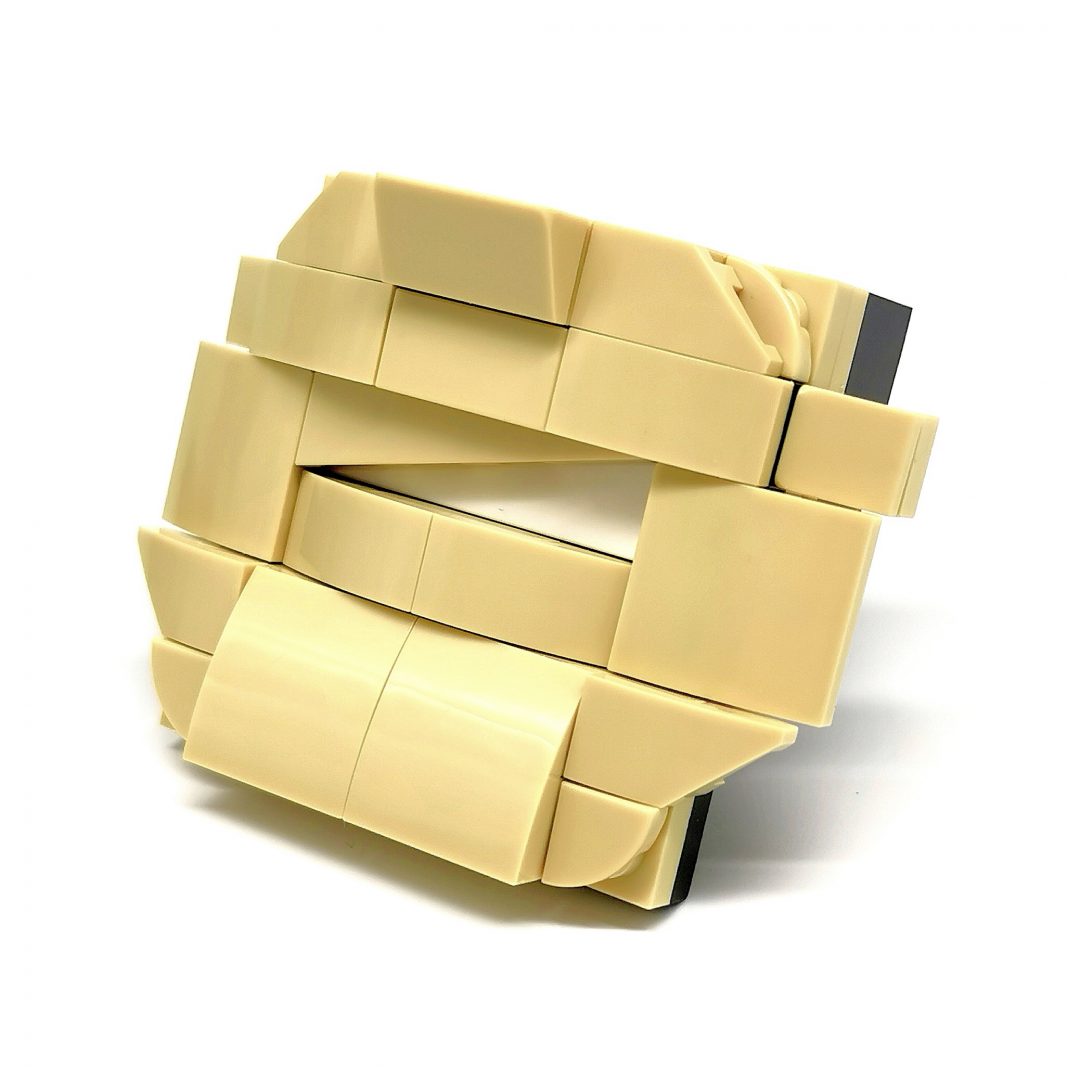
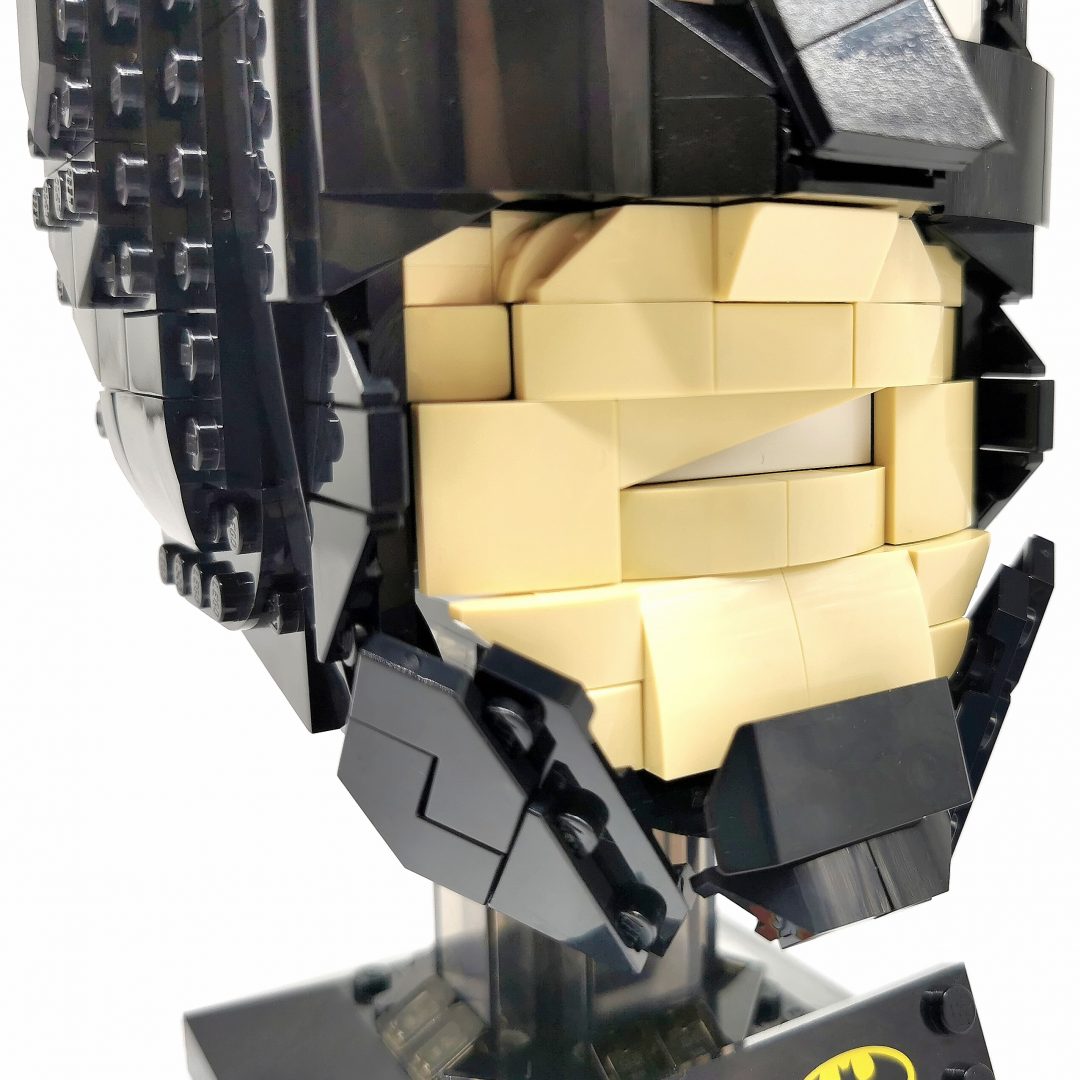
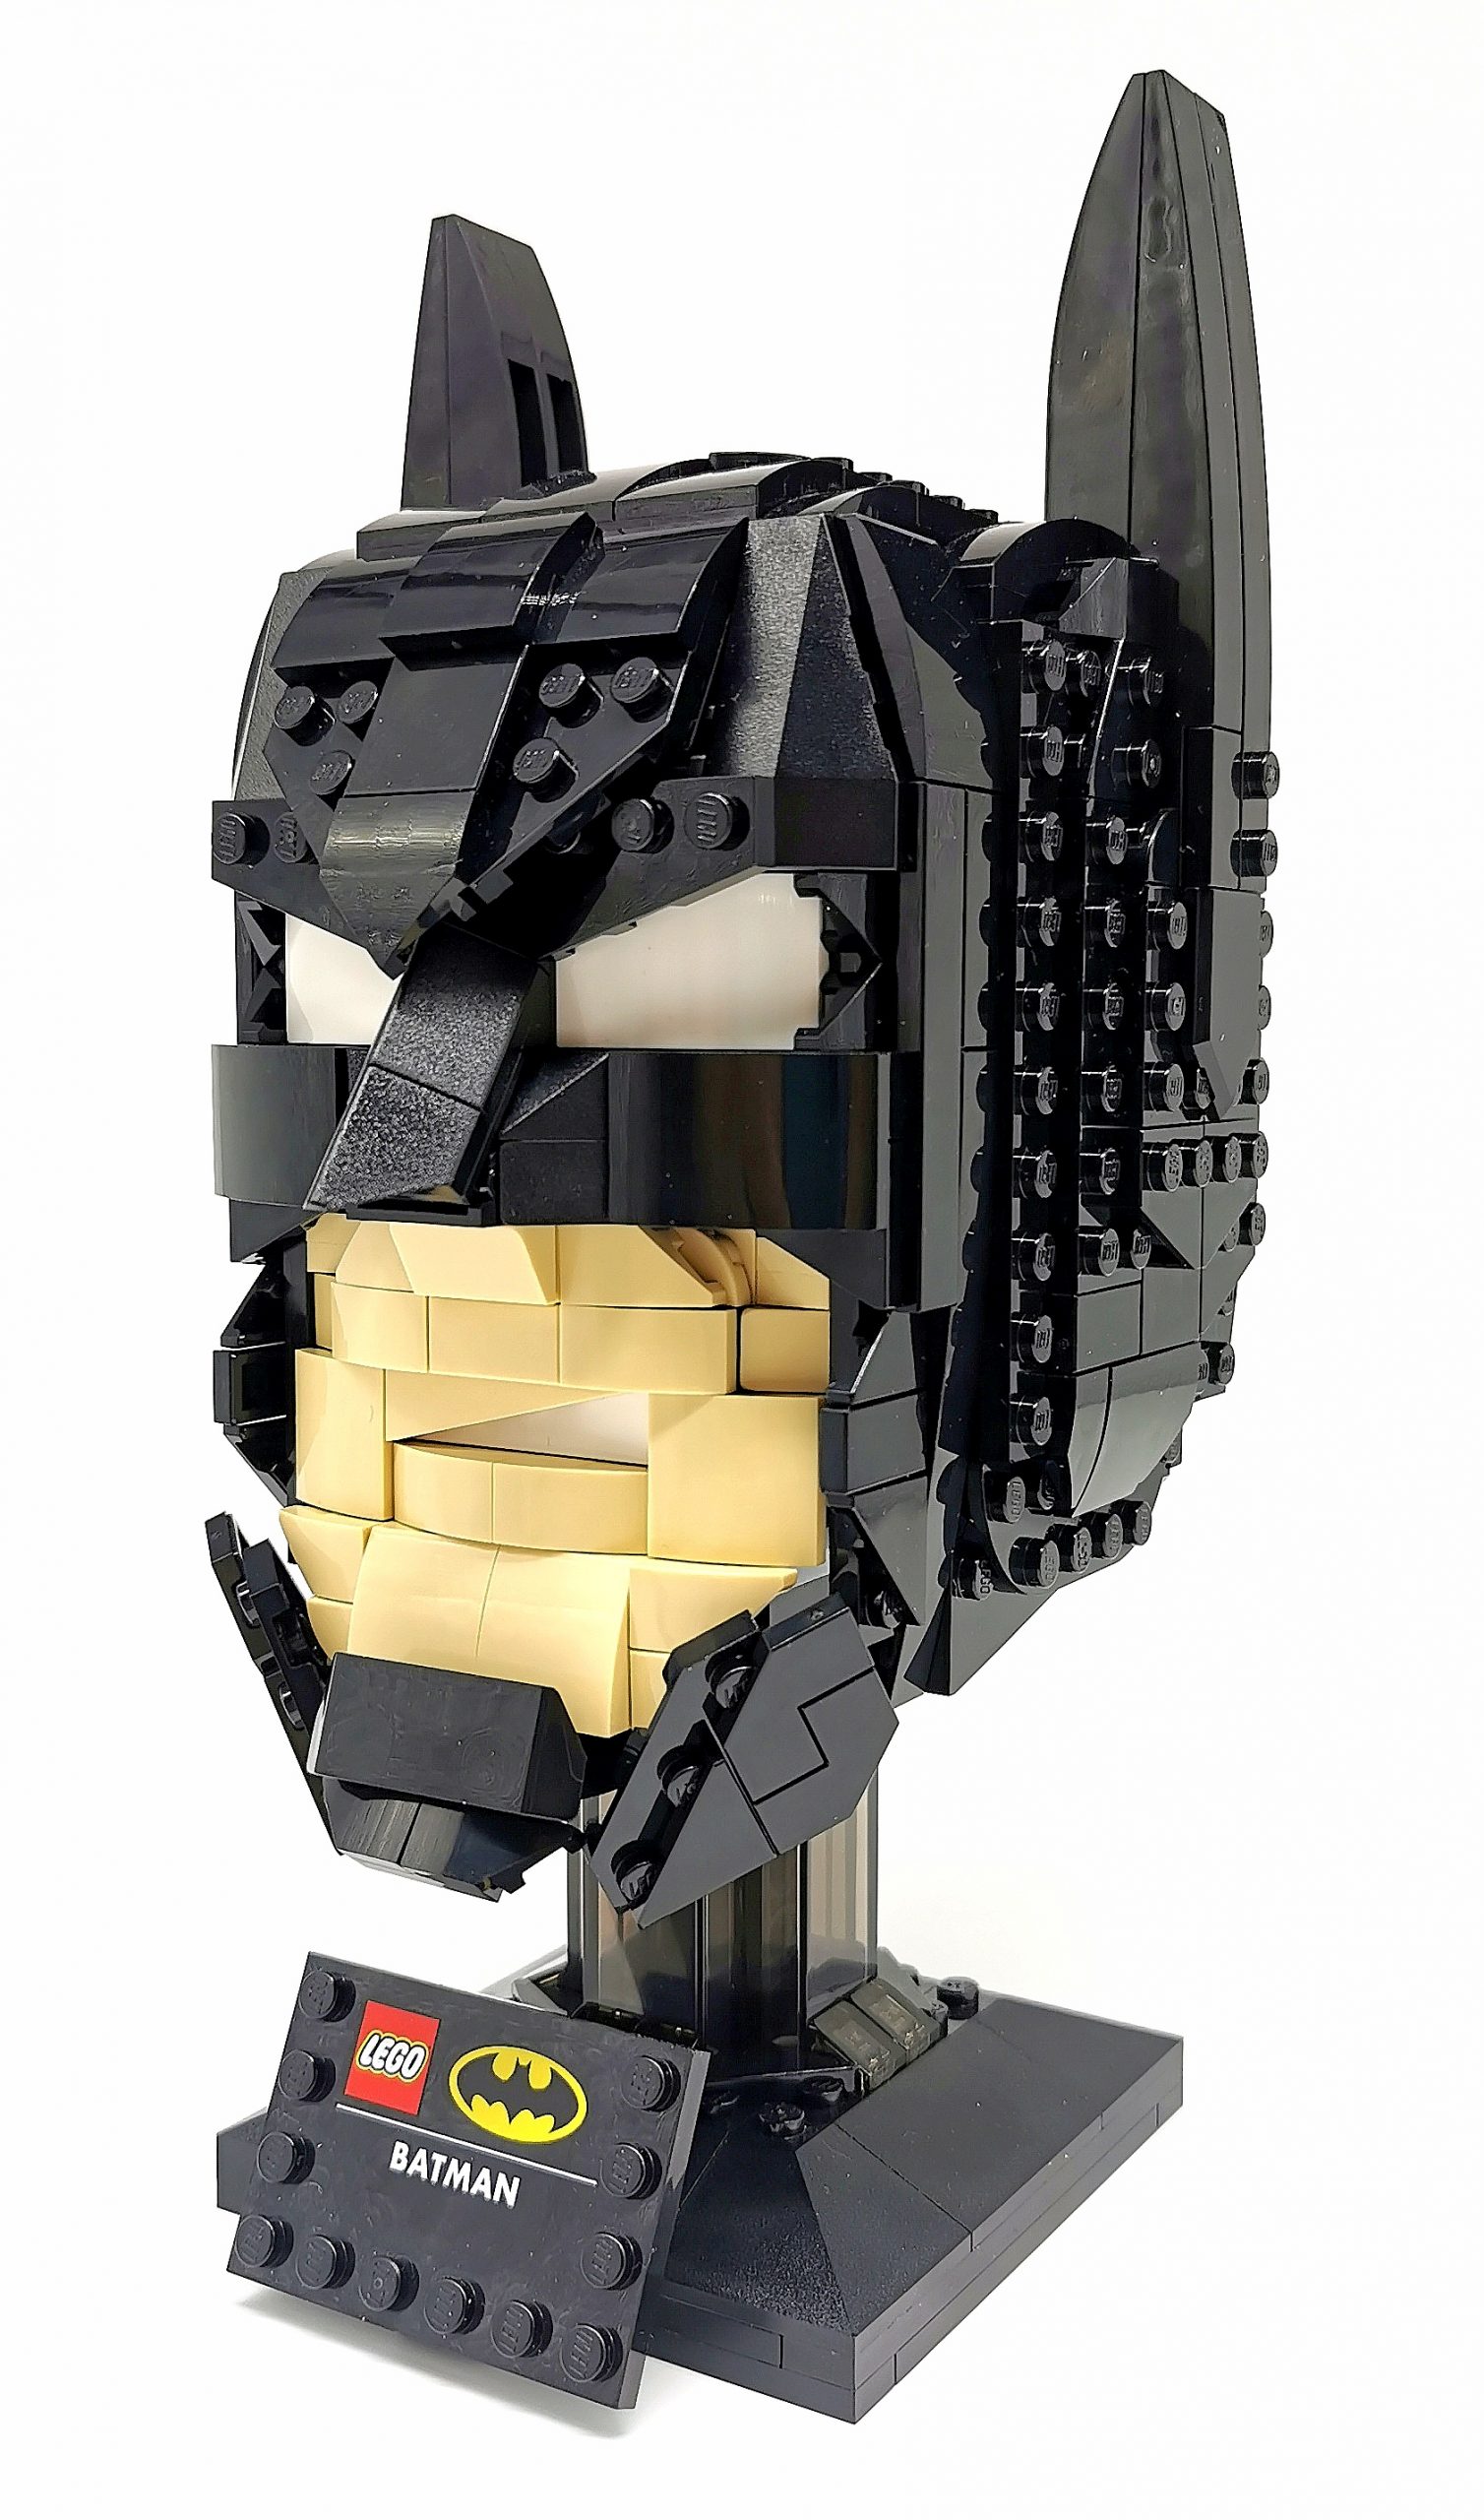
The technique used for the mouth section makes for a nice surprise as it is standard brick construction, one on top of the other. The over lapping of the tan plates, slopes and tiles is so satisfying and the end result looks amazing and works so well, I especially like the angled plate that creates the ‘snarling’ expression!
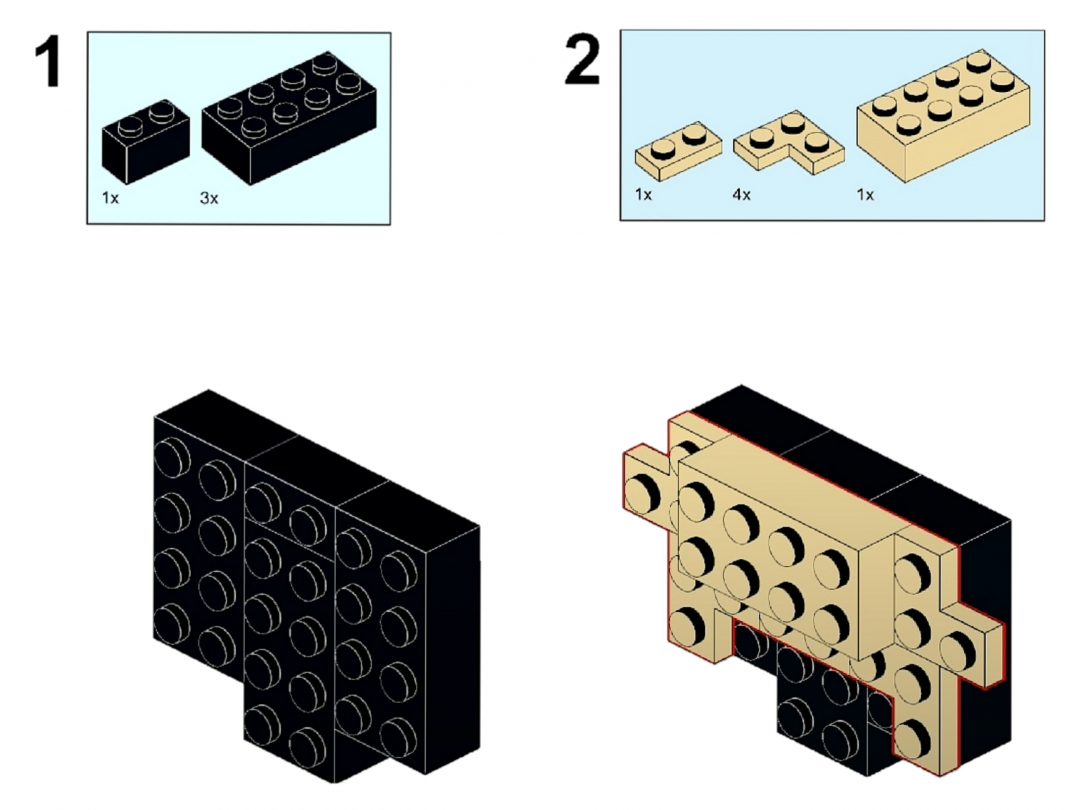
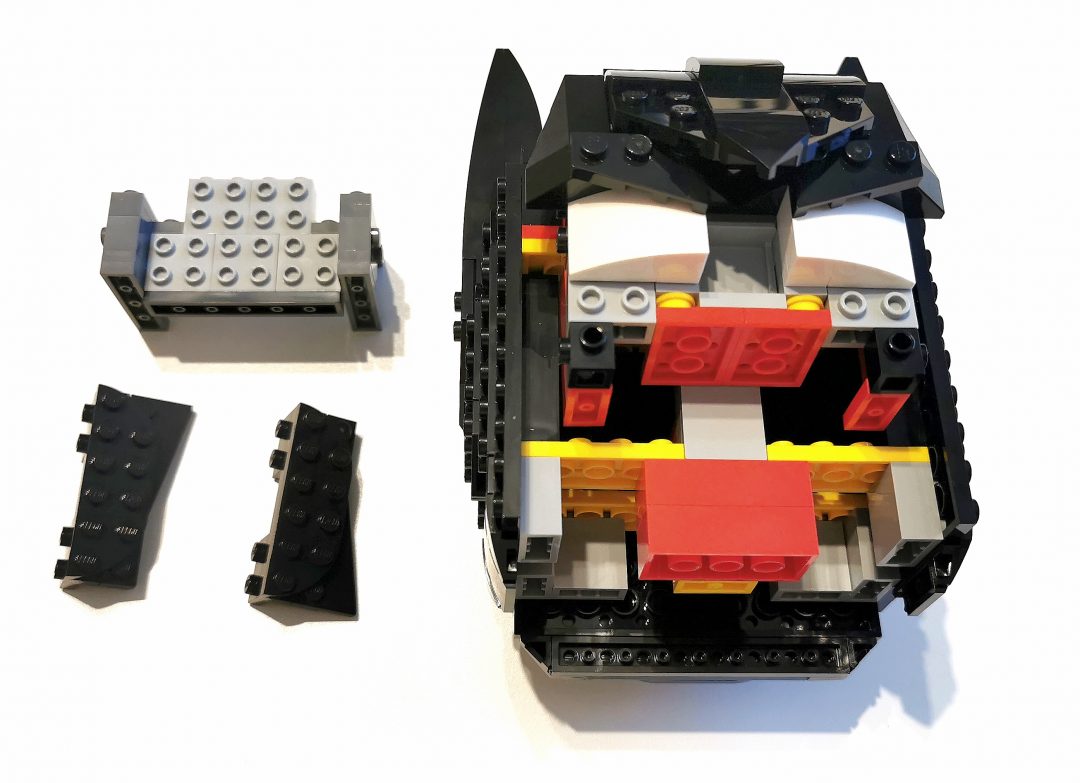
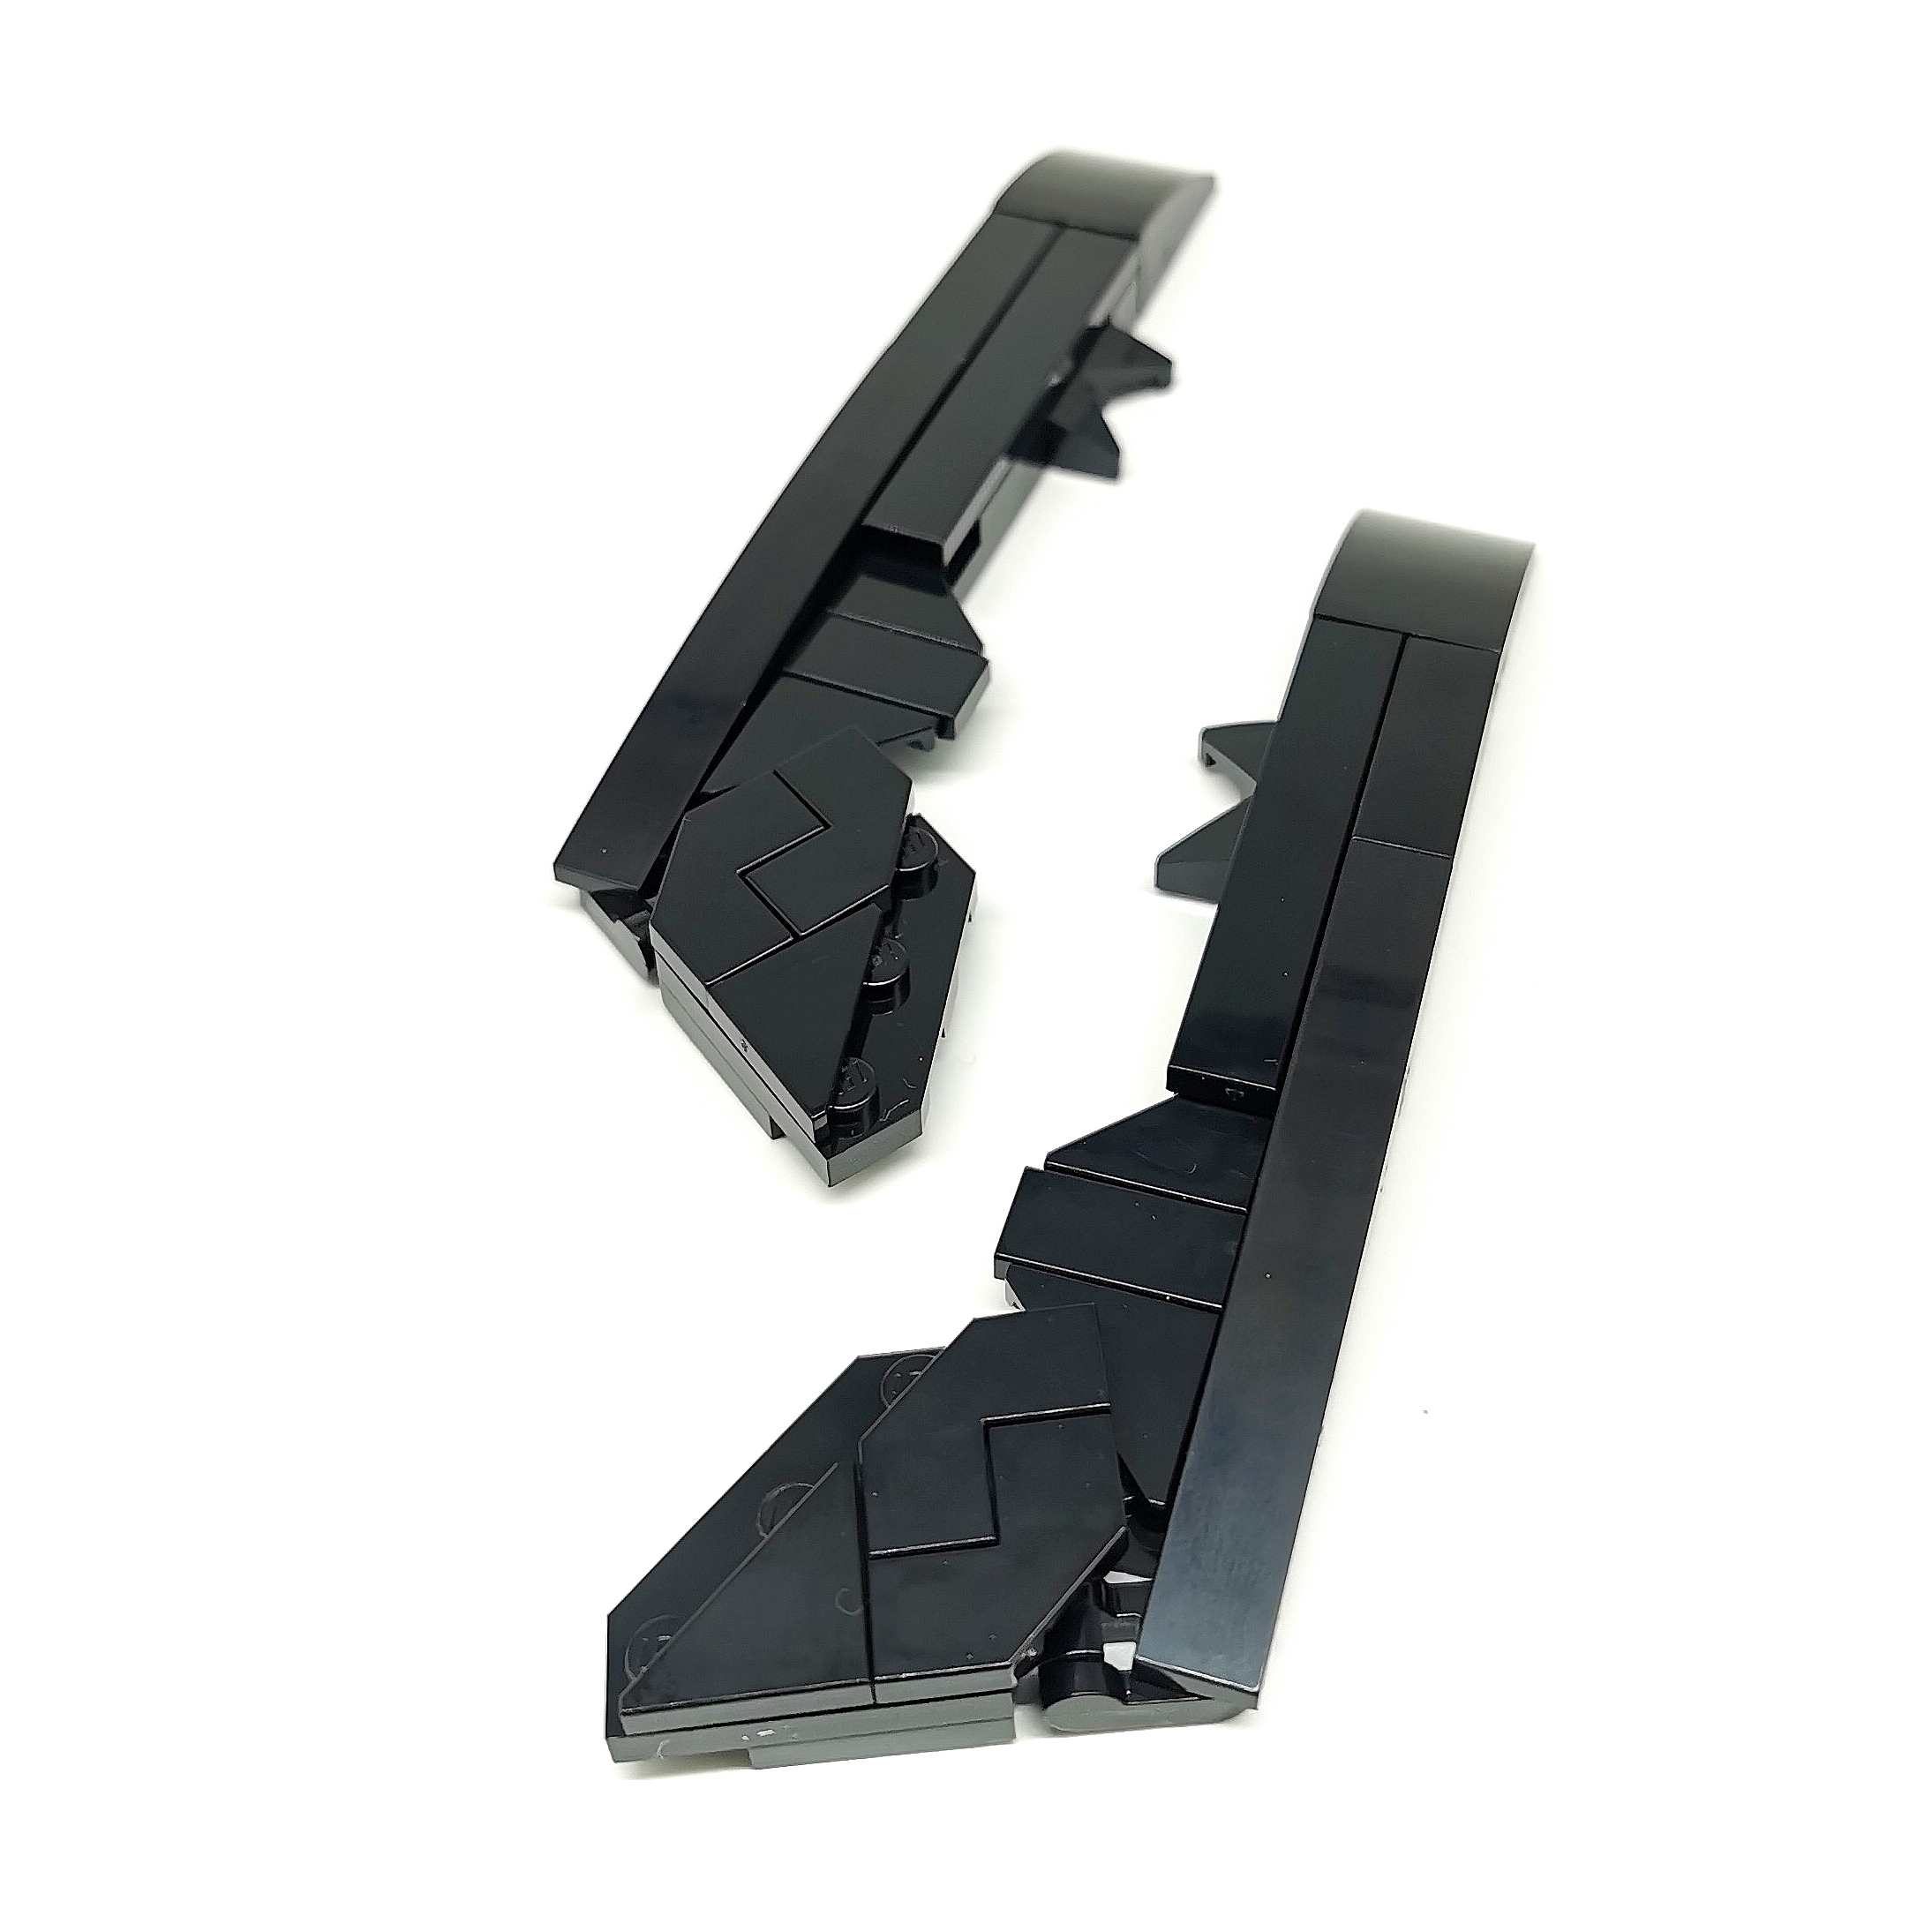
The next two parts you construct are the long, thin, strips each side of the Cowl, this is where you start to reuse parts from the original set. @let_them_fly_lego has included instructions for one only, you simply have to repeat it but in mirror image, it sounds complicated but it’s very straightforward. Holding it up with the Cowl in the background helped me picture where parts should go and which way.
Please use the image below if you’re struggling.

Following on from that we build the small chinstrap section, which consists of only a handful of parts but the usage is stunning, SNOT piece here, a curved slope there and hey-presto, a cool looking chinstrap that pops into a 2×2 plate located under the Cowl.
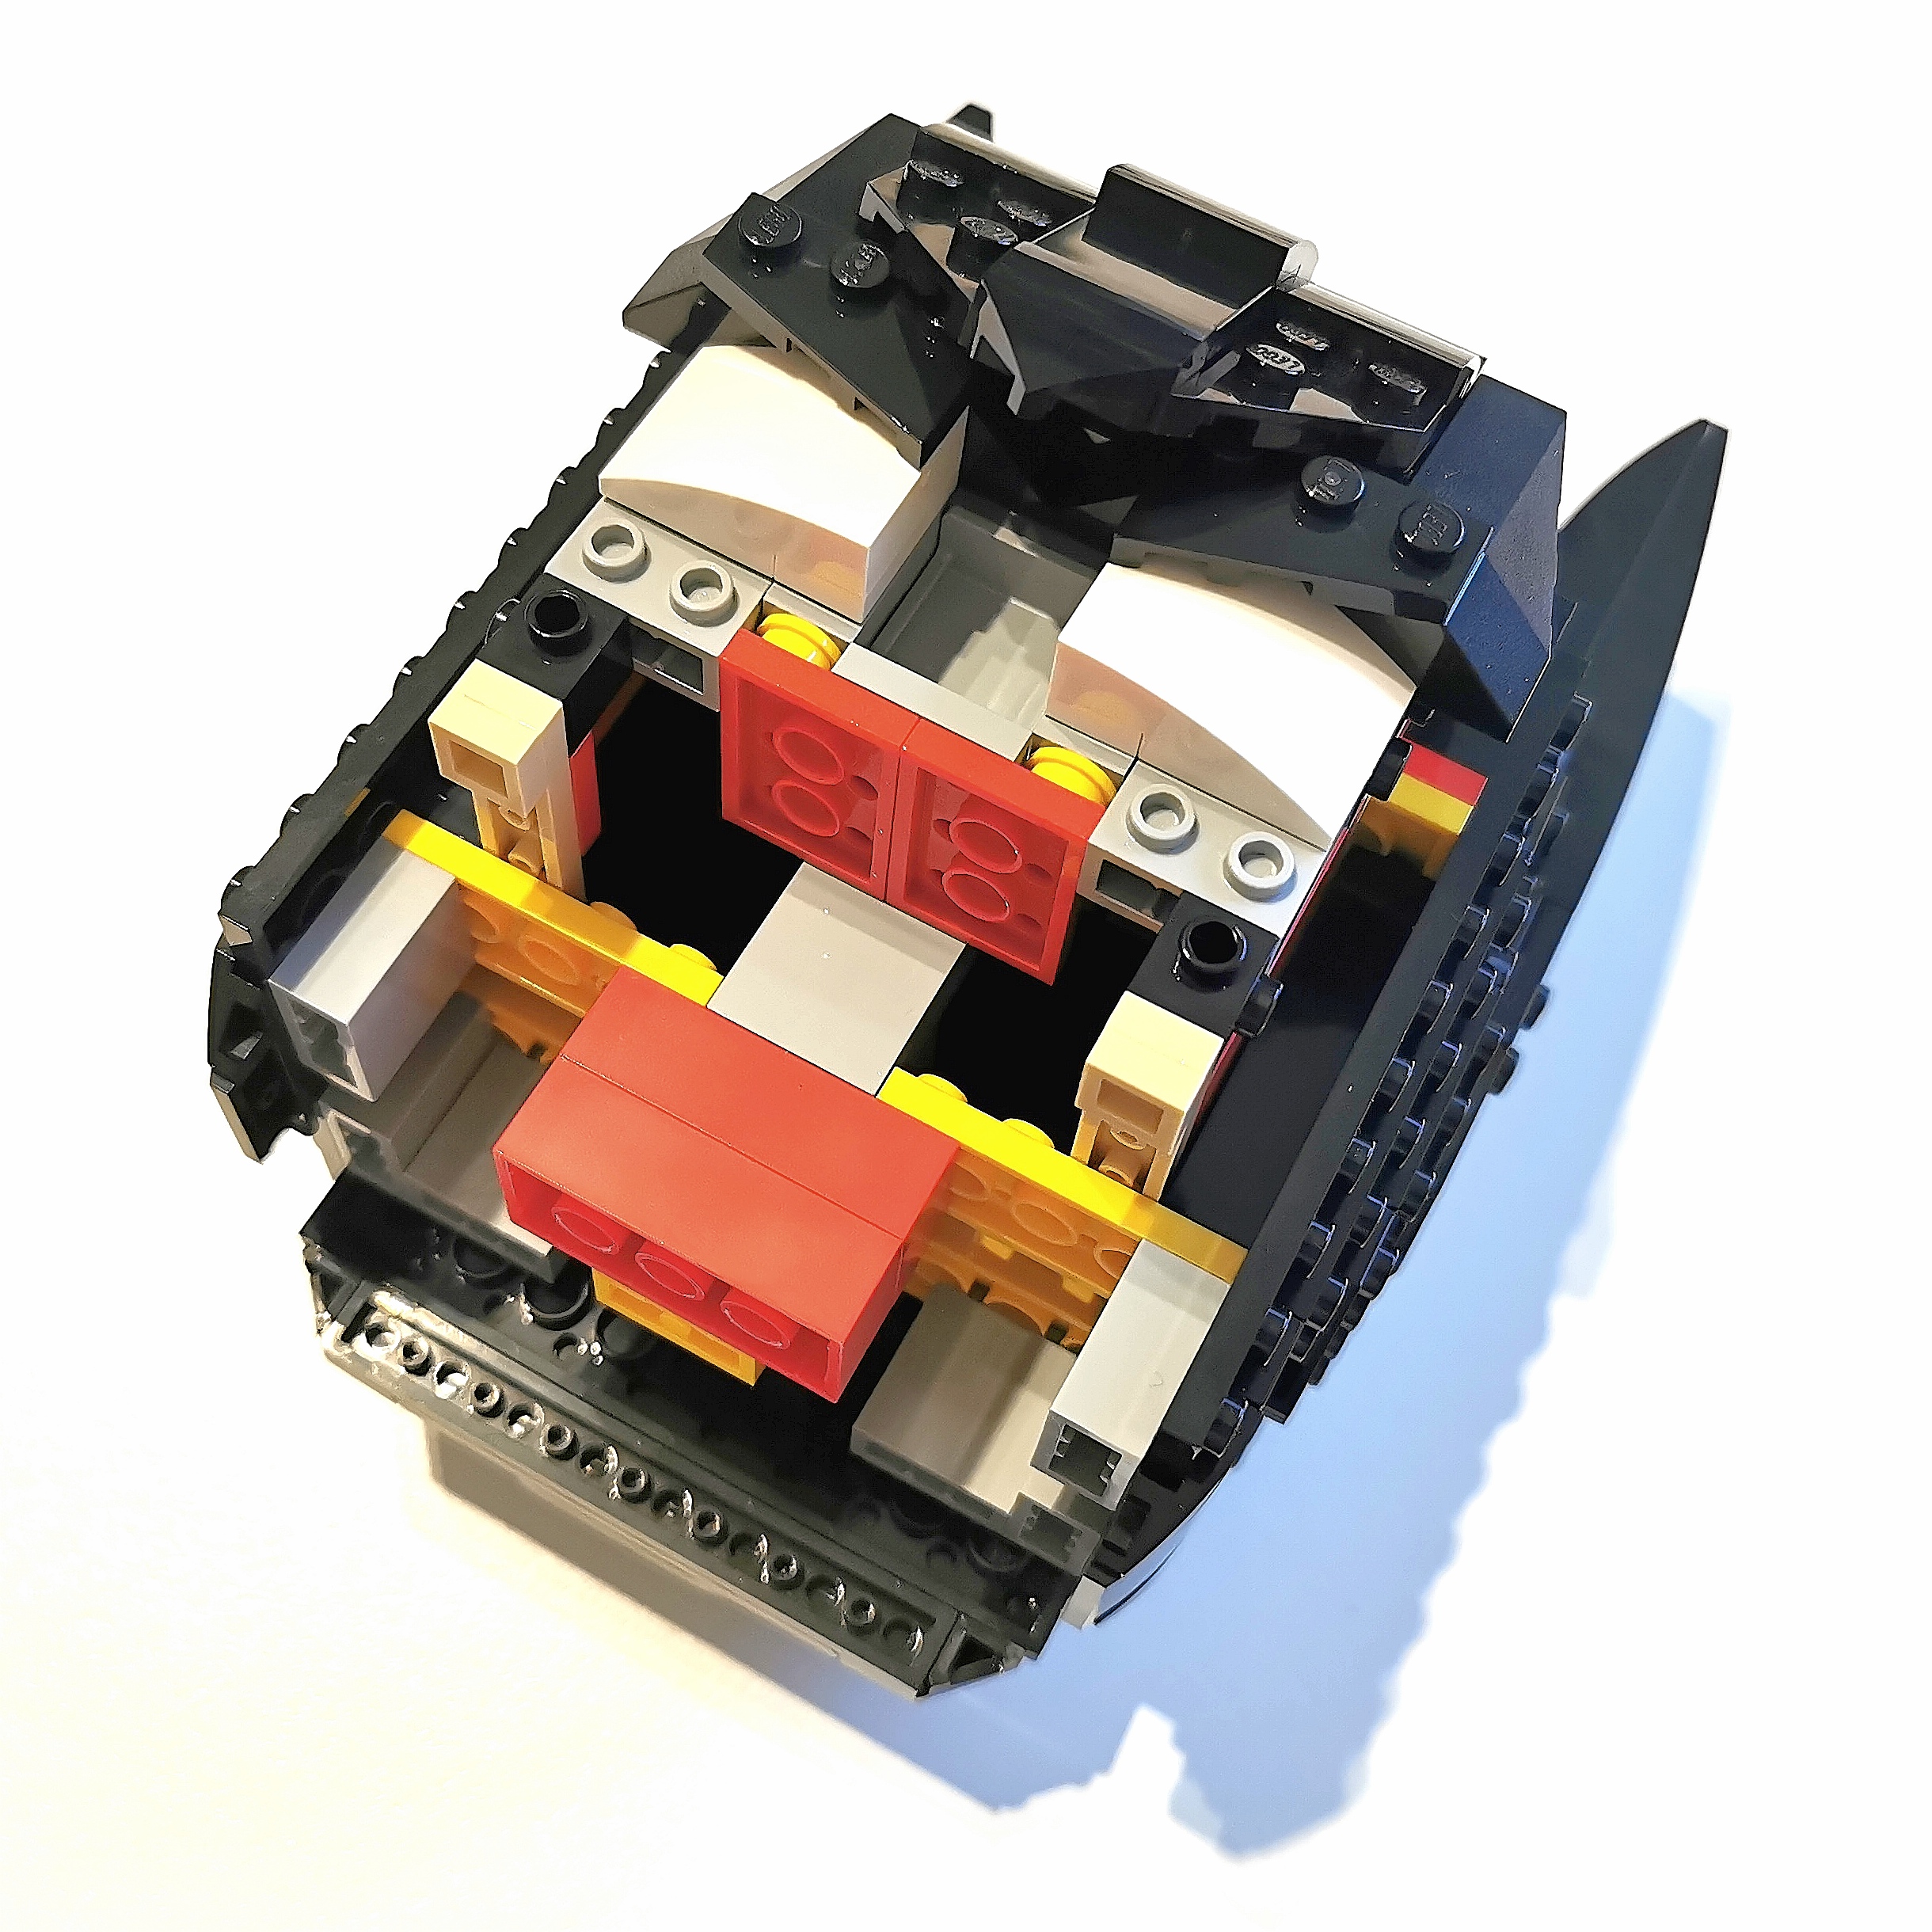
Now that we have all the sections built and ready to go we first need to strip the original LEGO DC Batman Cowl back somewhat, removing the narrow side panels, the large transparent mouth shield and some of the inner pieces behind all of that.
Don’t worry, it’s actually really simple and far more straightforward than you might think. I’ll be honest and say that I was dreading this part of the mod and held off for a day or so and muster a plan of attack. Mark from @brick_beat helped me out a great deal as he also aquired the mod and fancied a bash at it. He was the one that tackled the implementation first and said how easy it was, thanks Mark!
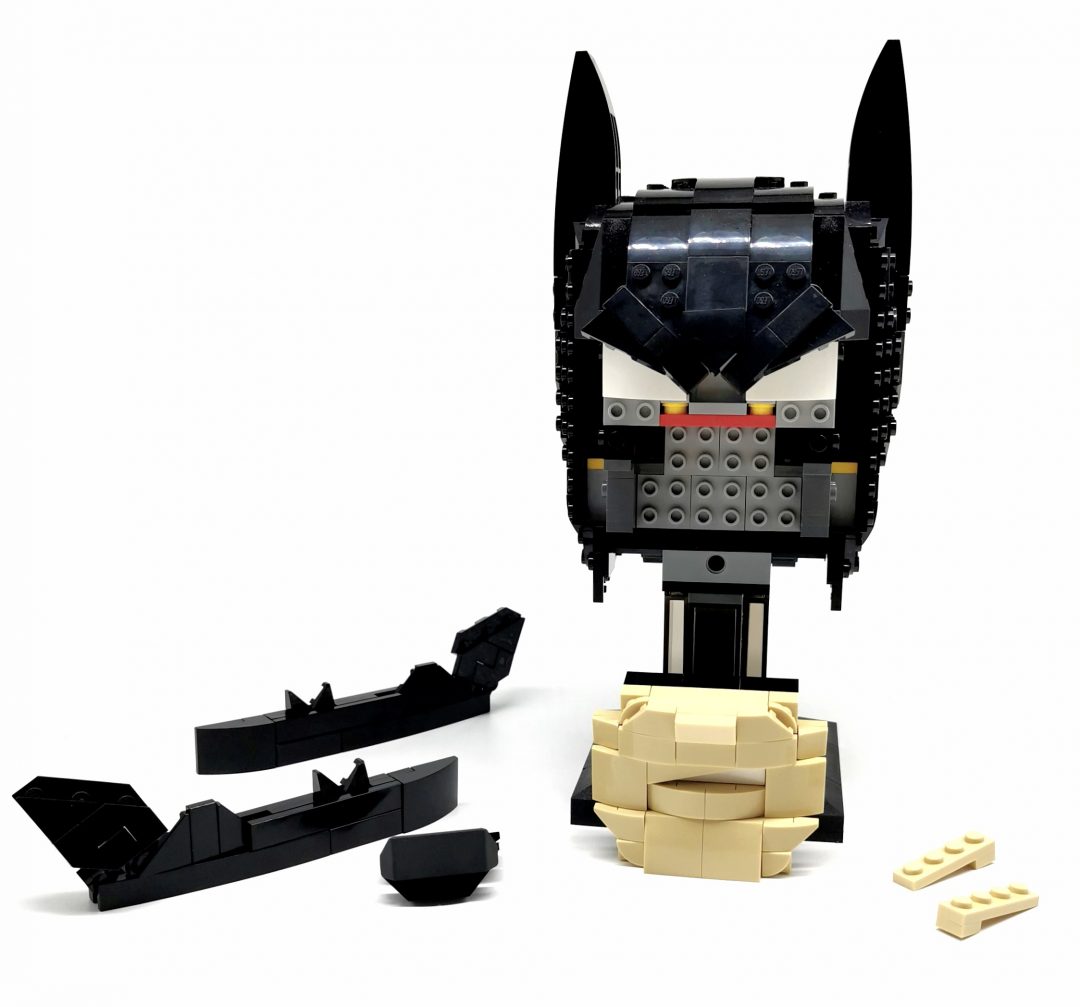
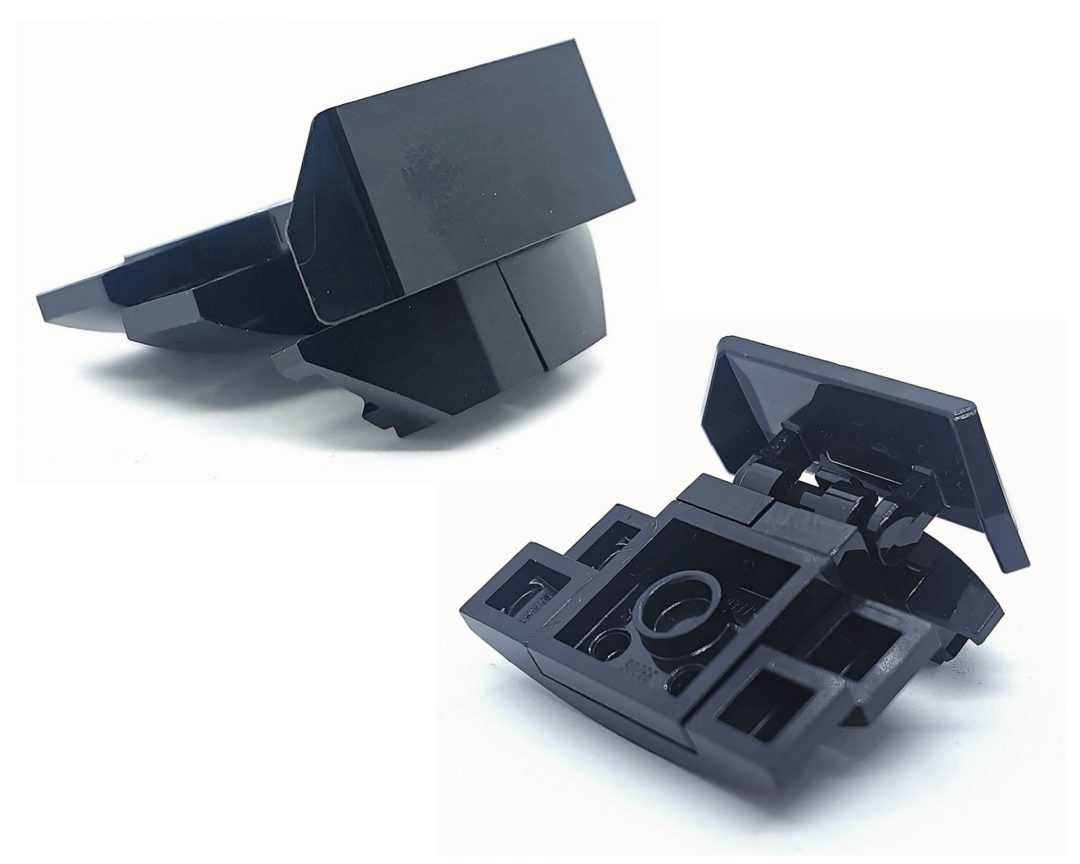
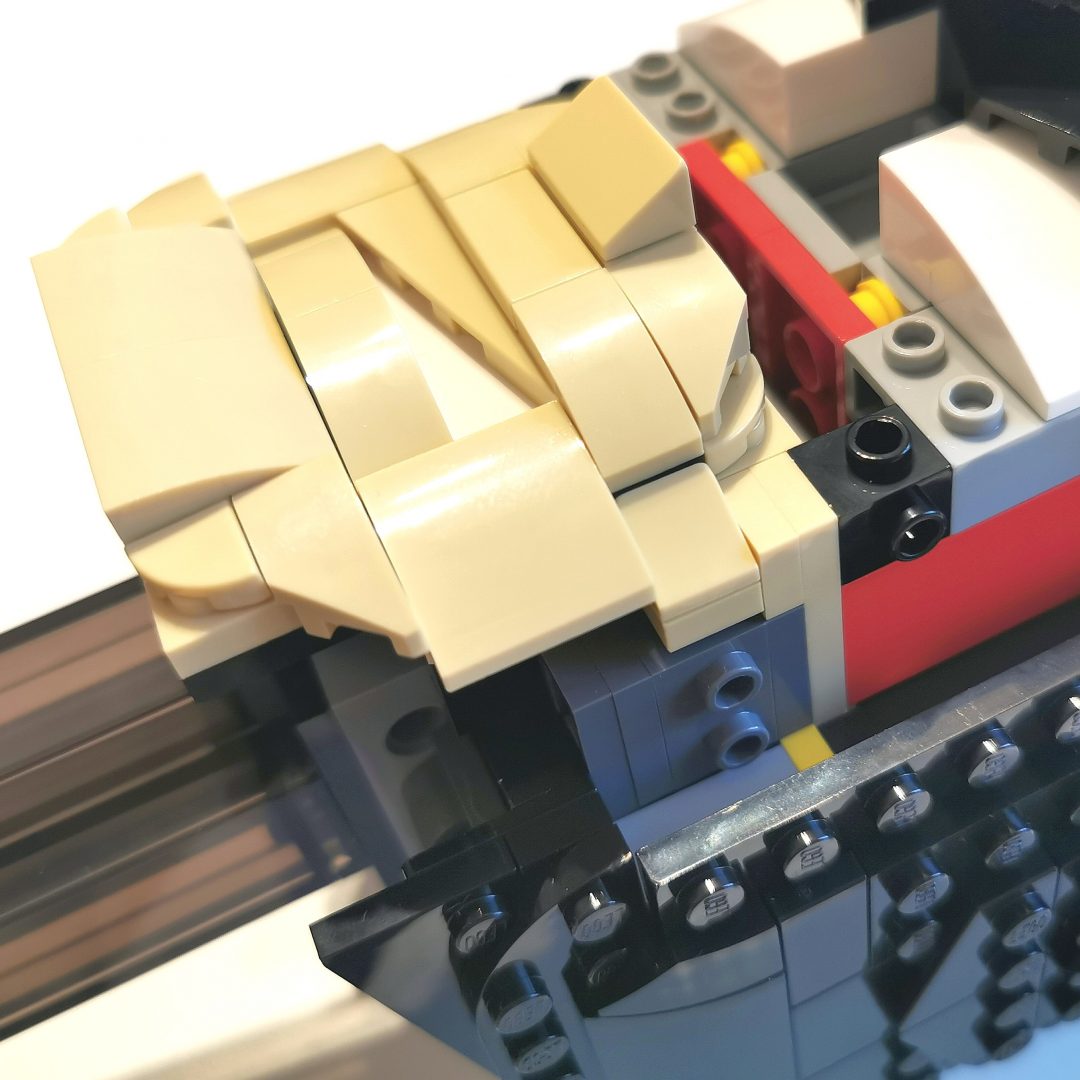
Carefully remove the Cowl from the display stand, hold the bulk of the head firmly in one hand and the stand in the other and gently ease them apart, you should end up with two parts that look similar to the image below. 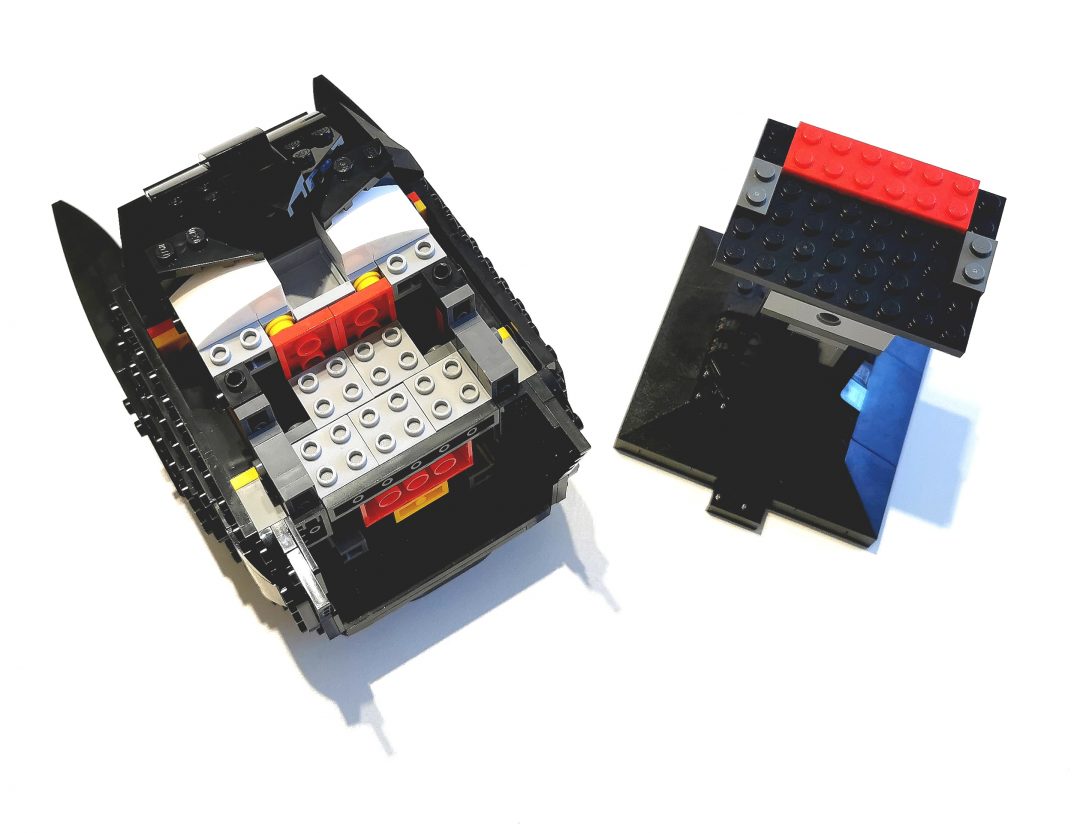
Next you remove the parts I call the ‘chops’, they’re the pointy bits located each side at the base of the Cowl. They’re held on by two studs so should just drop off with a gentle nudge. Removing these parts allows you to safely pull out the group of SNOT bricks and the plates attached to them more smoothly and importantly together.
Not pictured or documented is the removal of the nose section, this is also paramount to the successful application of the month modification. This whole section also pops off with ease.
Again the image below shows you which pieces need taking out, before you can replace and insert the small tan plates that result in filling gaps either side.
From here you can pop the group of SNOT bricks back in, removing the top two 1×4 plates which have now been replaced with the tan coloured ones. After that reinsert the ‘chops’ and you’re now ready for fitting the mouth, two narrow sides, and chinstrap!
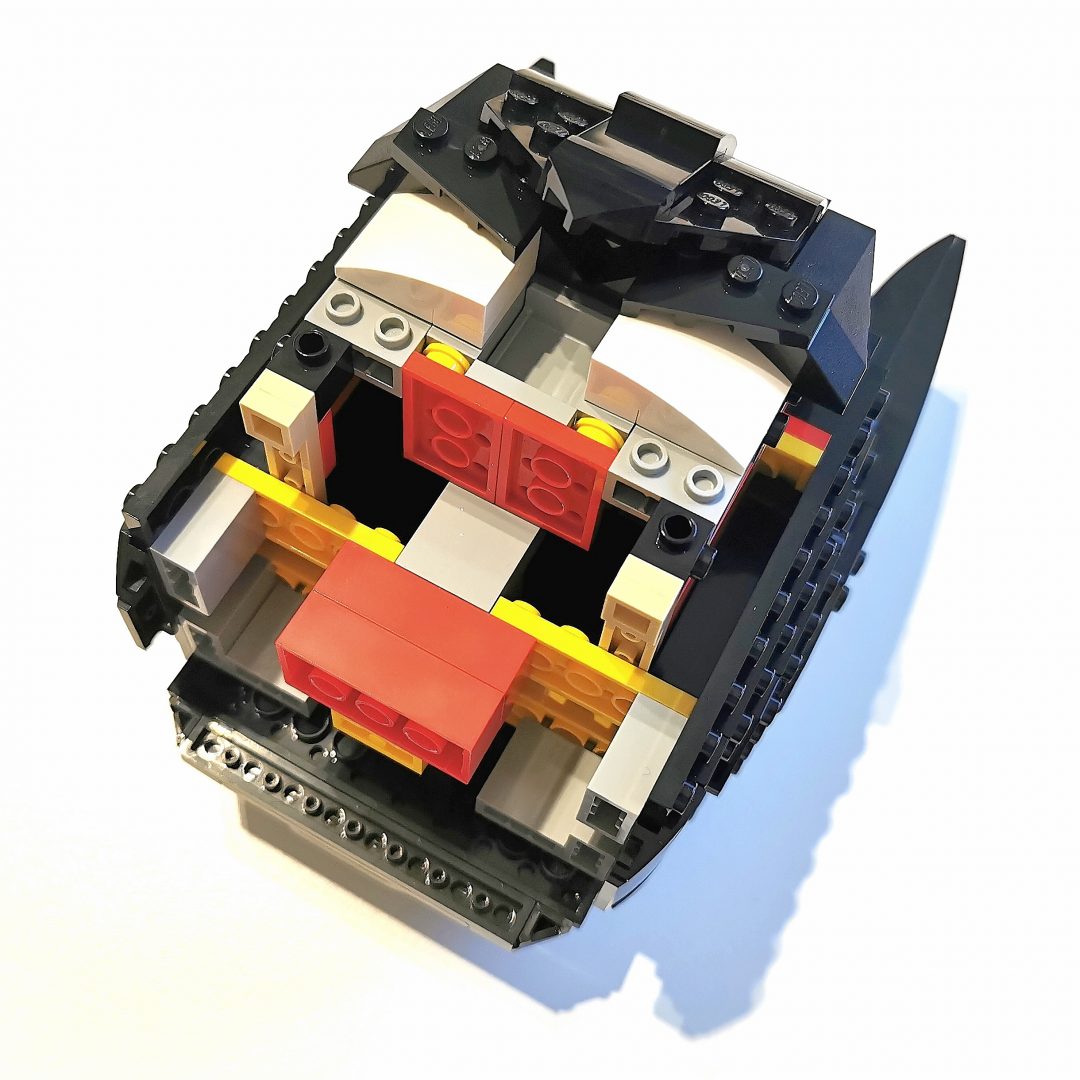
You can’t go wrong from here as everything fits snugly back into place, the mouth piece sits just under the nose and can only go in a certain position, the two narrow side panels fill the gaps either side of the Cowl, and the chinstrap fastens into place under the mouth, simple, right?!
An optional extra, as I see it, are the eyebrows, as these can be changed out too. Replacing the strange hinged ones we get with the original!
This involves removing the entire brow section and placing the two black angled plates directly above the eyes. I must admit I rather like the simple way these look and chose to implement them on my Batman Cowl.
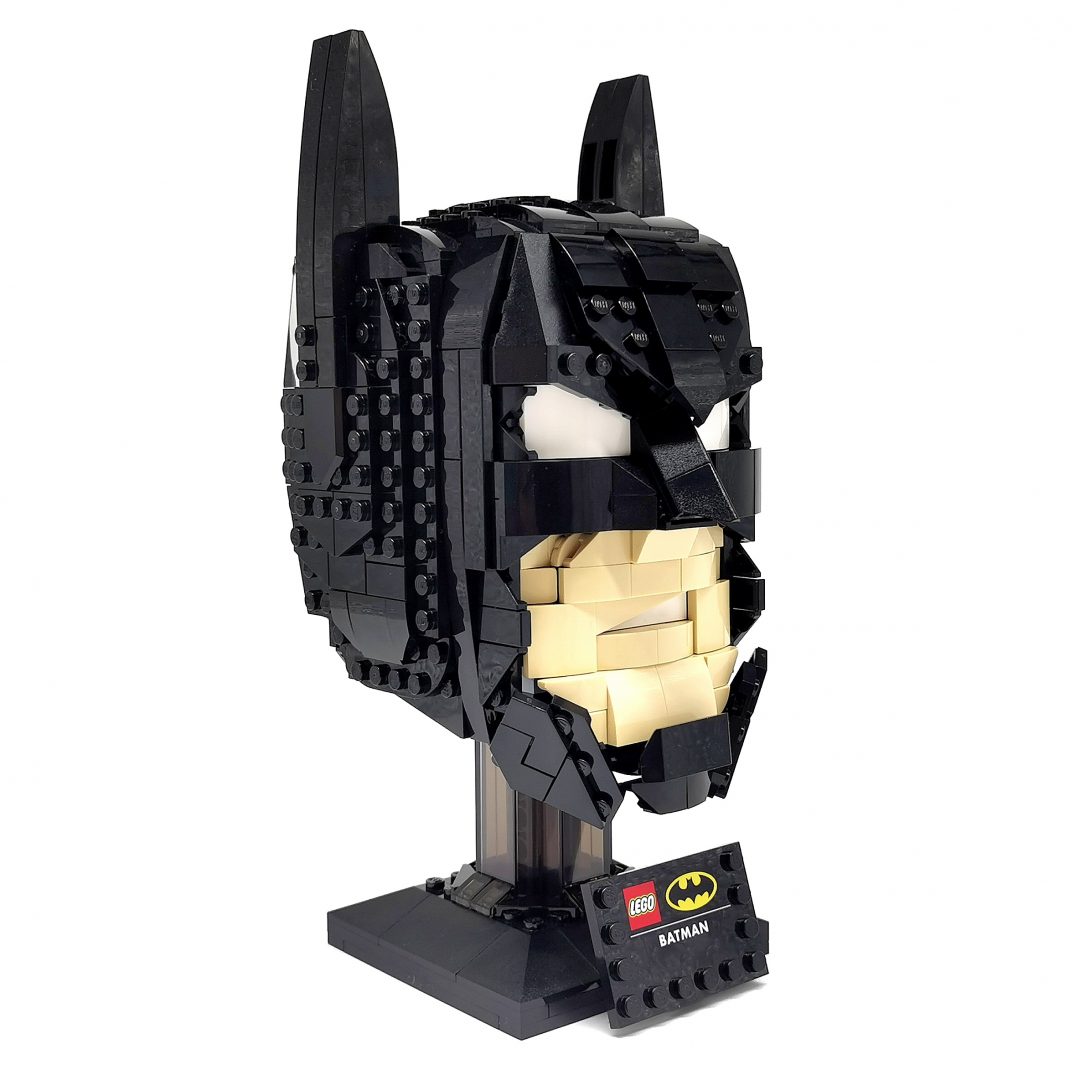
Overall the modification is great and well worth implementing, it makes a cool set ever cooler whilst keeping the whole look and feel the same.
Granted sourcing the parts is the hardest part and takes the most time, but the end result well outweighs that hard work and you’re left with something that is awesome and unique.
I’ve enjoyed every second of this build by @let_them_fly_lego and it has spurred me onto look at how I can enhance other sets, not just from the Helmets line, but all sets. Adding a little creative license to your builds is what LEGO is all about!
Checkout our Instagram Reel here.
If you fancy reading our review of the LEGO DC Batman Cowl 76182 please click here.


What is your reaction?
 YES!
YES!
 I like it
 It's OK
 Not Sure
 No!
No!