
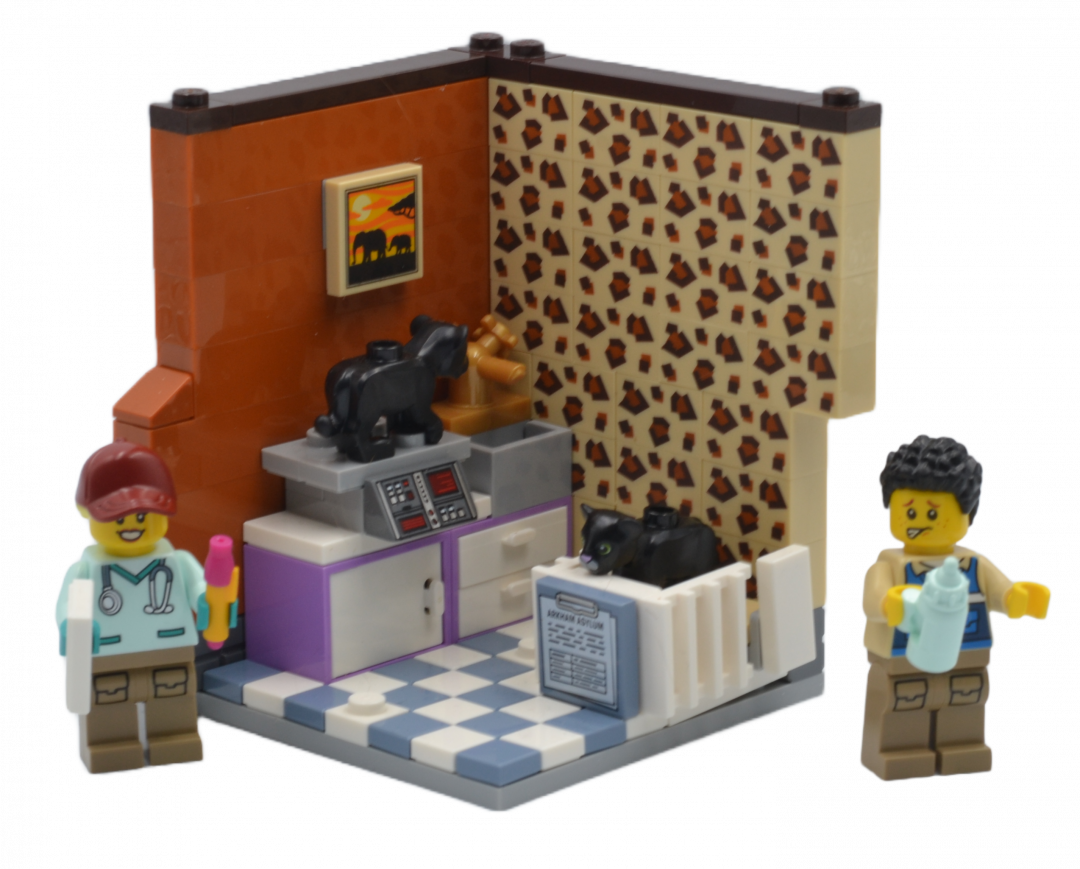
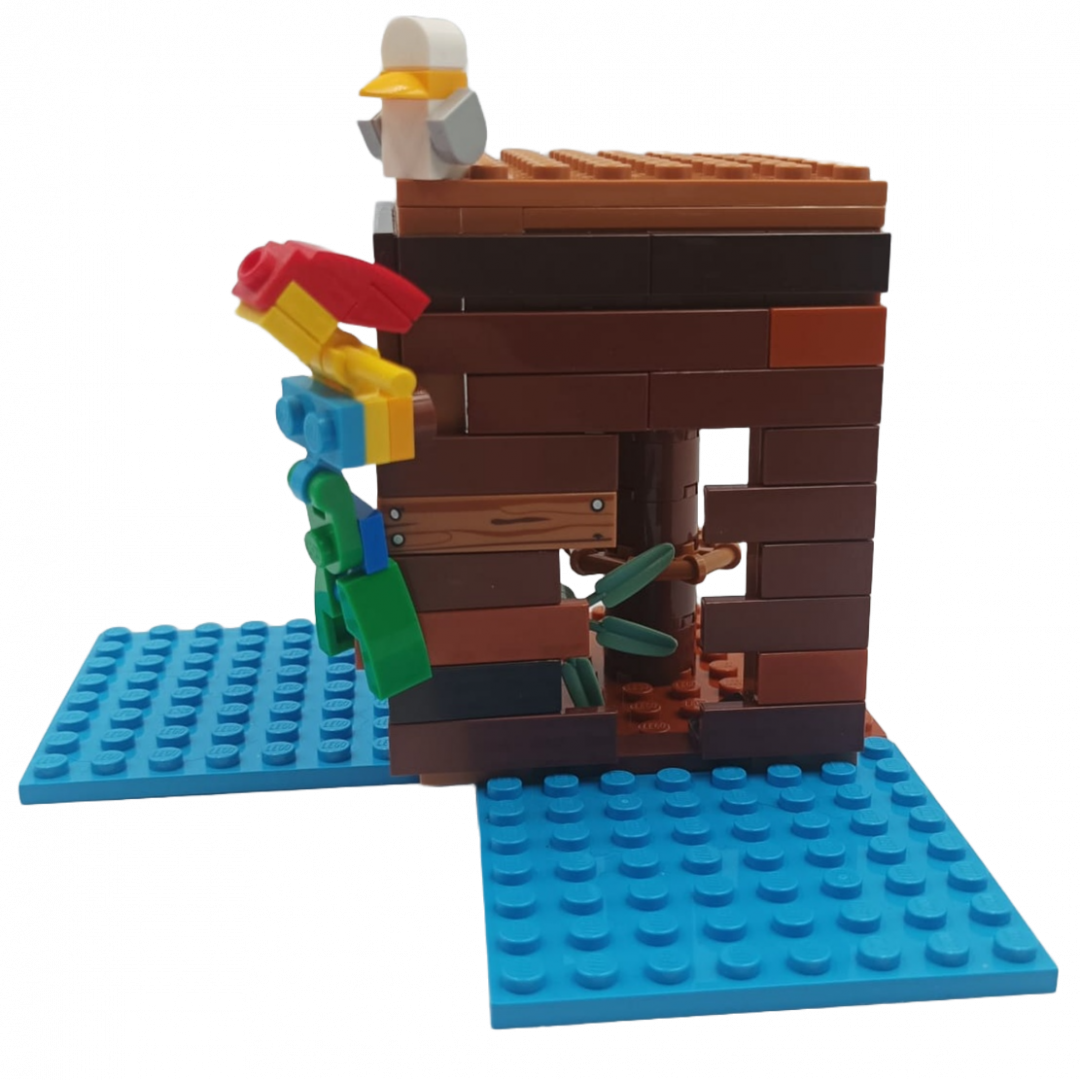
A popular format for MOC (my own creation) building is the (minifigure) habitat. It’s basically a scene within a stackable 8x8x8 cube. Because of its limits it really triggers my creativity, you can try new techniques on a small scale, you don’t need an enormous parts collection and you can build something decent in just a few hours. Furthermore there’s plenty of challenges online where habitat fans join in to build and admire each other’s work. In a series of blog posts we’ll discuss the habitat and the creativity of some amazing builders. In this first part we’ll cover the basics.
How to build a habitat?
Habitats share common dimensions. This makes them suitable for stacking, collaborative projects etc. Some liberties can be taken but the connection points between habitats needs to be considered if a stack is created.
Step 1:
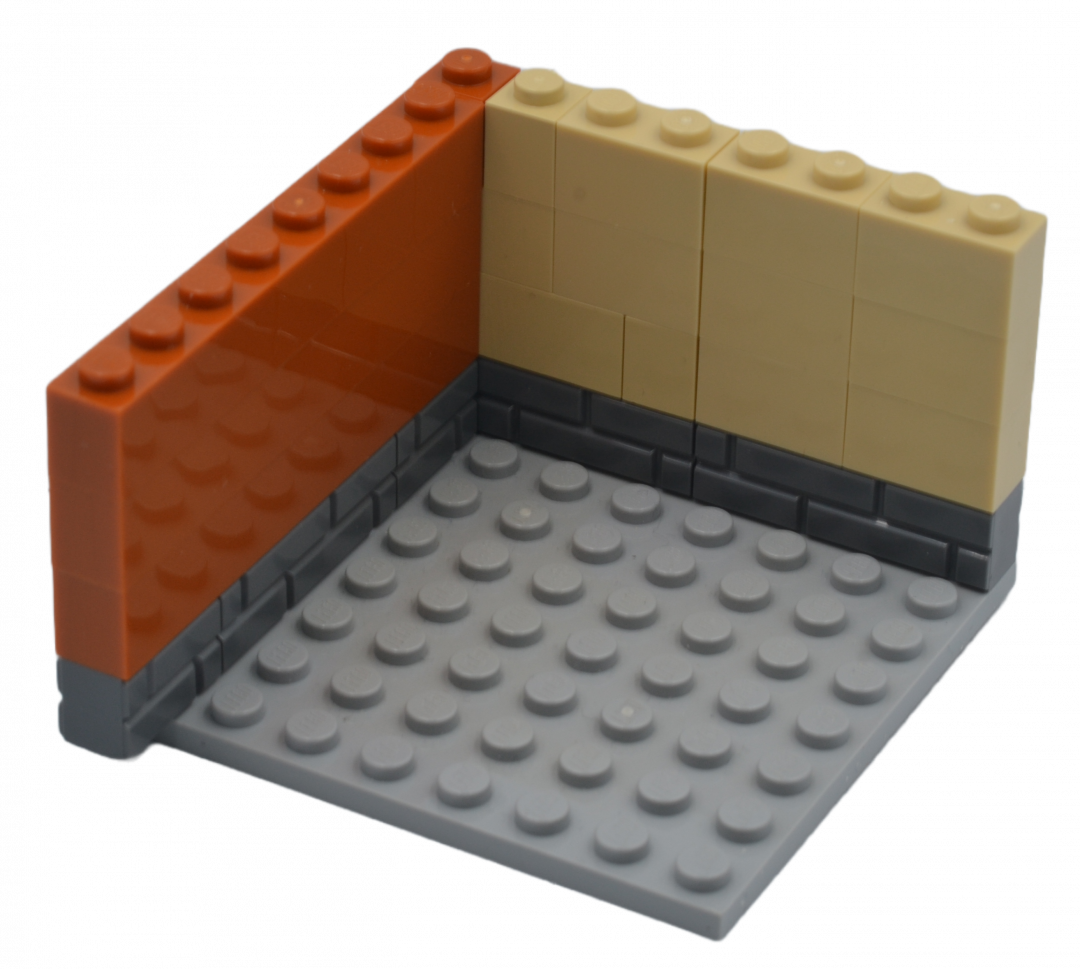
Start with an 8×8 base. It doesn’t really matter if it’s a solid 8×8 plate or a combination of smaller plates. With the construction of walls, tiling or other building features the base can be strengthened later on.

Step 2:
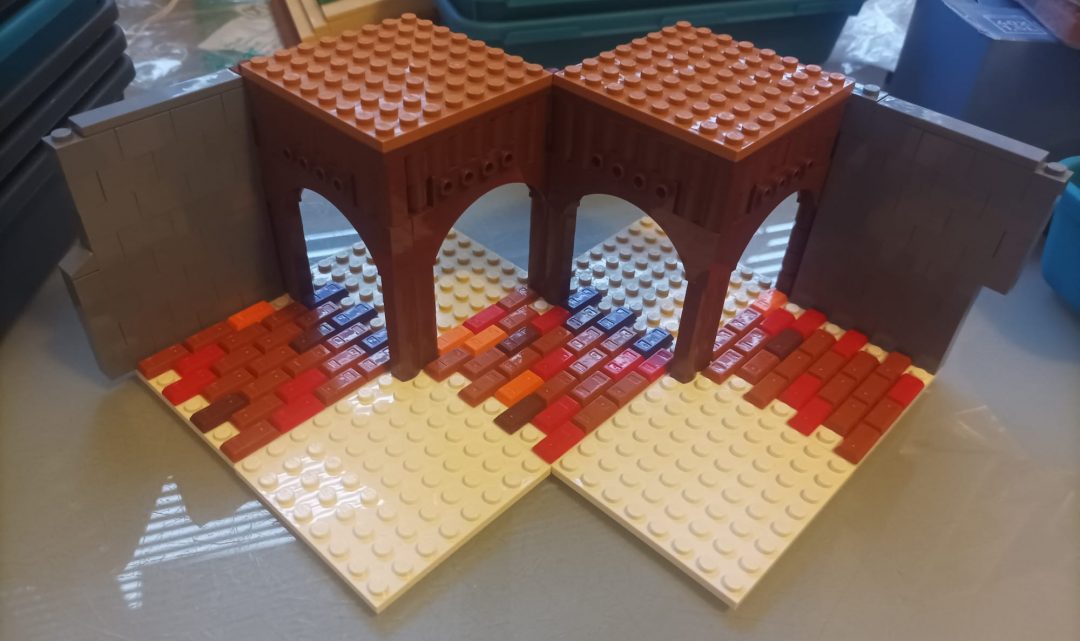
Build the left and right walls 4 bricks high. You can also go for 12 plates or other combinations that give the same height. Traditionally, the left wall has a 1-stud overhang. Creating a length of 9 studs on that side. Some variety is possible (right instead of left, no overhang etc). Just be aware that changing this will impact connecting other habitats.
Step 3:
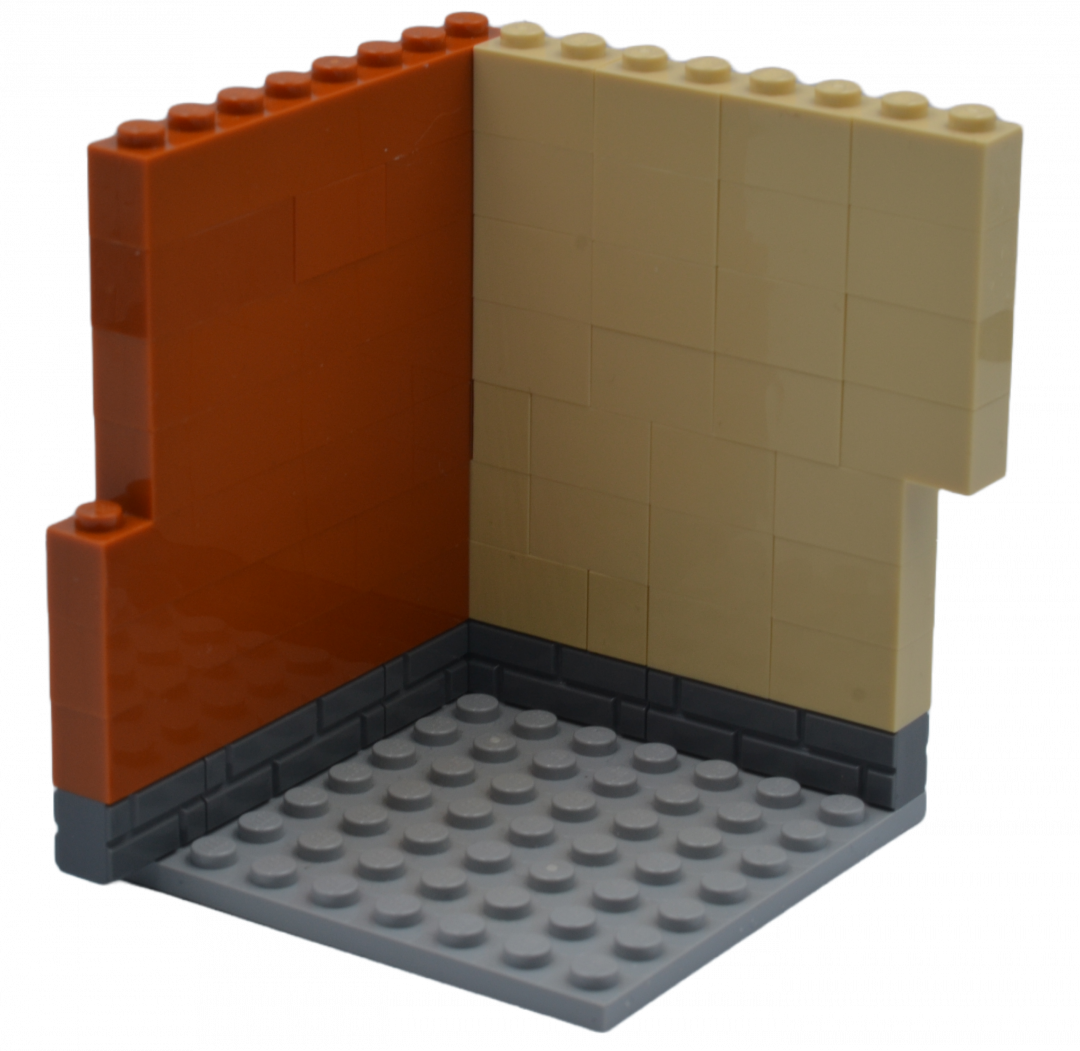
Starting at row 5 the overhang shifts to the other side. So if you started the overhang on the left side you skip the first stud and build the walls a further 4 bricks in height. On the right side the fifth brick will be one stud longer than the first row. This is how you can connect habitats together on the left and right hand side.
Step 4:
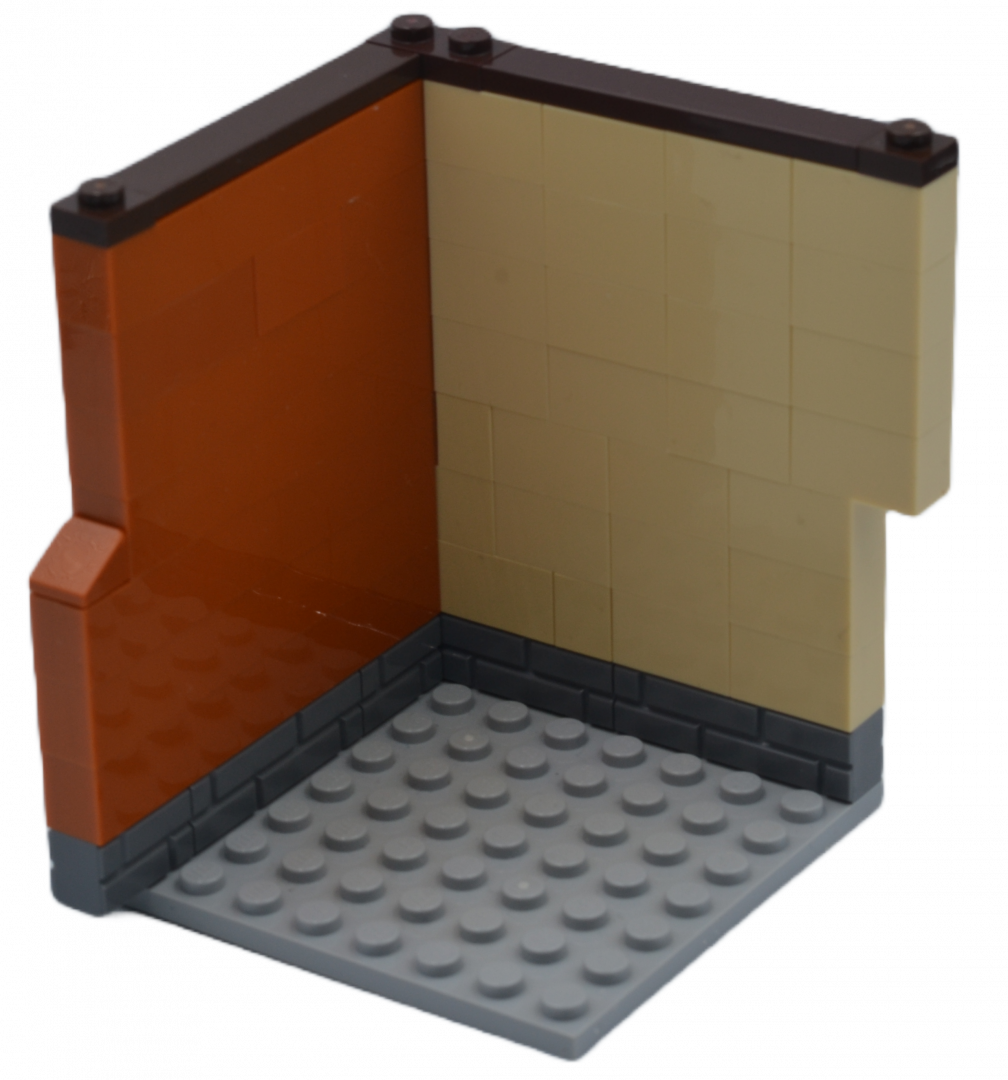
You can temporarily hide the open stud in the wall with a cheese slope or something similar. This gives a smoother look when a habitat is not connected on that side. Finish the habitat with a 1×1 plate on both ends and a 1×2 plate in the corner. This will give stability when stacking another habitat on top. In between these plates 1×6 tiles (or combining smaller ones) will help easily taking the stack apart without destroying the individual habitats.
Step 5:
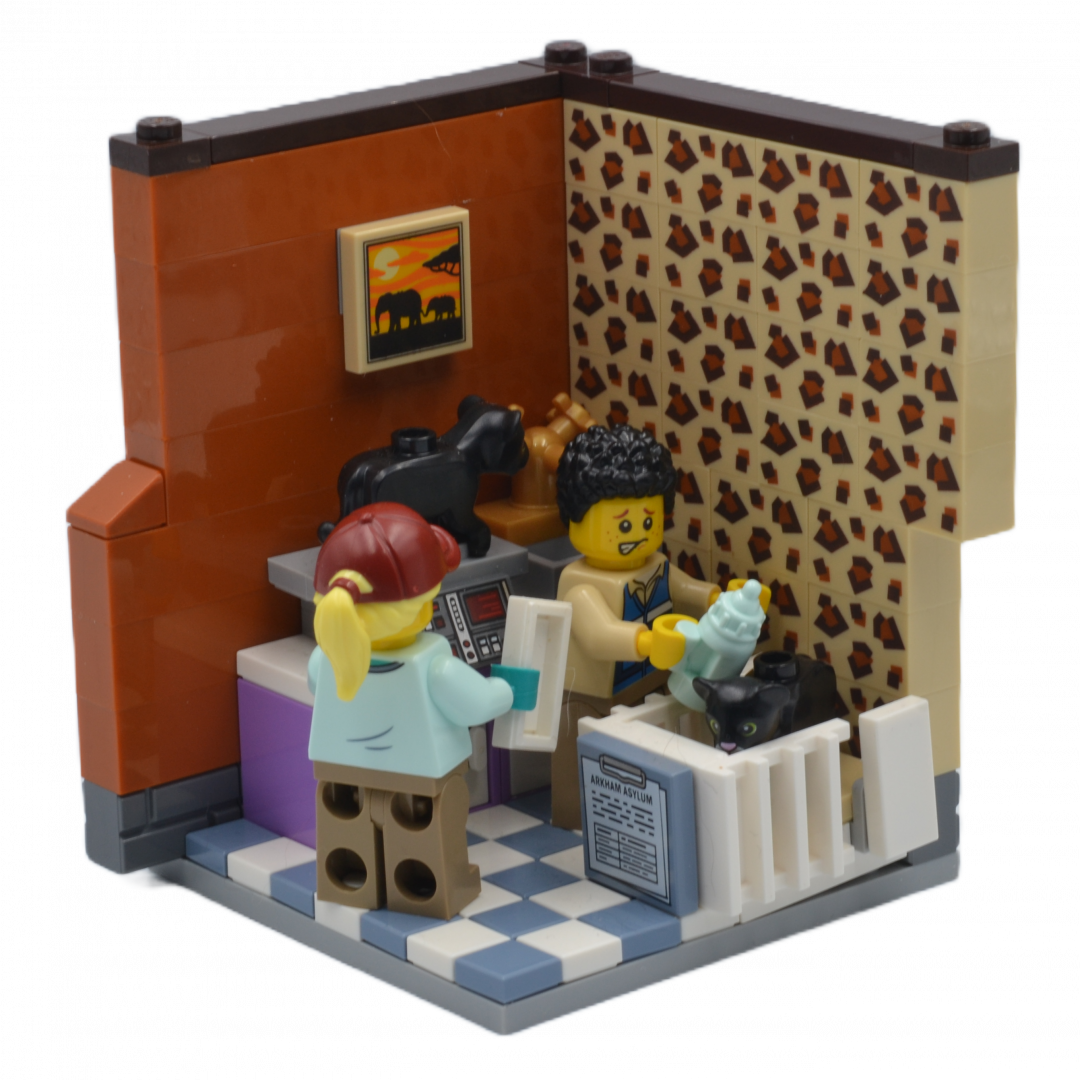
Pick a minifigure character and create a fun backstory to build within the habitat. Decorate with some details telling the story of your figure. I usually start with a temporary plain color for the walls and swap this out during the build once I’ve decided what the ‘story’ of the habitat will become.
Cohesive stack building:
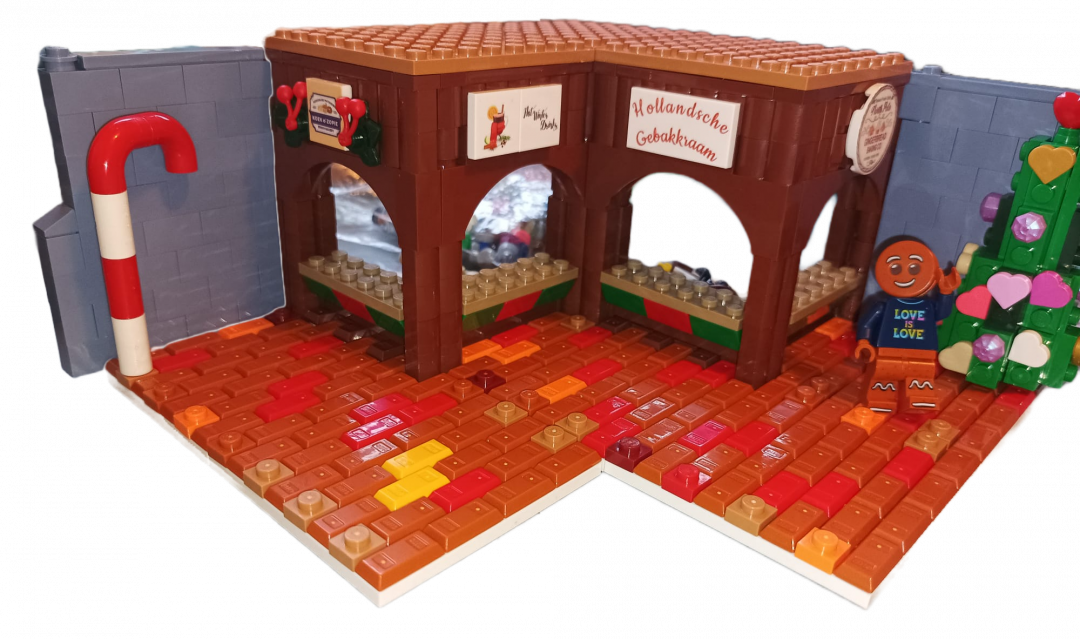
Most of my habitat stacks these days are what is called ‘cohesive stacks’. This means all habitats together will form a bigger build. This has changed my building process somewhat. First I’ll make a rough version with all the needed connections between the 8×8 plates. This means I’ll start building a few habitats simultaneously. Once the basic structure is in place I’ll finish the habitats individually like described in the stacks before. In these pictures there are some examples of my holiday habitats where I wanted the stack to be a Christmas market. And also the recent Pride habitats, where I intended to create the bow of a ship in the middle.

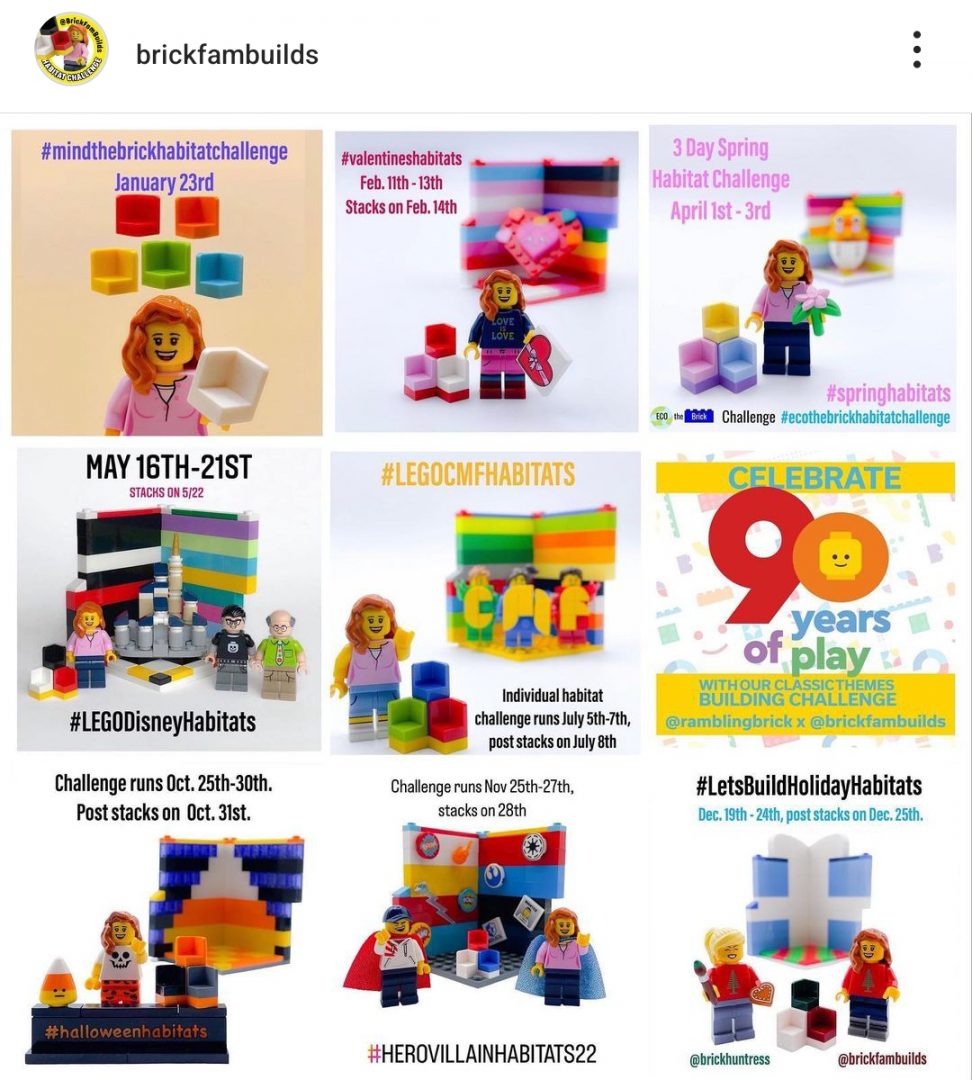
Instagram challenges:
Like mentioned in the introduction, there often are habitat challenges on Instagram. Especially @brickfambuilds has frequent challenges. She is also a master in creating very creative habitats herself. If you’re curious about habitat building be sure to follow her and you’re always welcome to join the challenges, especially if you’re just starting building habitats. It’s a fun and supportive community so we can only recommend taking a look.
This was our introduction on the basics of habitats. In the next blog in this series we’ll be taking a look at some builders who looked out of the box and created some unique habitats. In part 3 we’ll be diving into creative habitat stacks and the possibilities explored by some talented builders. A big thank you to Jen @brickfambuilds for her help in creating this blog.
Has this blog inspired you to give it a try? Be sure to use hashtag #thebrickposthabitats when you share your build. We’ll try to share as many as we can in a future blog in this series.
What is your reaction?
 YES!
YES!
 I like it
 It's OK
 Not Sure
 No!
No!


Thanks for this blog. I love building habitats and the challenges by @brickfambuilds.
If you like, have a look at my many habitats on Instagram ( @klausbricks ): Architecture, Disney, Halloween and many more themes.
Klaus D
Thank you for leaving a comment. I will certainly have a look at your account. I myself must have a go at these cool Habitats!
Yeyyy!!!! Awesome blog from a master habitat builder!
Thank you for highlighting Jen’s challenge that has been going strong for nearly 3 years now.
I’m a bit late but thanks for your kind words! Jen is the Queen of habitats after all., you really can’t go passed her when discussing the format..