When looking for a decent NASA Artemis brick set, I took a few things into consideration – Price, quaily, and space (pun totally intended).
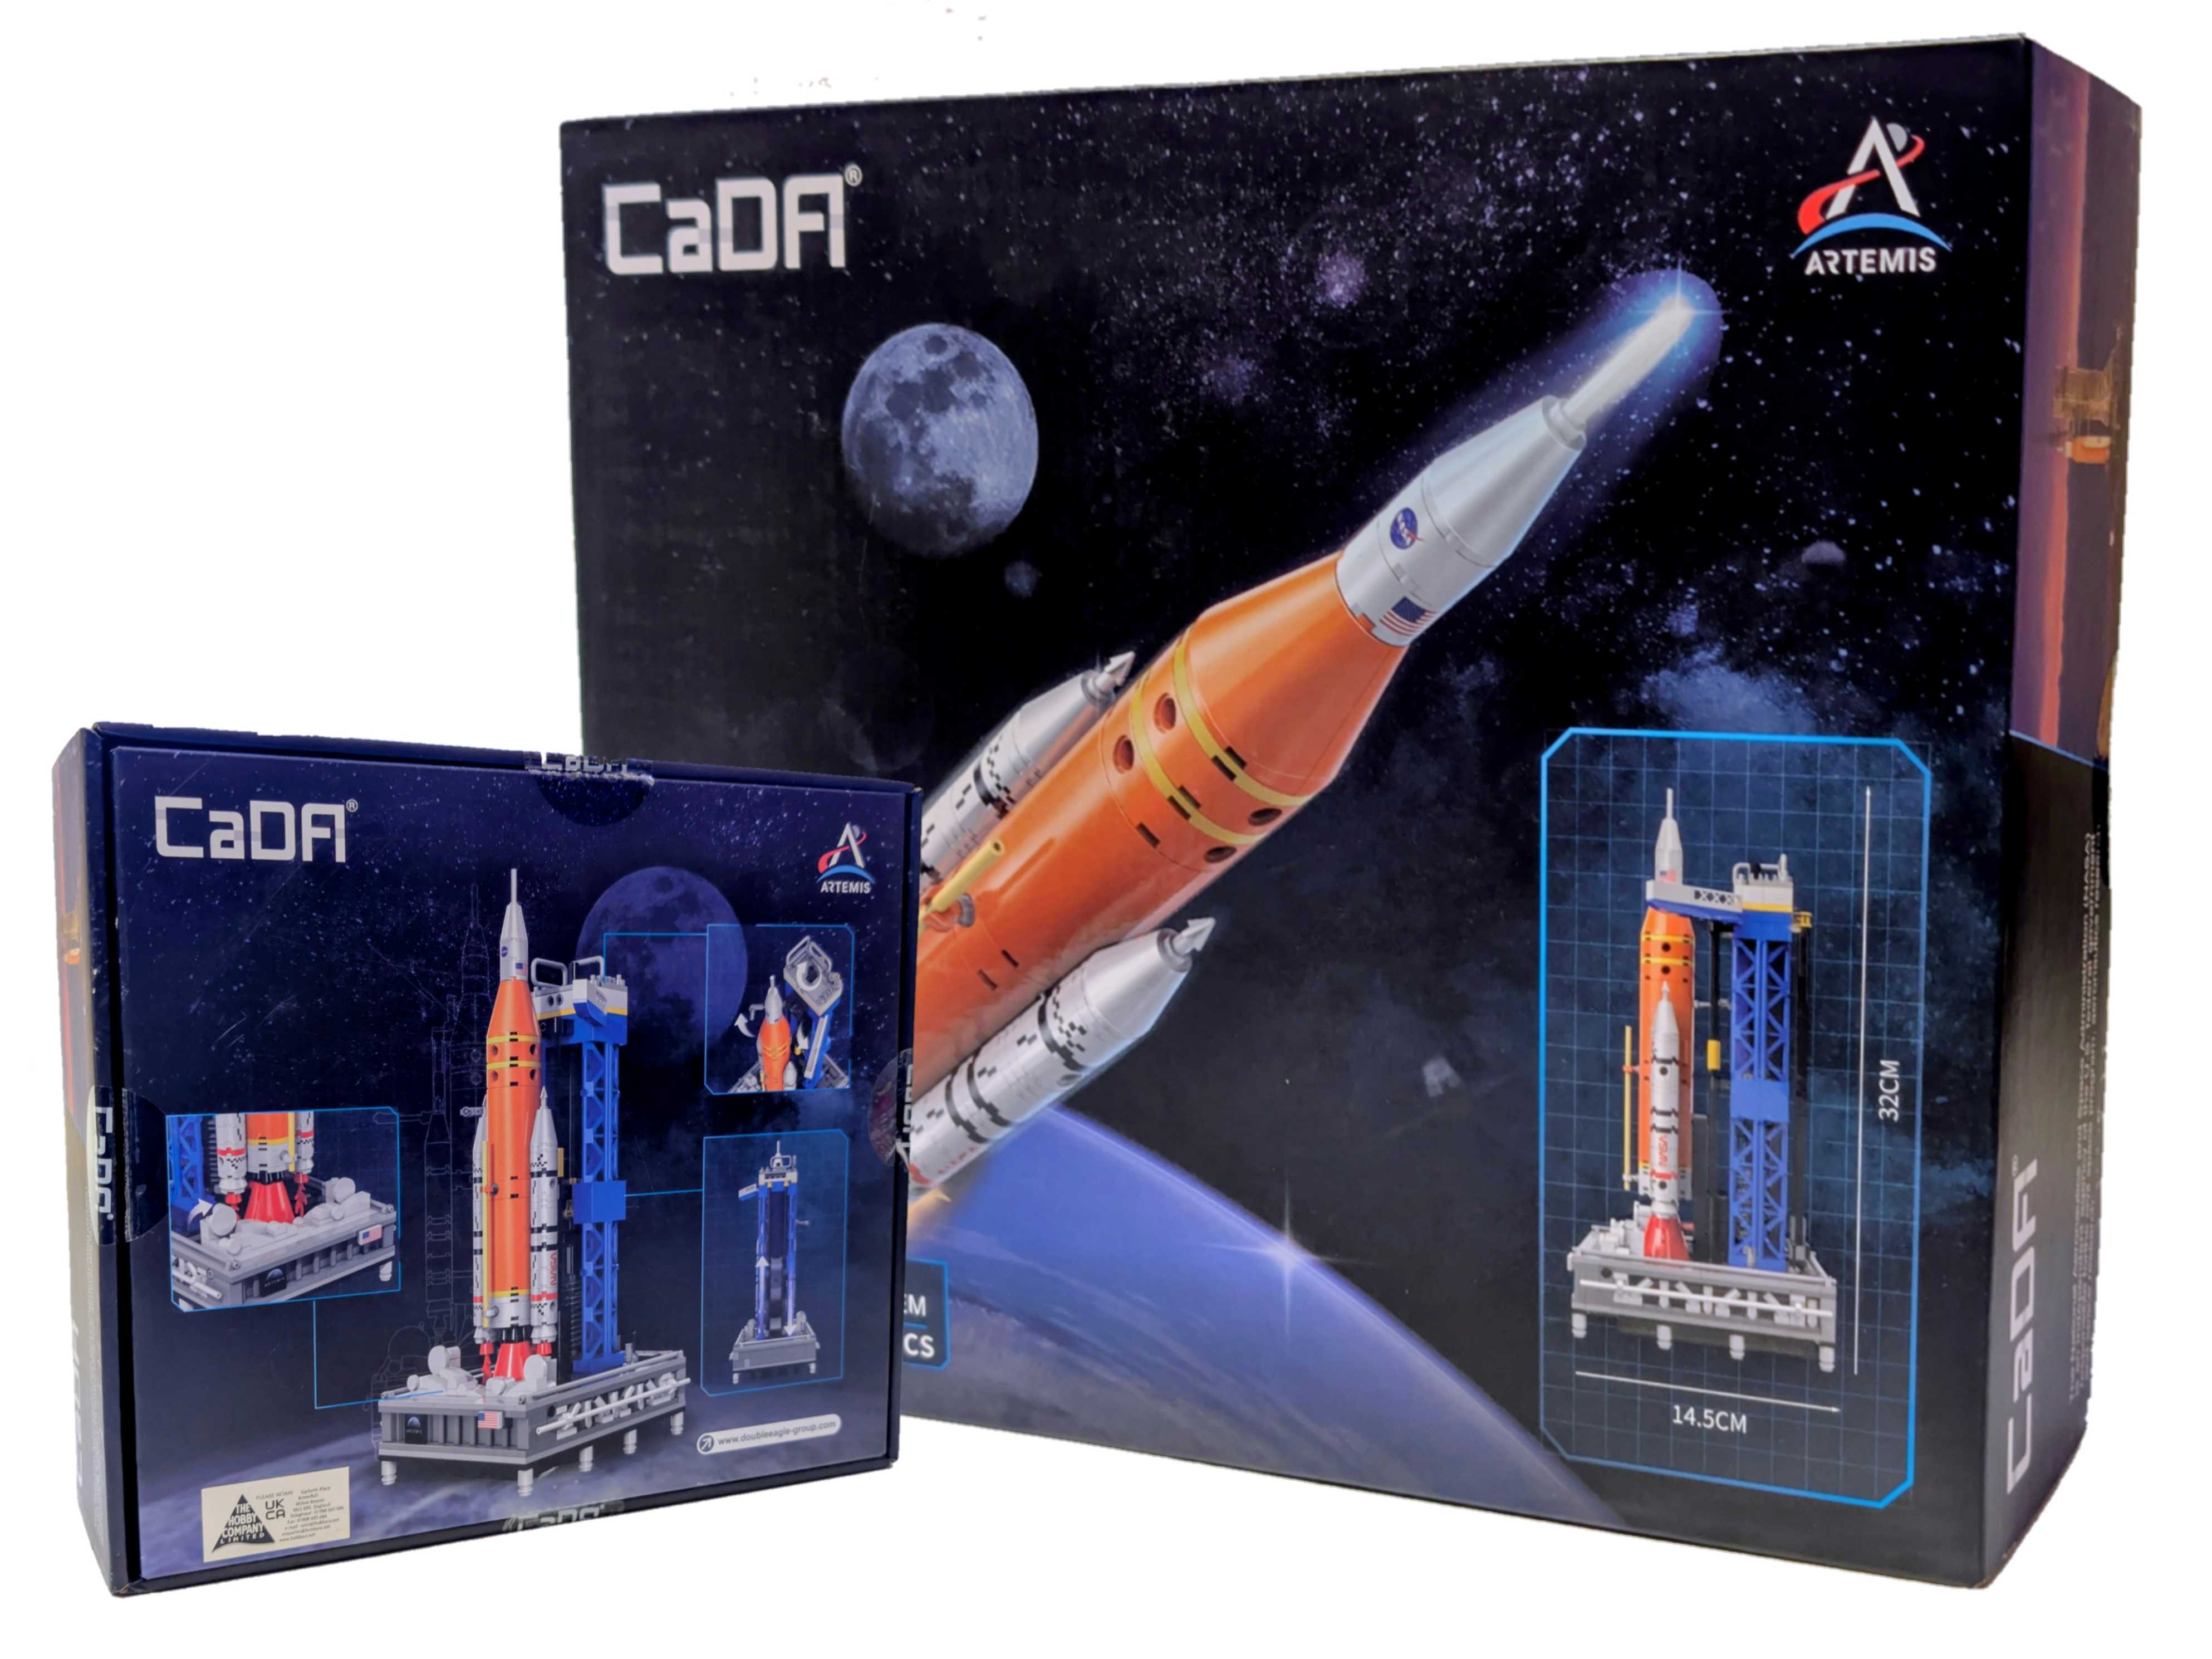
I went straight to the leading brands website and said to myself “this is a great looking set, but way out of my budget”, it was also a tab tall, I have very limited display room so this sat was sadly a no go. I then came across CaDA, and alternative brand that had a couple of offerings, one small in scale (a little too small) and another that stood just over 30cm tall – the latter was perfect for my needs. The website I purchased this from is called Jadlam, a company I have used a handful of times, mostly for purchasing Scalextric for my Dad.
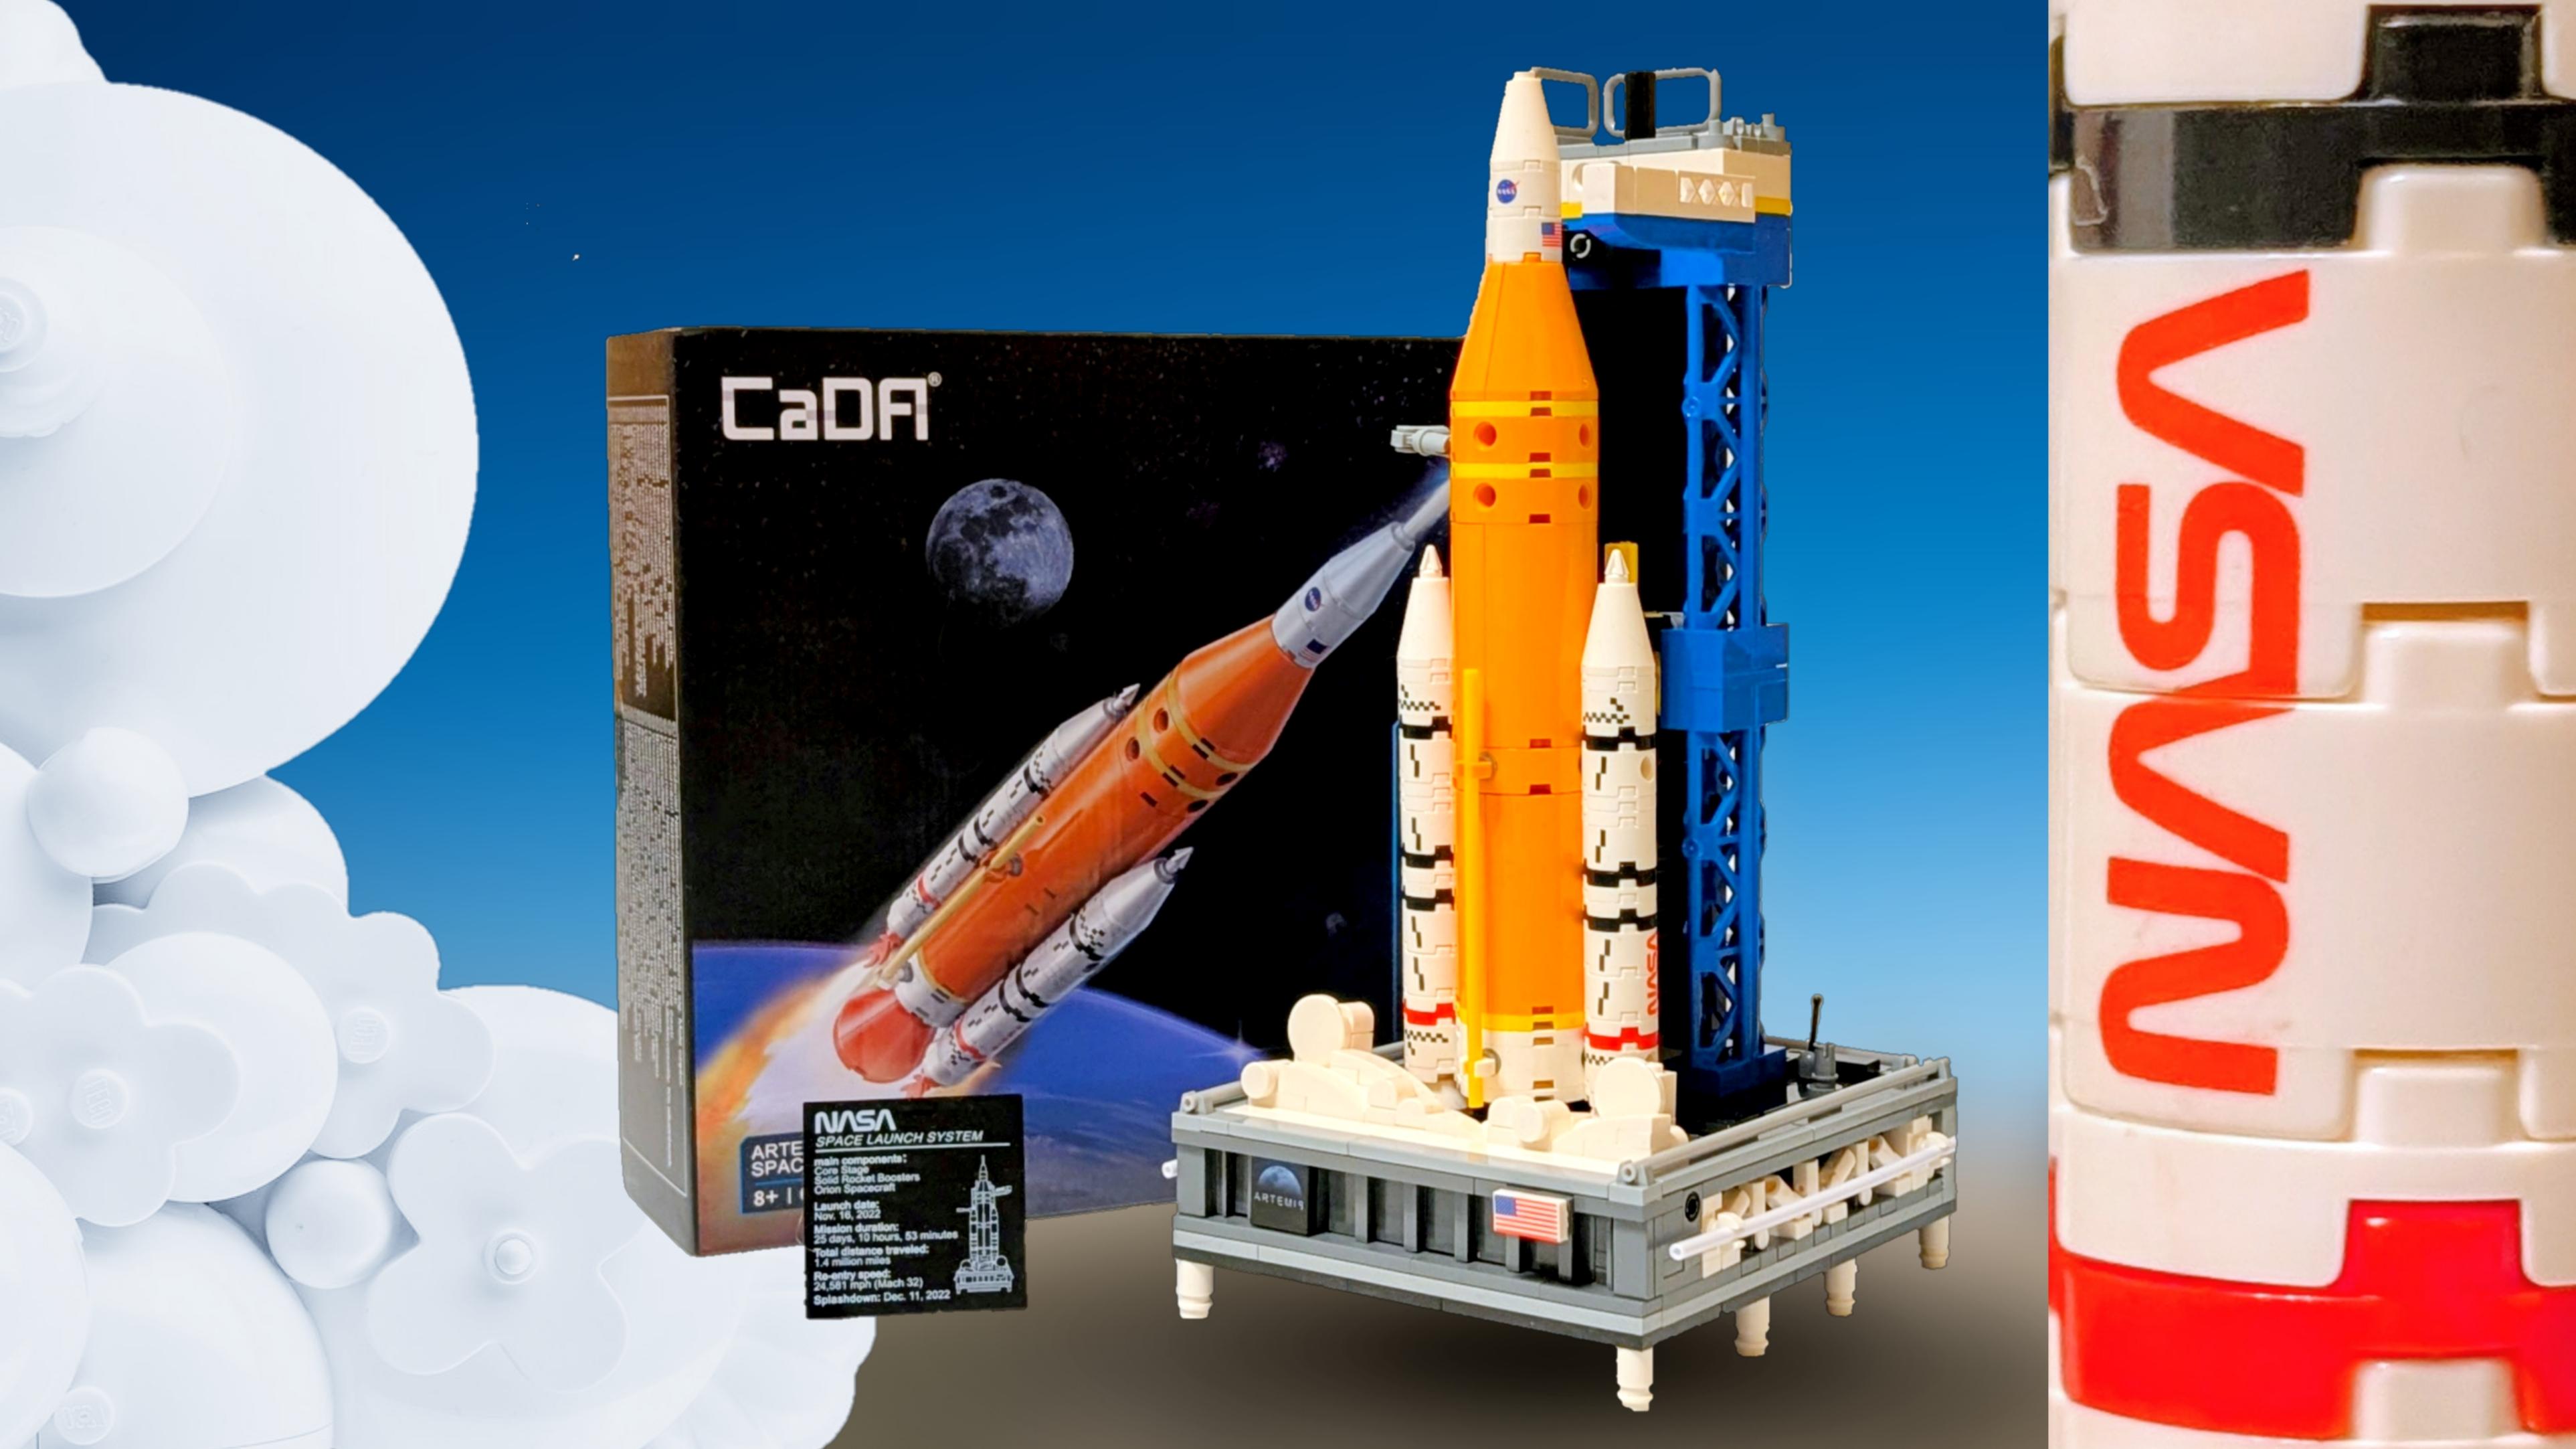
I’ll. Jump straight into the short but sweet review with the box, the artwork, and what’s Inside. First of all the art is great, it’s slightly embossed to give that premium feel. The colours are bright and standout against the darkness of Space, I particularly like the smaller diagram that shows it’s size, including the rockets base. Inside you’ll find a bundle of bagged bits and an instruction manual. Having built a lot of leading brand sets, I was surprised the bags weren’t numbered, having to tip them all out and seeing the 659 pieces in a pile scared me a little.
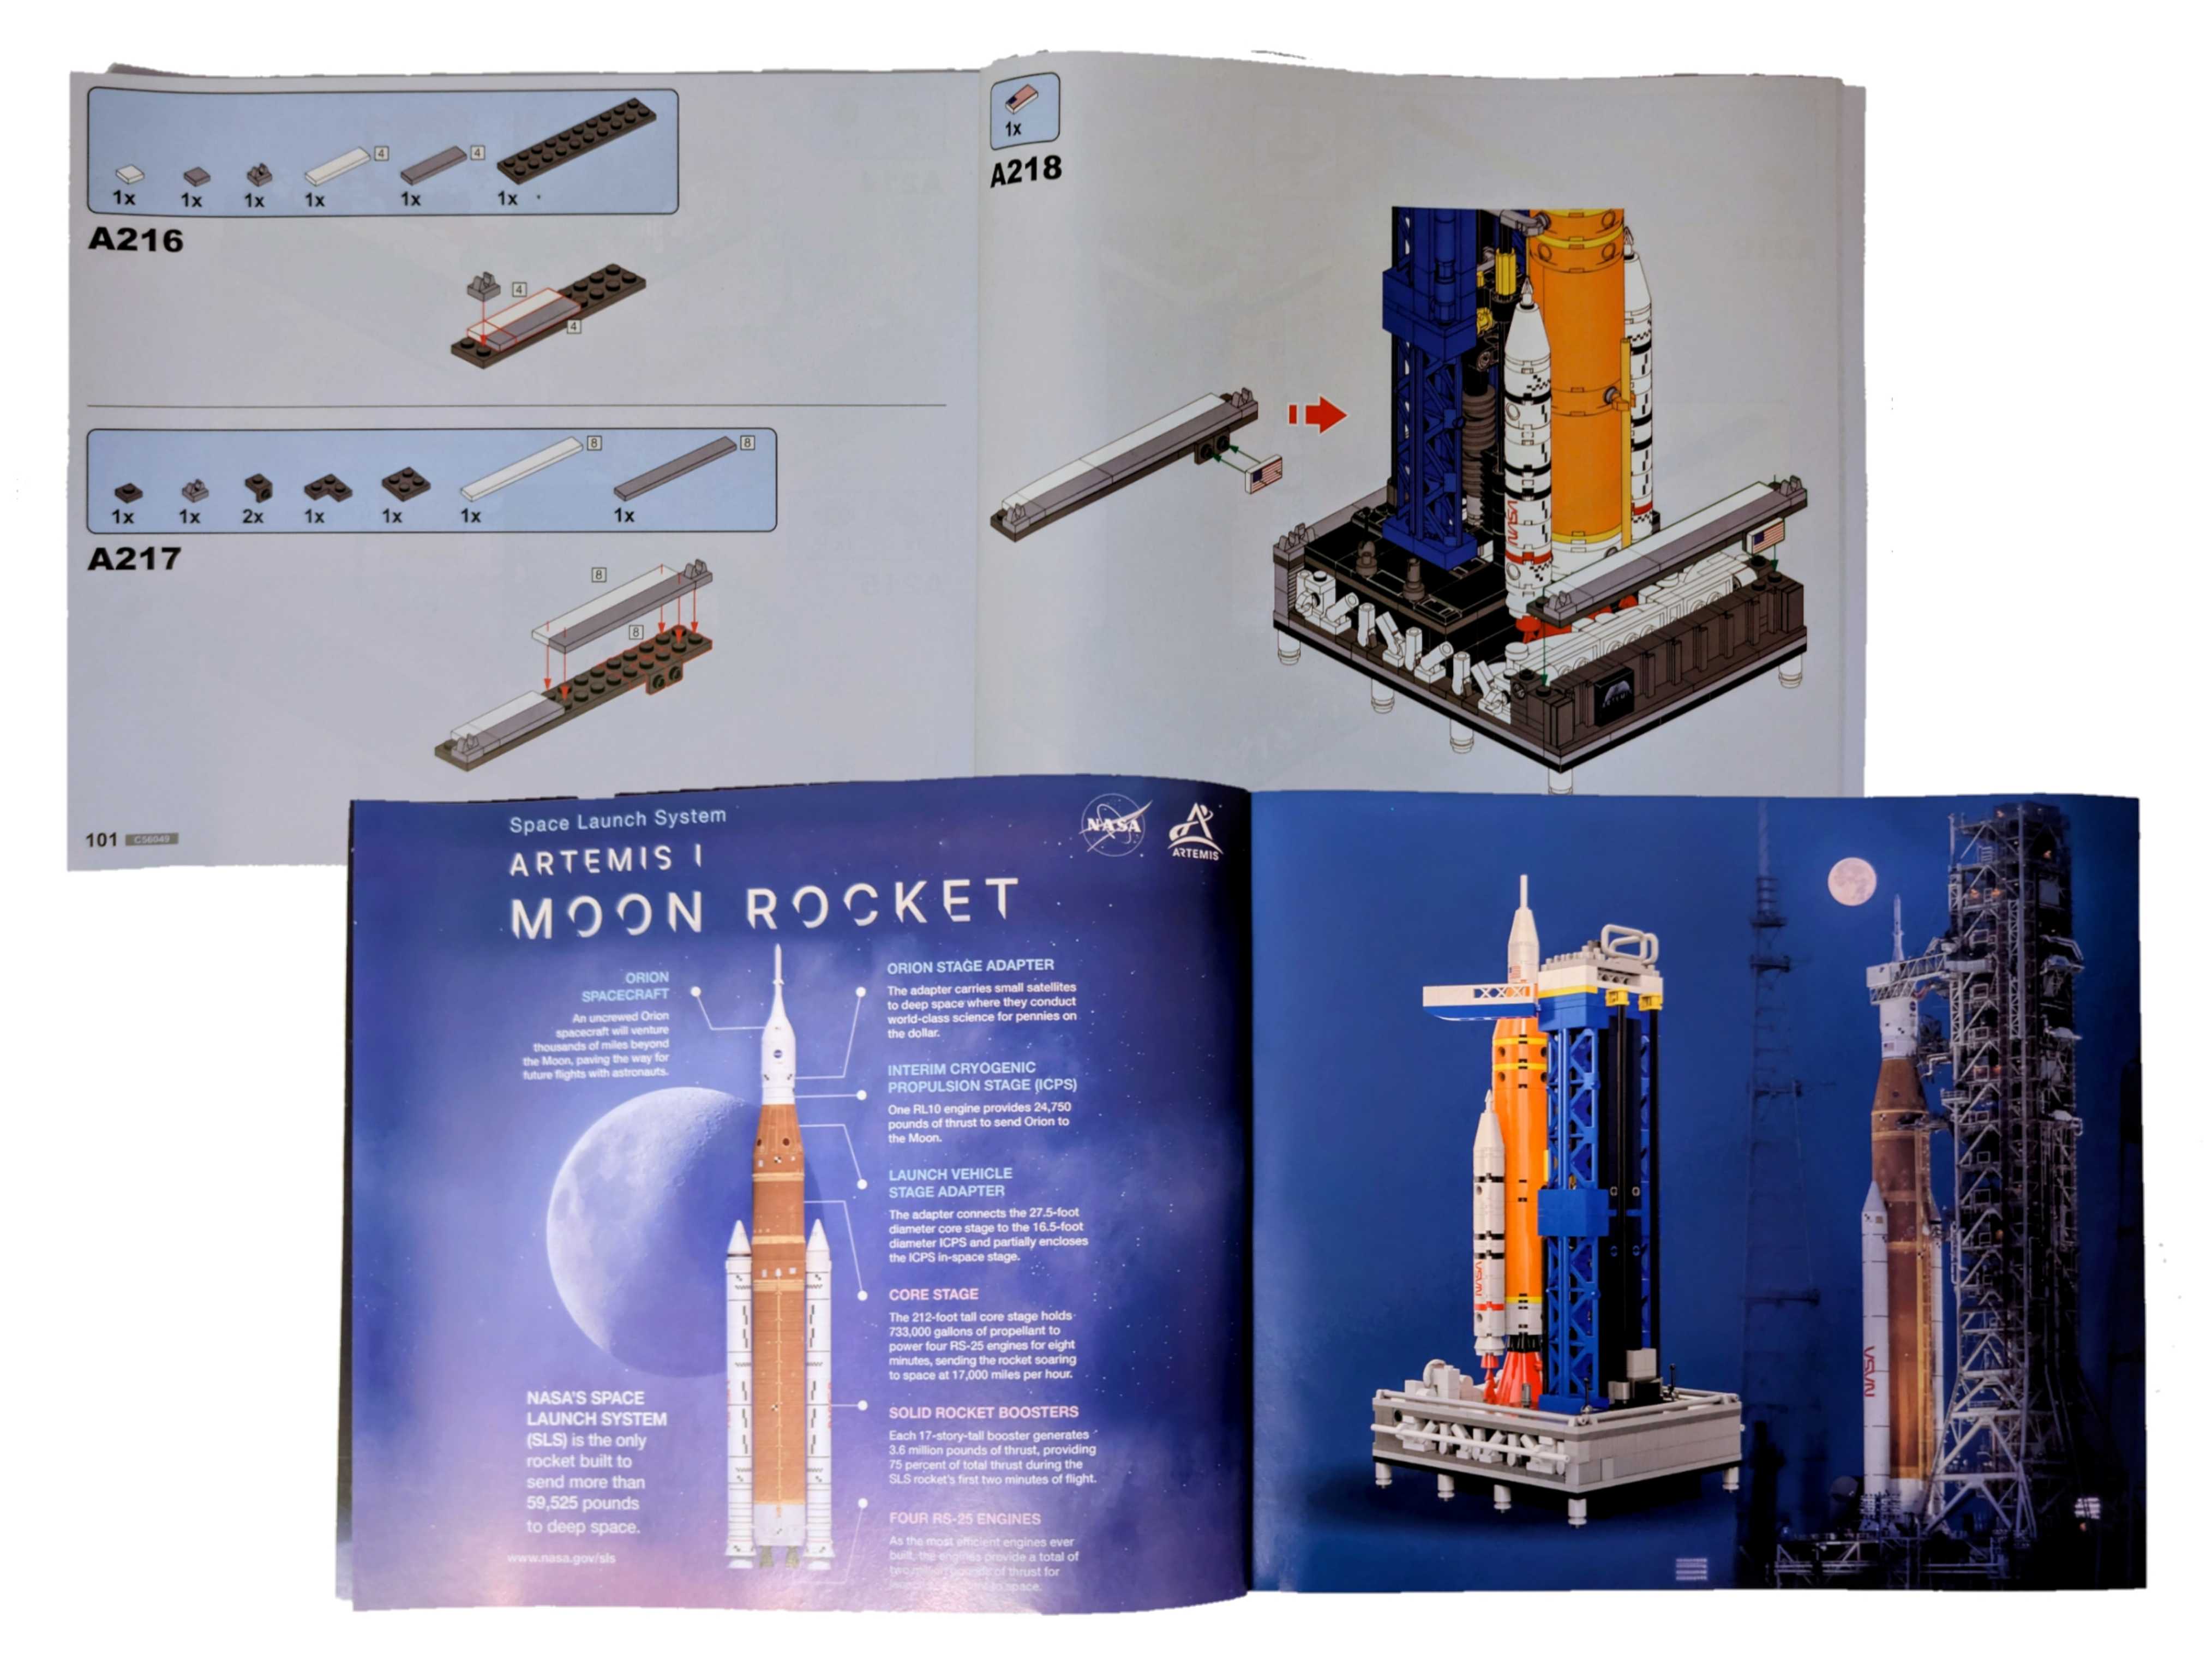
Flicking through the first few pages of the manual, you are presented with a ton of insightful information about NASA and the Artemis program. The set is based on the Artemis I rocket and the SLS (Space Launch System), with a few artistic licenses used and colours swapped out for compatible bricks and pieces.
The instructions are a very important part of any set, they not only have to be easy to follow and clear but also give the builder a sense of achievement every step of the build – nobody likes repetition or stepping away from the final product thinking ‘I can’t remember any of that build‘. I’m glad to say CaDA have done a great job with their manual, the flow is steady, the parts per step are just right, and the layout is spot on. As with most booklets, no just CaDA, some colours are too similar when printed, sometimes I had trouble differentiating between dark blue and black – this isn’t a big issue, just one I’d like to mention, building in a properly lit area is best.
Moving onto the build itself, I thought it was best to split it into two, showcasing the SLS first followed by attaching the rocket. Not having numbered bags threw me as my usual photographic practice is after each bag is completed.
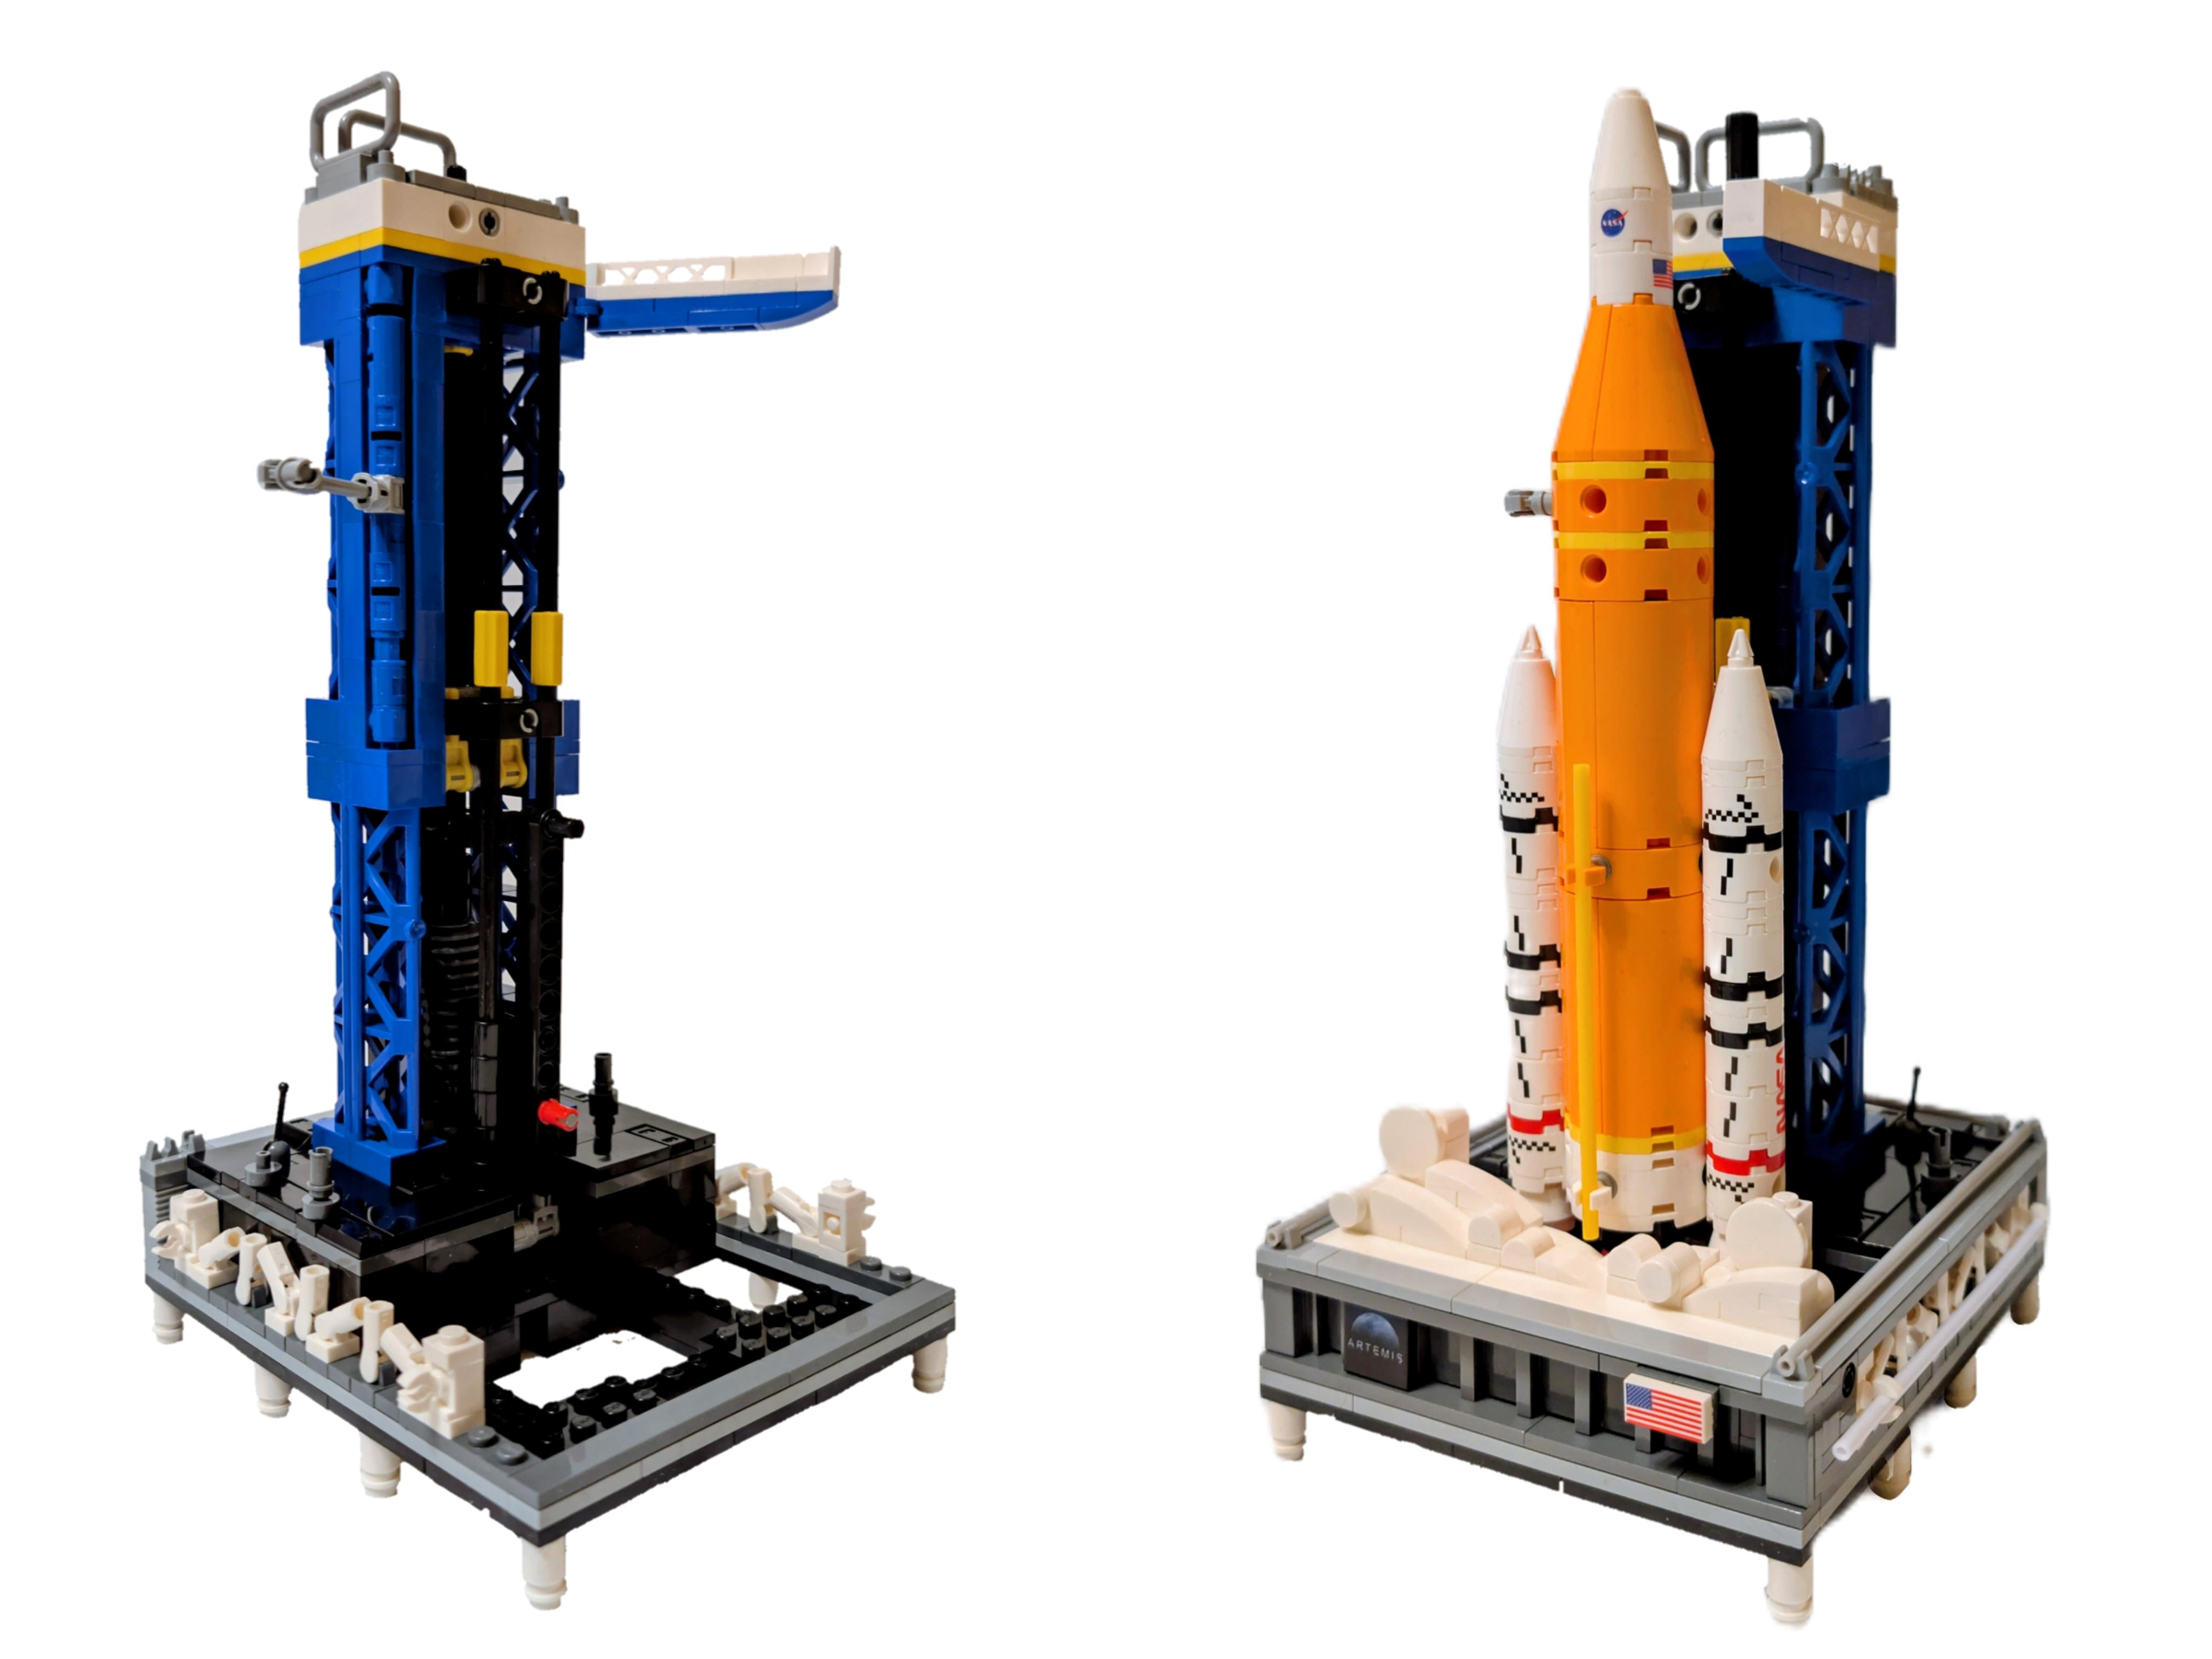
The base went together well, although the 8 platform feet constantly fell off due to lifting and moving the set as I built. As you build up the layers, adding architectural details such as small parts that resemble pillars and girders, you start to see it come together. The angled white parts along both sides looked clunky at first but once you pop the top plate on it finished them of nicely and again looking at it as a whole you understand what they are meant to be.
Within the base and up through the tall blue columns is a series of long bars that connect to a gear piece, once the set it fully constructed it allows the Artemis rocket to ‘lift off‘ slightly from the SLS, giving it an element of movement. A great little play feature that works surprisingly well, given my history of disliking more technical builds.
Once the base is complete, with added support and gangway for the Astronauts, you make a start on and finish the Artemis rocket in the last section of the book. This is perhaps the easiest portion of the build and where a ton of printed parts are used – yes you read that right, no stickers here!
The main body of the rocket is a series of stacked tube parts, held together with round plates and bricks, I did find the clutch power of one of the plates to be weak, but it holds enough to not constantly fall off, for a display set it is fine. Layering up both fuel carriers with round 2×2 printed bricks and 2×2 plates, they quickly come together, make sure to uses the correct NASA elements (individual bags) as the finished angle will be slightly off.
Popping the rocket into place is quite straightforward, thanks to the holes on at the back and the two exposed pins on the SLS. Along it correctly, push it on, and wait for the faint clicking of bricks – hey-presto it’s on. The final build of the set is the cloud of smoke at the base of the rocket, this is fairly straightforward to construct and even has a swivel feature of it’s own, it can be laid down (pre-launch) or raised up (during launch). At first glance I presumed when the rocket is moving up it gently rises the smoke, nope, it rips the big red booster off. You’ll need to twiddle the knob to raise the rocket whilst the other hand lifts the smoke – or leave the smoke up like I have.
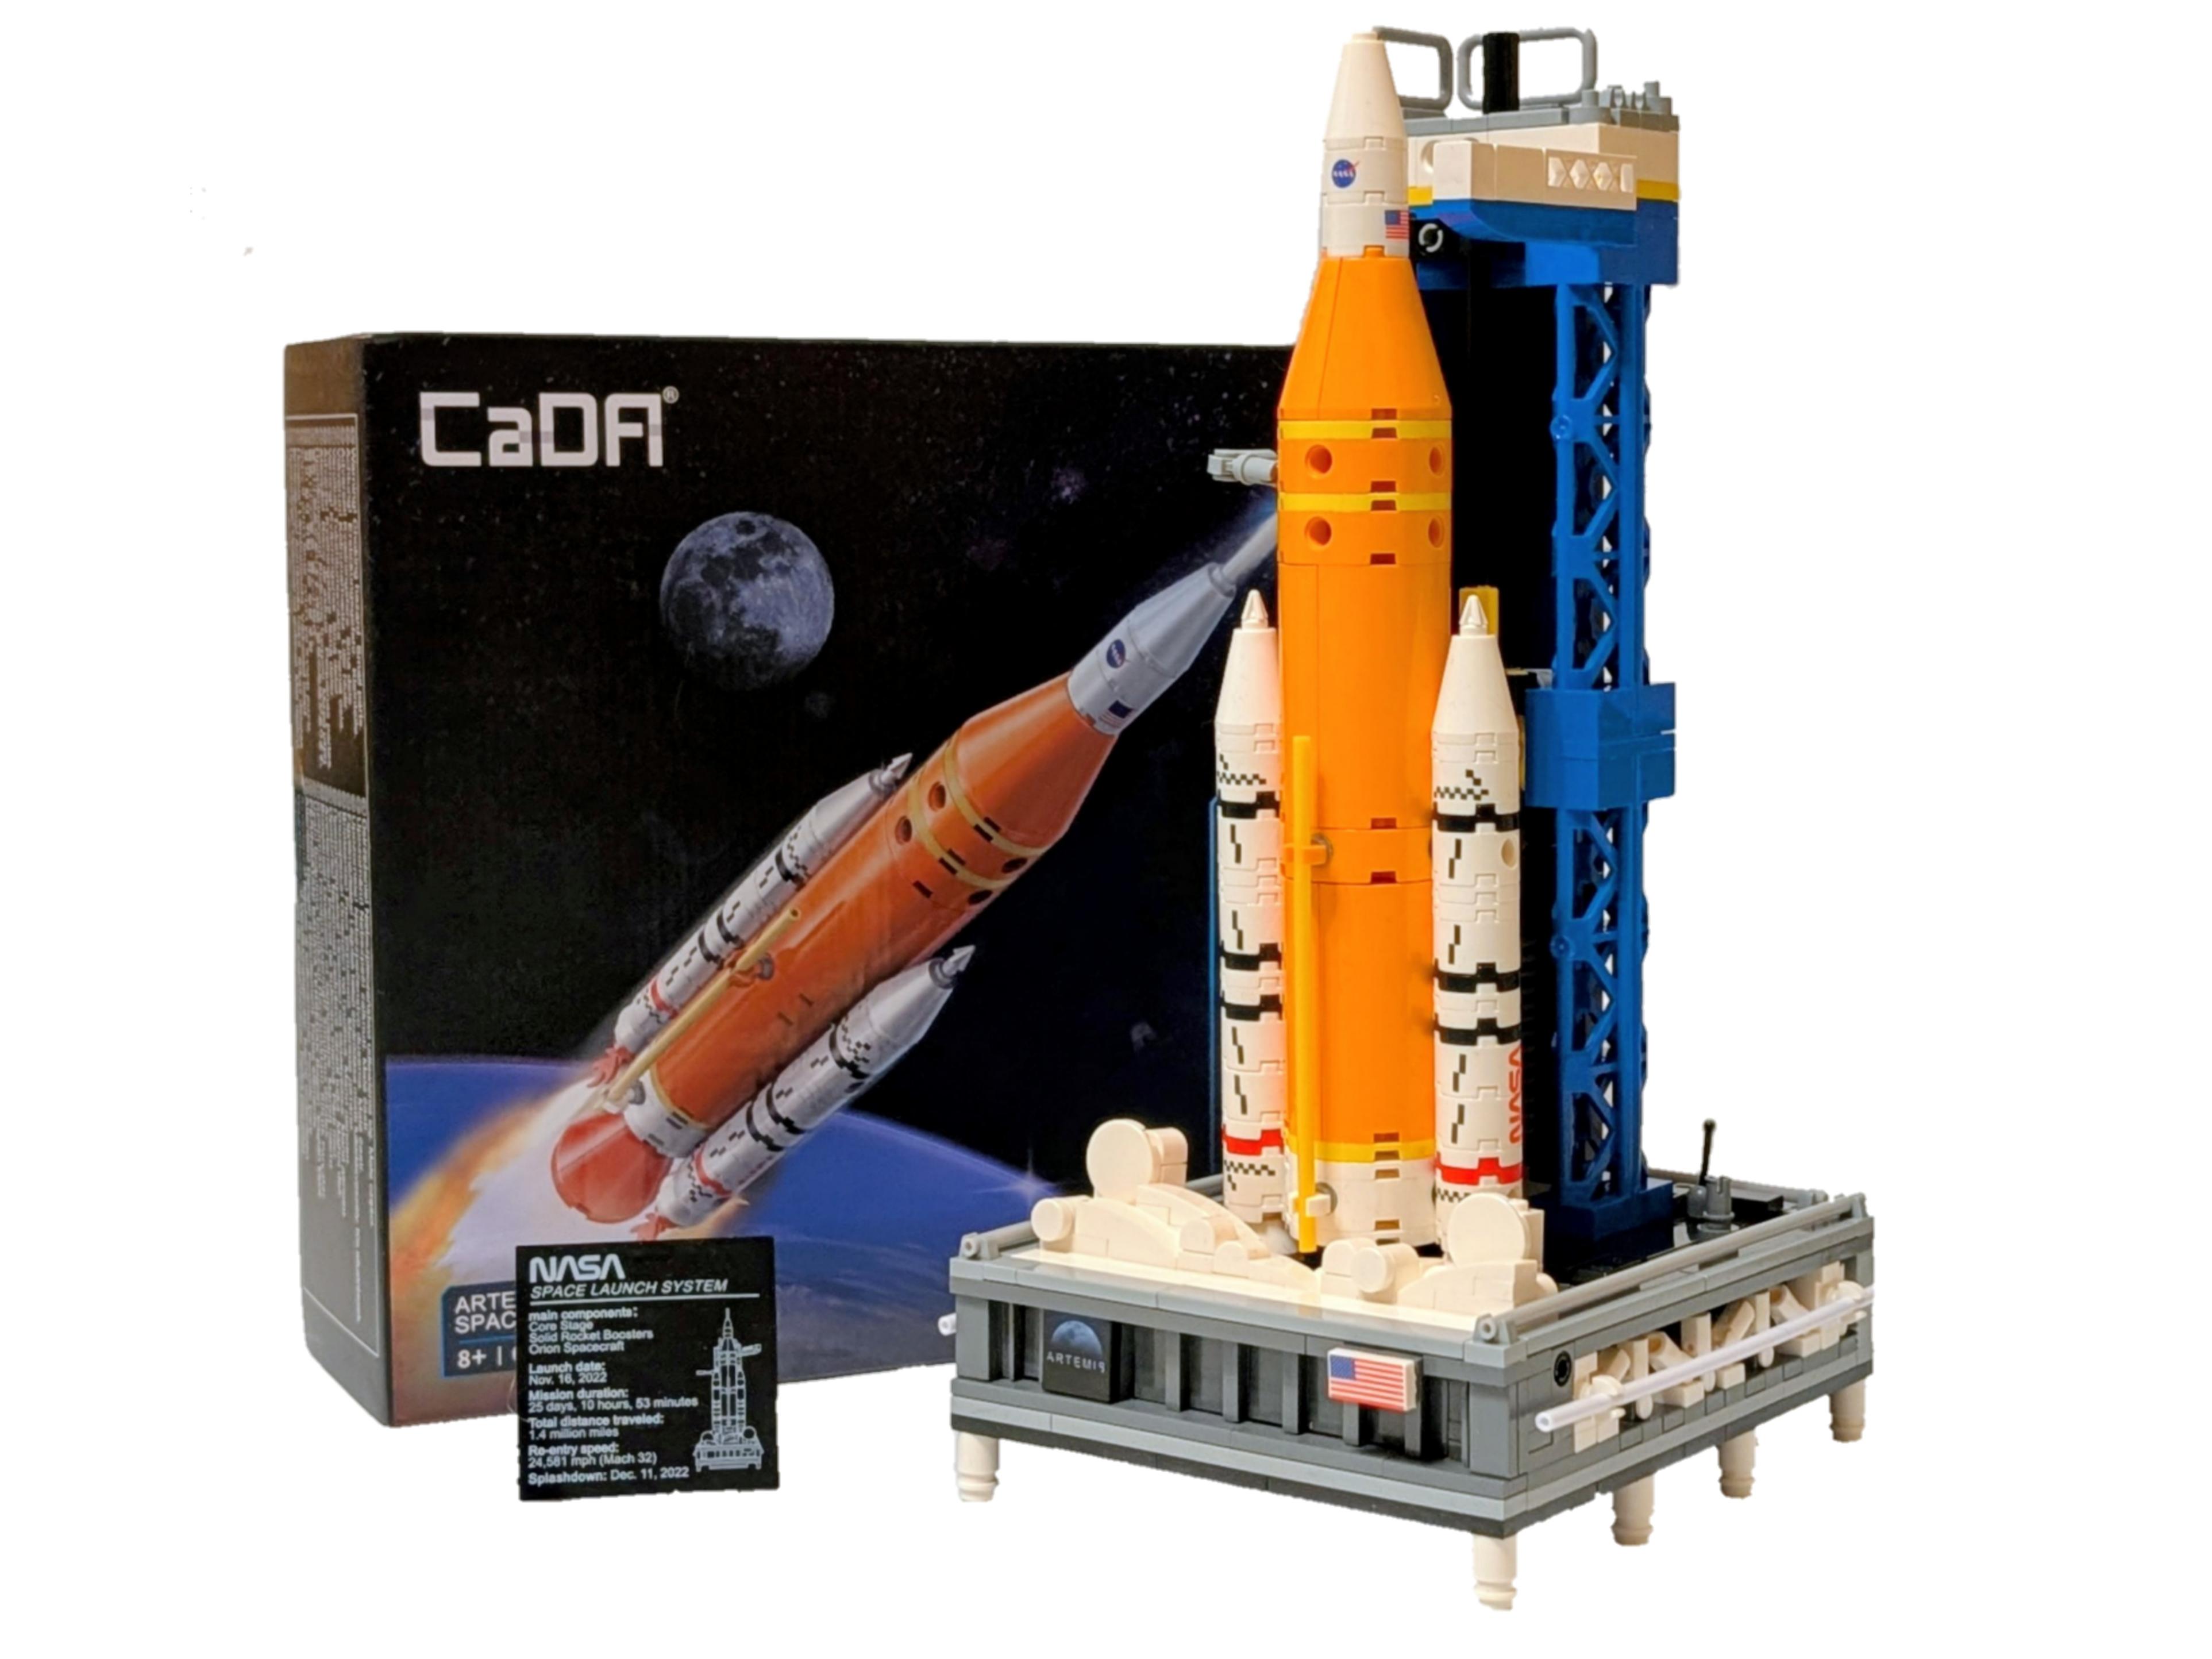
Overall the CaDA C56049W NASA Artemis SLS Rocket is an enjoyable build that not only went together well but more importantly looks the part. The Printed elements are great, including the Artemis logo and USA flag front and centre. It’s sturdy, doesn’t fall apart when lifted and the mechanism works well – a fitting tribute to NASA and the Artemis program – well done CaDA!
The next stage of my mission, and one of the reasons I needed this set, is to add the custom LEGO Artemis II crew Minifigures I purchased from Minifigs.me. If you haven’t seen them please take a look here, they are a must have for any Space fan.
CaDA C56049W NASA Artemis SLS Rocket 1:460 Brick Model 659pcs
CaDA C56049W NASA Artemis SLS Rocket
An enjoyable build that looks great on display
Pros
- Price (around £30)
- Printed Parts
- Size (32cm tall)
Cons
- Clutch power of one piece
- No numbered bags/stages
- Element colours inside the manual
What is your reaction?
 YES!
YES!
 I like it
 It's OK
 Not Sure
 No!
No!