We recently bought, built and reviewed the LEGO Mario & Standard Kart (72037) set and gave it the highest of marks, a full 10 out of 10. It’s a stunning build and looks great on display, amongst the other Nintendo themed sets. But there was something missing, I couldn’t quite put my finger on it, until BOXXCO reached out and offered me a case to fully showoff the Italian Plumber and his ride!
So jump in, buckle up, hang on for dear life and watch out for blue shells – here is how we got on and what we ultimately think of the BOXXCO Mario Kart case.
Let’s start at the… start, delivery day. I knew it was on the way and due to be delivered but what turned up didn’t seem right, the box was humongous. Upon opening the box and digging through the packaging, which there was quite a lot of, I finally got to the bundled-up case. For something somewhat fragile I appreciated the extra protection the large box offered, the first tick on my review spreadsheet.

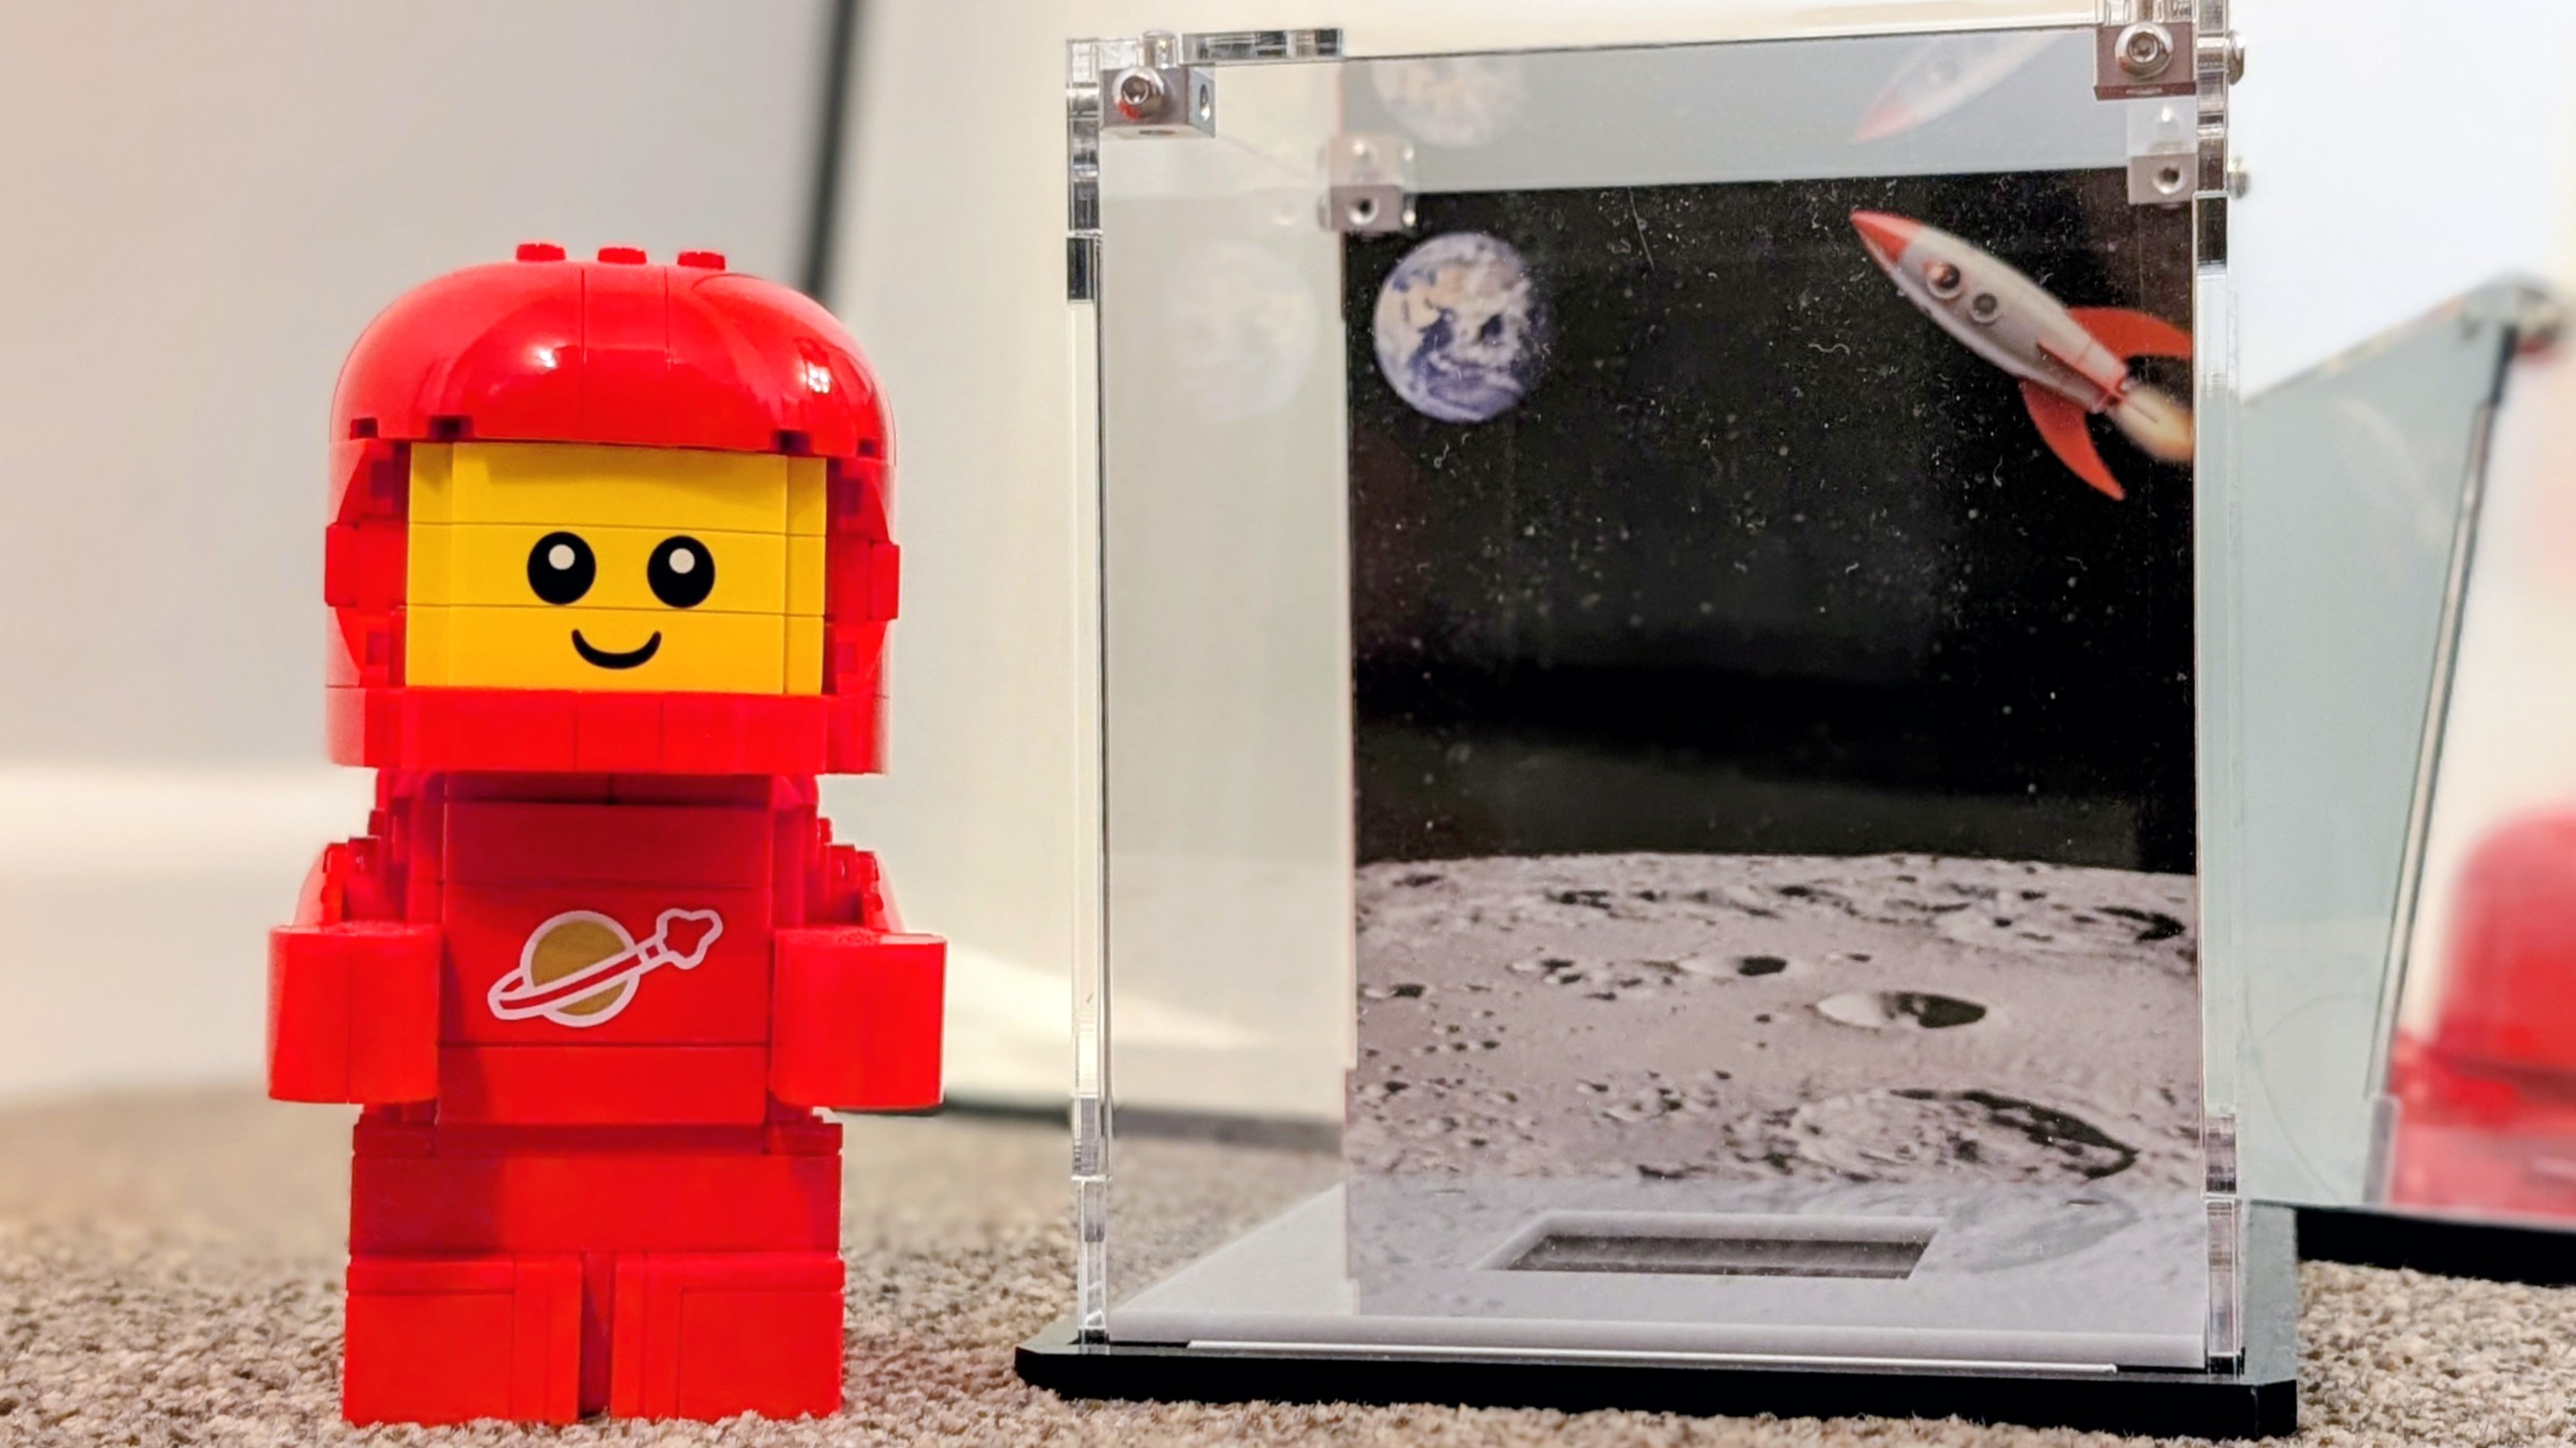
Once I disposed of the outer packaging, in the various recycling bins, I laid out the case in its individual parts. The packets of screws and corner gubbins, the base & sides and finally the printed backdrops, which looked beautifully done by the way.
I grabbed the single-sided instruction sheet, scanned it quickly and got to work. I was done in about half an hour so there’s no need to worry if you think it’s difficult, I’m the least handy person I know so you’ll be fine. The instructions are basic but that’s all you need really, what bit goes where and how.

There was a little surprise, the size. In the photos it looked a little narrower to me, so when laying the panels out on the table I was taken aback just how big this thing was. It’s in no way a bad thing, it just surprised me and my shelf!
With the instructions etched in my brain, I started constructing the case, starting with the side and front panels, holding it all up, attaching the cubes and screwing into them, it was a little tricky but I soon found my flow. Before I knew it most of the case was done, all that was left was to choose a back panel, which one should I go for? They have two on offer currently, Rainbow Road or Anti-Gravity Track, it was a tough choice but Rainbow Road was a clear winner. Saying that I will be changing them over every now and again to mix it up, both look gorgeous and printed to a very high standard. Which one would you go for?

Before screwing it all together you remove the plastic coating, this obviously protects it until you’re ready to build it. Good thing too as I probably would have scratched it a few times trying to figure out where to build it, choosing a large table is best, laying out all the pieces.
I applied the back panel, Rainbow Road, and hey-presto, the case was fully done. To pop the LEGO Mario Kart set in place, simply lift up the side & top and put to one side. Grab the small brick-built display stand that comes with the set and secure it to the 4 studs in the centre of the case. Place the Kart and Mario on the stand and position it how you wish, I went for a jaunty angle and Mario’s head looking out rather than focusing on the road ahead.

There is also the option to have a custom sticker made too, feature your name, date you built it and set information. It’s a nice personal touch that I highly recommend doing. The shiny, holographic, sticker is thick and premium feeling and adds a bit more sparkle to your display.
Tadaa! The BOXXCO case is complete and boy-o-boy it looks gorgeous!
Thank you to BOXXCO for gifting us this amazingly crafted and built product. It not only protects your prized LEGO sets but they also look awesome doing it. We aren’t in anyway affiliated with BOXXCO but please consider purchasing your next case from them, mention us in the notes during checkout to let them know where you heard of them, The Brick Post!


BOXXCO LEGO Mario Kart (72037) Display Case
Review
Thank you
Your Review is appreciated
What is your reaction?
 YES!
YES!
 I like it
 It's OK
 Not Sure
 No!
No!