
We have teamed up with LeLightGo to showcase their awesome Light Kits and give you an idea of how it can enhance your LEGO sets and take them to another level completely!
If you’re an avid reader of ours then you most likely know we’ve already dabbled in light kits. The most recent one was lighting up the Infinity Gauntlet, which in our opinion is one set that really does need a light kit, the Infinity Stones look absolutely stunning when shining bright. Grab yours here.
I’ll run through the process very quickly followed by photos and videos on the finished product.
The box:
The box is small and stylish and lists everything you get inside, although the installation guide is digital and found on their website.
Open the outer cardboard box and you’ll find a nifty hard plastic storage box that not only looks smart but it also doubles up as a protective shell for all the delicate cables and LED lights.

Each of the silver bags inside is nymbered or lettered, making installation easy and seamless.
The instructions are incredibly well done and take you through the whole process bag-by-bag, it even lays out the contents for you to check against before starting. This makes installing the light kit even quicker, and I must say this was one of the quickest I’ve ever installed.

To quickly find the instructions you’re looking for on the their website, search the page for the LEGO set number, it’ll take you directly to it. Click the lick and download the PDF, and away you go!
The Installation:
As we mentioned earlier we decided to tackle the installation process live on our Instagram account (@thebrickpost), which went extremely well and as usual the chat was great fun. Make sure to follow us to see future live streams.

We had the instruction manual ready on a tablet screen to make it easier to follow and away we went.
Laying the cables and parts out is definitely the way to do it, it helps by showing you the different lengths of cable and allows you to connect the right ends to right LEDs.
Following the steps is also very easy with a handful of photos corresponding to each section showing you exactly where a particular goes. I don’t think the process could be or get any easier.
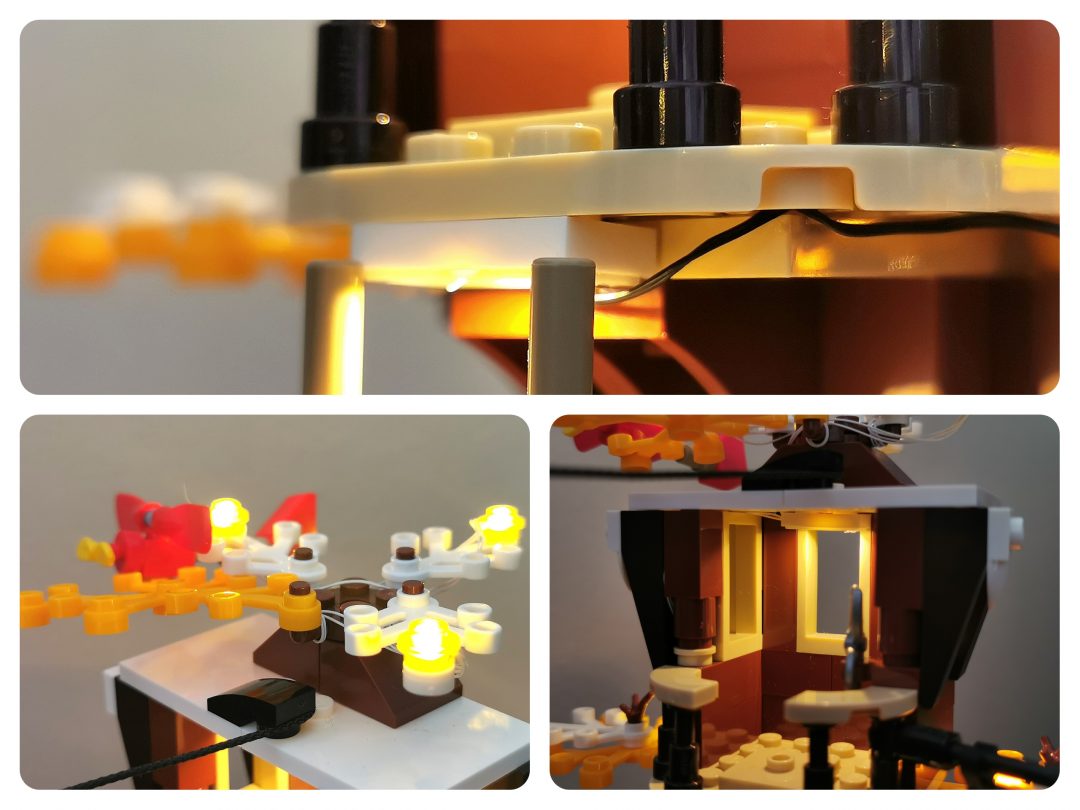
The first bag has you apply a handful of LED strips to the ground floor, along with a bulb placed in the lamp above the front door. This does require you to take small parts of the set apart but this is for the greater good and hides those pesky cables.
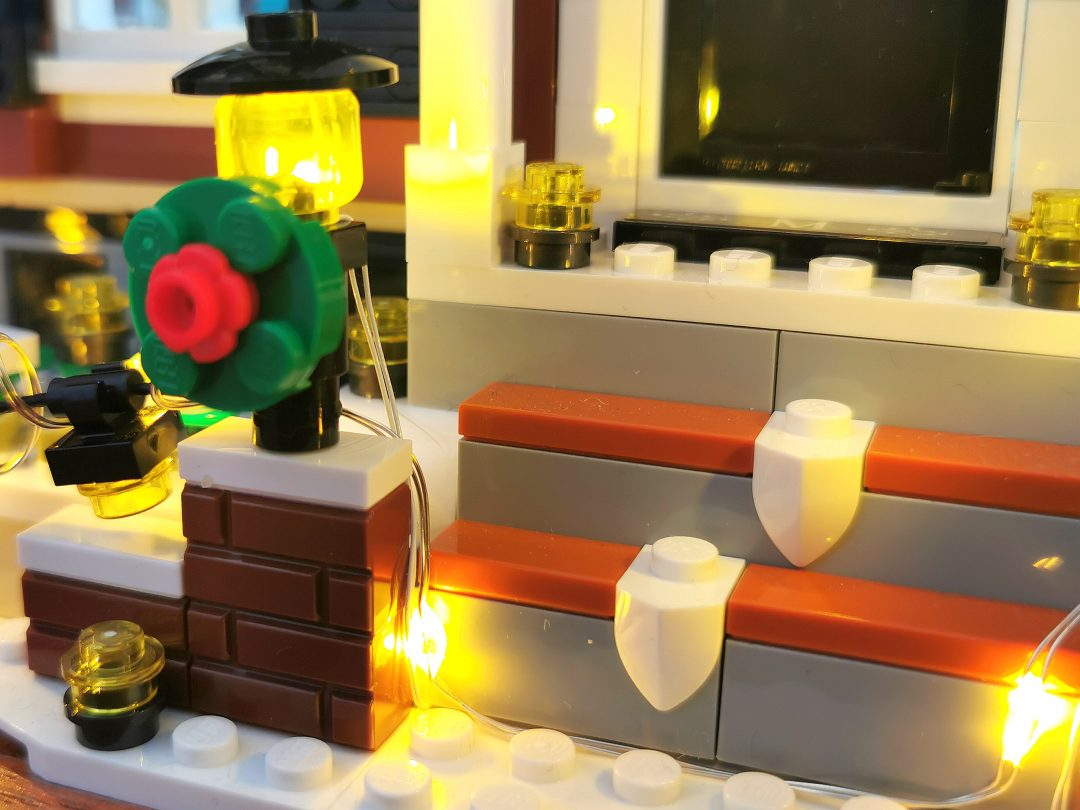
Attaching lights to the bunting along the front of the house was most likely the trickiest part as it involved wrapping the wire-string lights about the LEGO cord in just the right way to have it reach the end withoit too much excess. But the end result looks nice and you soon forget how fiddly it was.
Most of the LED strips have an adhesive side that you can put into certain places. Don’t worry the tape won’t ruin the LEGO Bricks as they can be adjusted, reapplied , and removed.
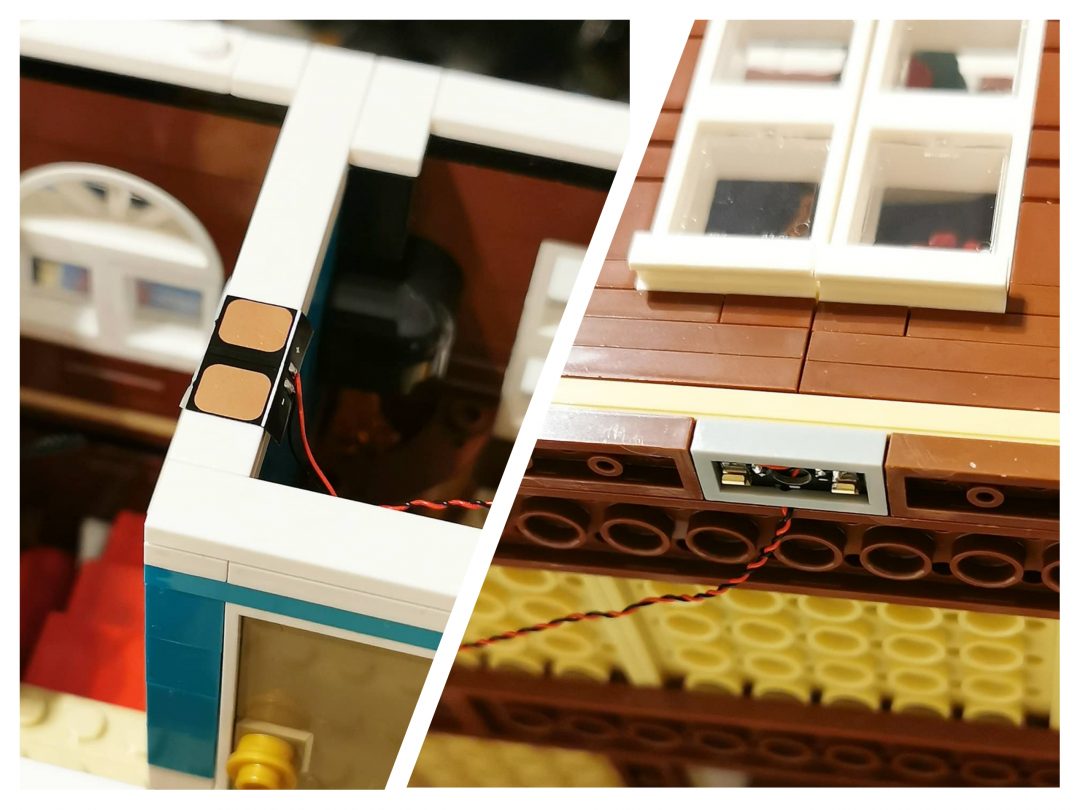
Another great addition to this LeLightGo LED Light Kit is the special connector parts that allow you to remove each of the floors and not be tied down by the cables. A copper connector is placed on the lower floor while a 1×2 connector brick is please directly above it on the upper floor, allowing them to touch and complete the circuit. A perfect solution for LEGO Modulars!
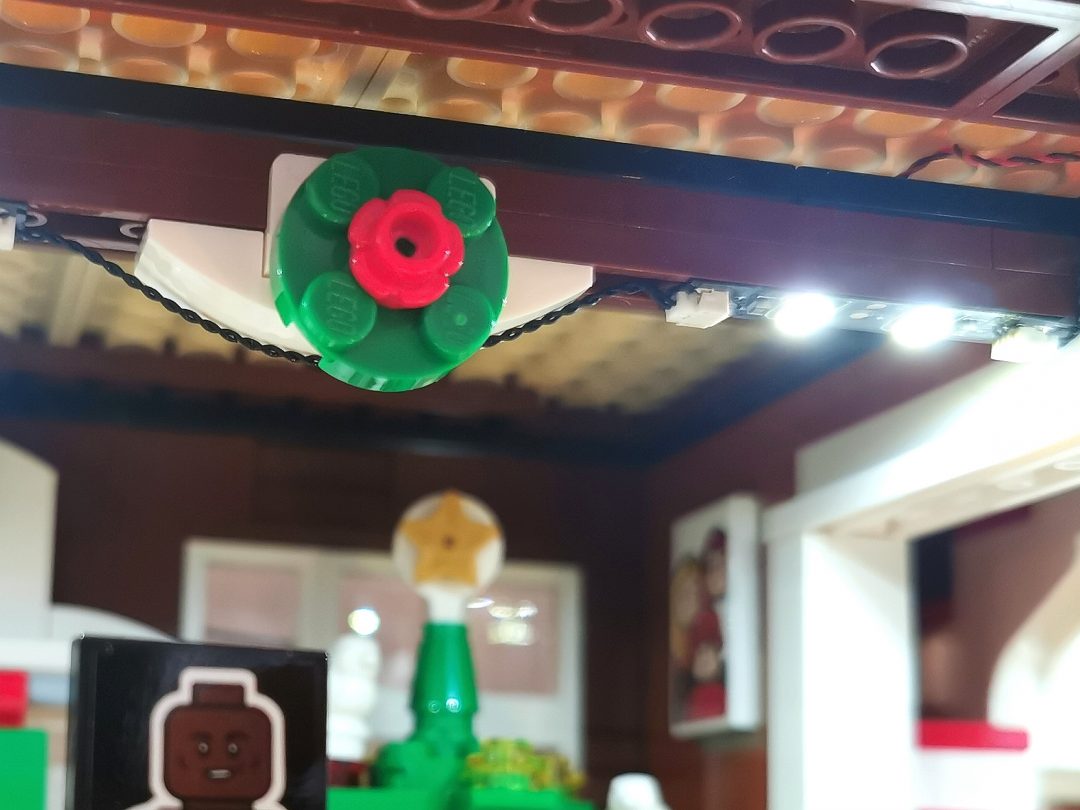
The remaining steps are pretty much the same and have you installing the cables and strips in similar places. The kitchen and basement area is unfortunately all wired together and thus can’t remove each floor, but the overall look of the lights is still stunning.
Lighting up the Wet Bandits Van and Kevin’s Tree House is also fairly straightforward and isn’t that taxing or fiddly. The Van does require a tab more dismantling than the house combined, but that’s ok, the end result means the cables are hidden and tucked out of sight.
These all connect in one central connector which is located behind the house and there out of sight, this down have a sticky back so could be hidden underneath the house itself, although this would considerably shorten the cables that run to the Van and Tree House.
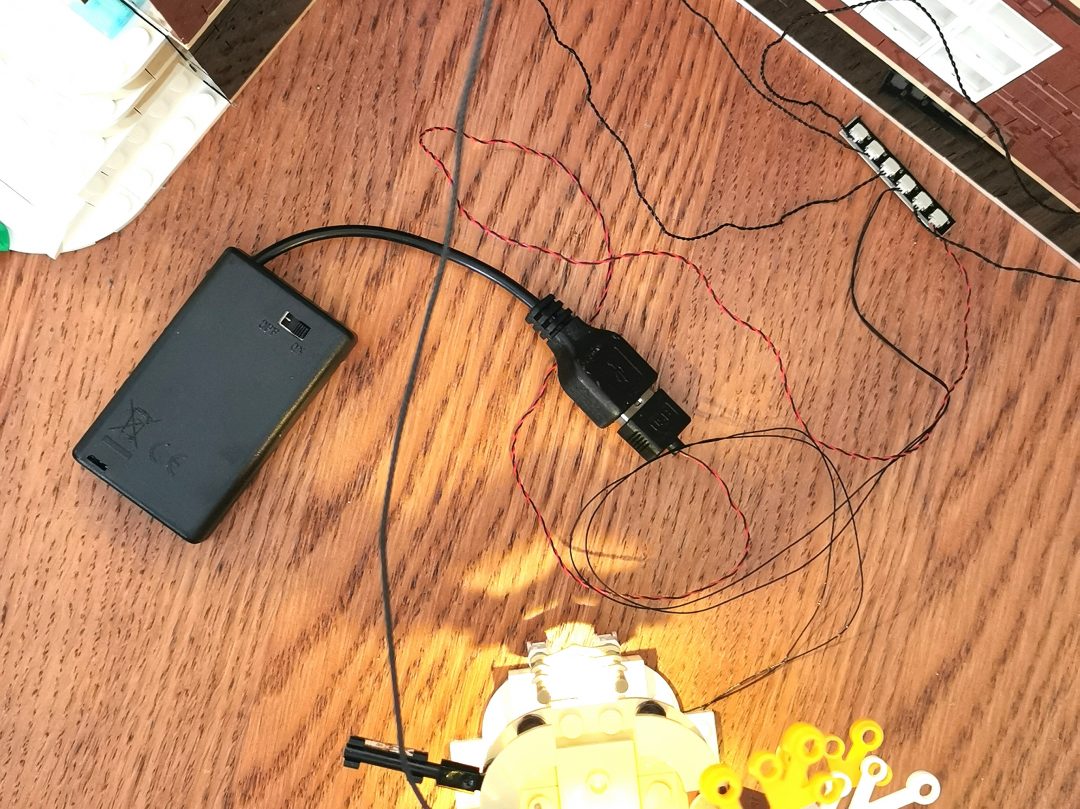
Having the option to be either battery or mains powered it opens it up and can be used in a number of scenes and positions. We would recommend purchasing a USB hub and running your LeLightGo Light Kit collection from that.
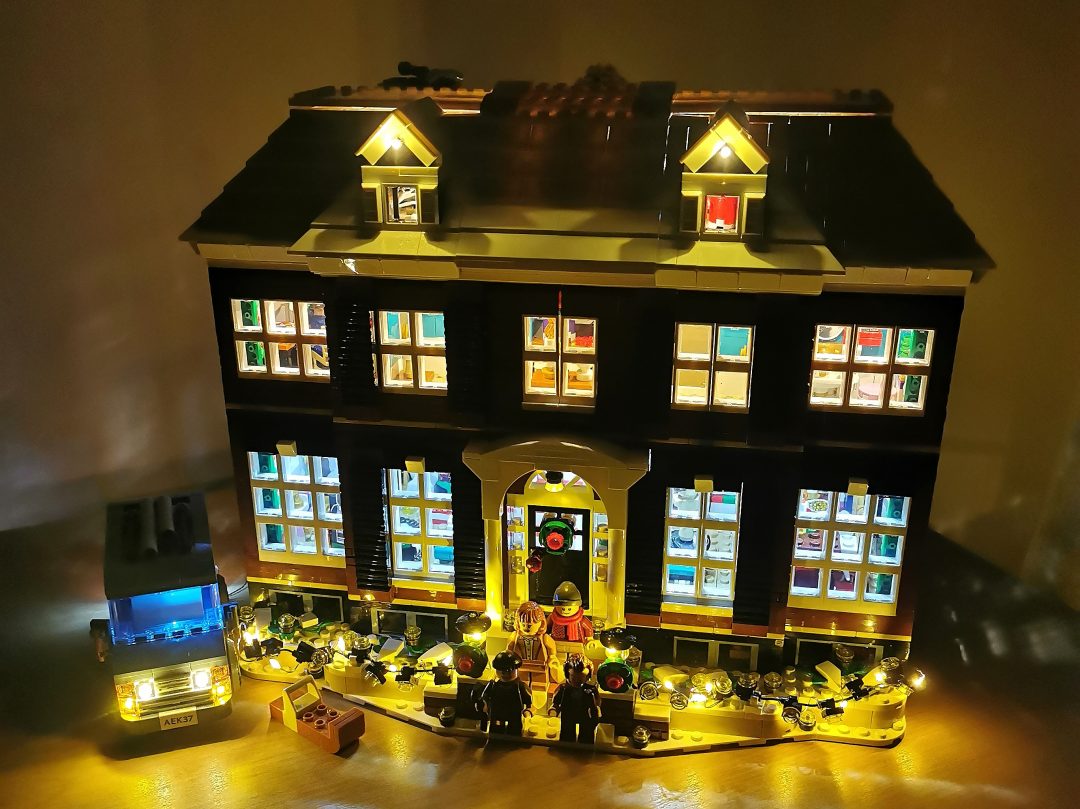
The Final Result:
Here is the final product, the LEGO Ideas Home Alone (21330) set all lit up with a LeLightgo LED Light Kit!

The Conclusion:
I think you’ll agree this set needs to be lit up, and what better way to go about that with a LeLightGo LED Light Kit!
From start to finish the whole process was simple and straightforward and with the help of the instruction manual you couldn’t go wrong. This is definitely one of the easiest light kits I’ve ever installed.
The inclusion of the wireless connectors, which allows the removal of the floors, is amazing and a very welcomed addit3to the modular experience – I can finally take the house apart and not worry about pulling out or breaking cables, amazing.
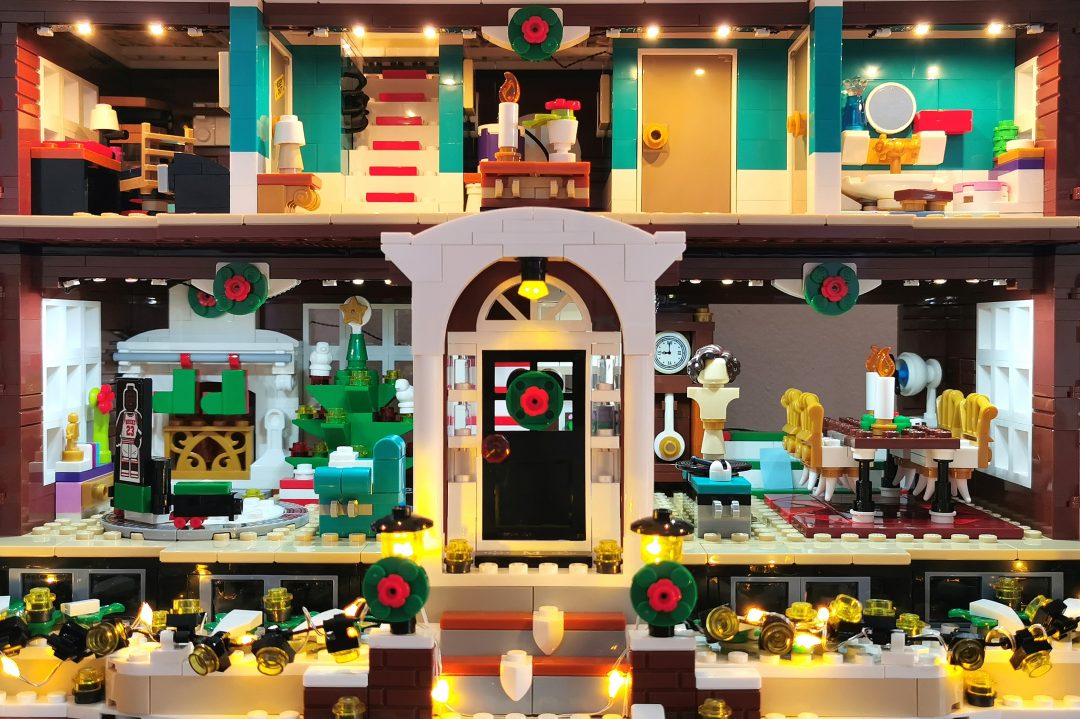
Each room has an ample amount of light and shows off the contents well. Most cables are hidden which is good as nobody likes additional things in view when admiring their LEGO.
Overall LeLightGo has done an amazing job with this light kit and we highly recommend it!
Please help support us by clicking our affiliate links below, we would really appreciate it. We also have a discount code for you to use, enter thebrickpost20 during the checkout process and you’ll get 20% off your order, nice.
LeLightGo:
https://lelightgo.com/?sca_ref=1326002.HFJ9qBQEID
LeLightGo Home Alone Light Kit:
https://lelightgo.com/products/light-kit-for-ideas-home-alone?sca_ref=1326002.HFJ9qBQEID
Thank you for reading this review by The Brick Post, we really hope you enjoyed it. Please bookmark us for all your LEGO related news, reviews, and more. You can also follow us on social media and interact with our growing community!

LeLightGo Home Alone LED Light Kit
Review
Thank you
Your Review is appreciated
What is your reaction?
 YES!
YES!
 I like it
 It's OK
 Not Sure
 No!
No!


[…] their furniture and with each new set they get better and better, although the messy beds in the LEGO Ideas Home Alone (21330) set were outstanding. Here in the Hotel they’re freshly made ready for the next guest and […]