The LEGO Game Boy (72046) could be the set of 2025 – it’s affordable, full of awesome techniques, and hits the nostalgia nail on the head!
This was my first time pre-ordering a set, ever, but not directly from LEGO. I was a day or two too late and the set had already gone on back order at LEGO.com, after a quick Google I saw that Nintendo UK had pre-order stock. Having an account with a few pounds of credit stashed away, I knew this was the place I’d go with, saving money along the way too.
Before we get into the review is are the product details:
- Release: October 1, 2025
- Price: £54.99/$59.99/€59.99
- Pieces: 421
- Stickers: 2
- Numbered bags: 5
The Box & Contents:
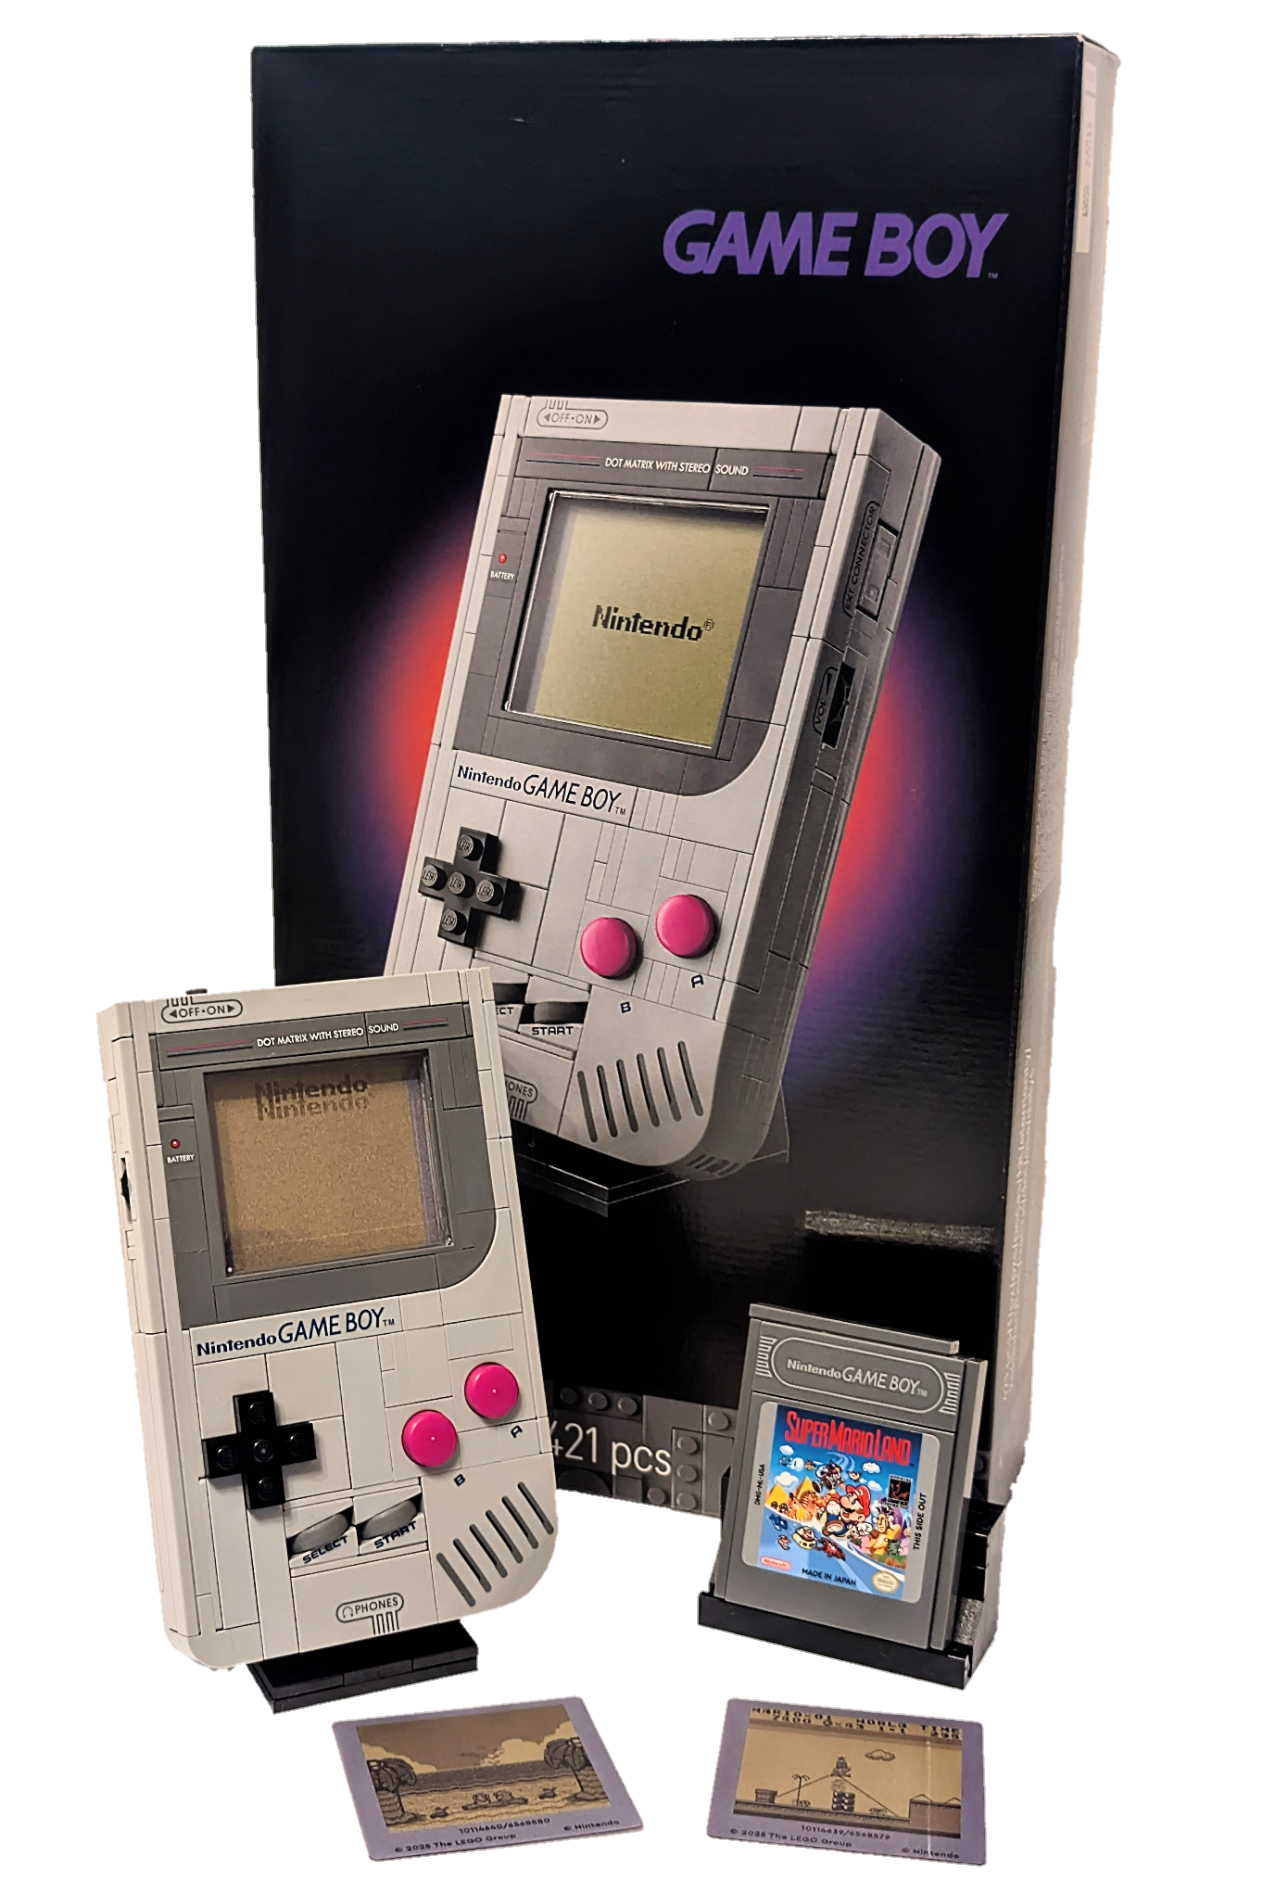
Being a part of the 18+ line of sets, the box it’s the usual plain dark background with the set front and centre. About the brick-built handheld device there is the classic GAME BOY logo in all it’s nostalgia-filled glory. Also listed on the front is the set name, set number and piece count, which is 421 in total.

Inside though, once you’ve cracked it open, you’ll find 5 numbered bags, a separate bag to keep the lenticulars safe, an instruction manual, and a small sticker sheet. Thankfully there are only two stickers, the rest are printed tiles and bricks, phew!
LEGO are gradually rolling out paper bags more and more and I’m. Pleased to say my copy had them. It’s alwaya nice to get the new paper bags, they are a lot easier to recycle. When it comes to the stickers, just two makes it more acceptable, although I’ve always said these premium 18+ sets should have entirely printed elements. But here I’ll let it slide as I think prints on larger tiles would look somewhat dull and the mould mark would poke through.
The Build:
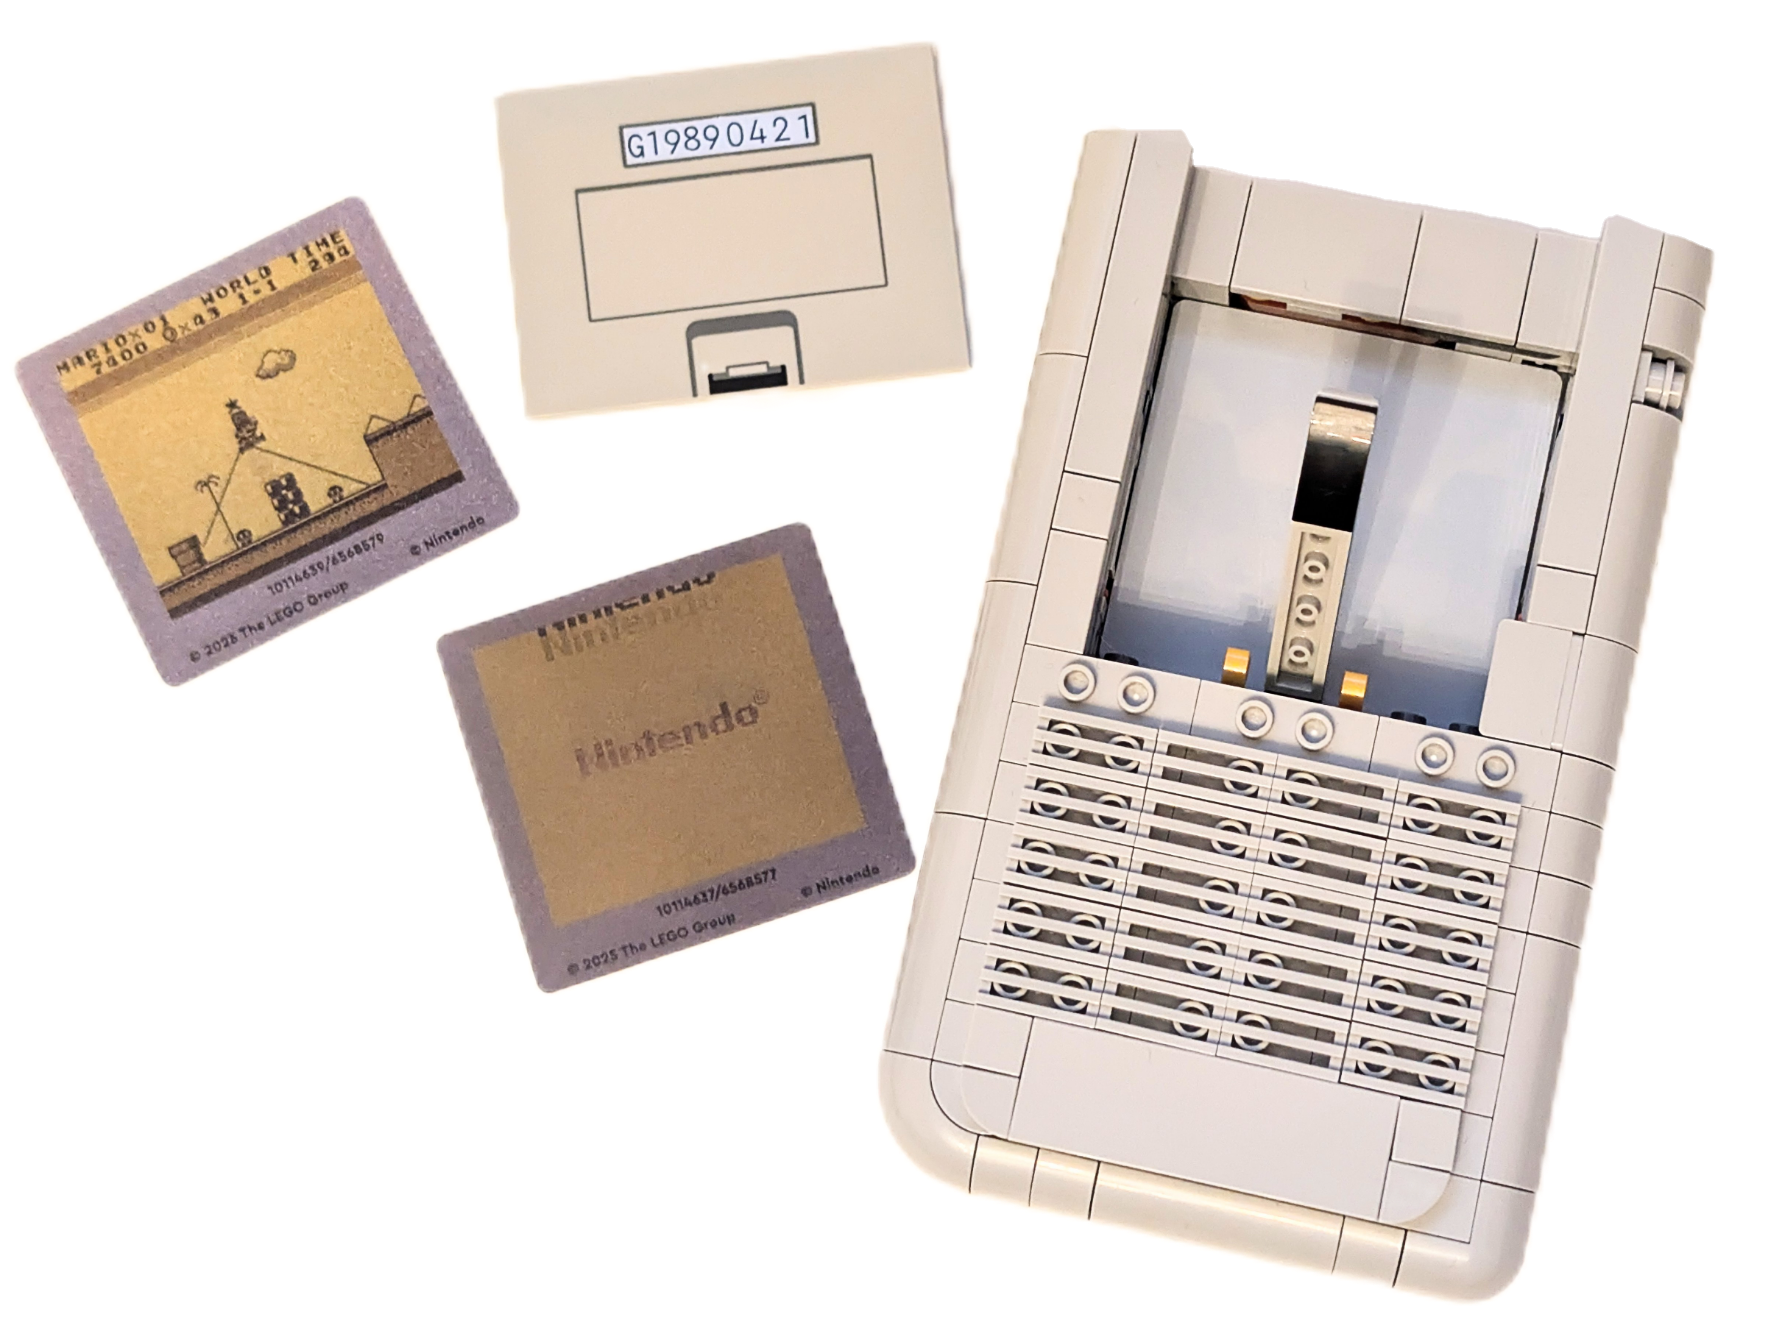
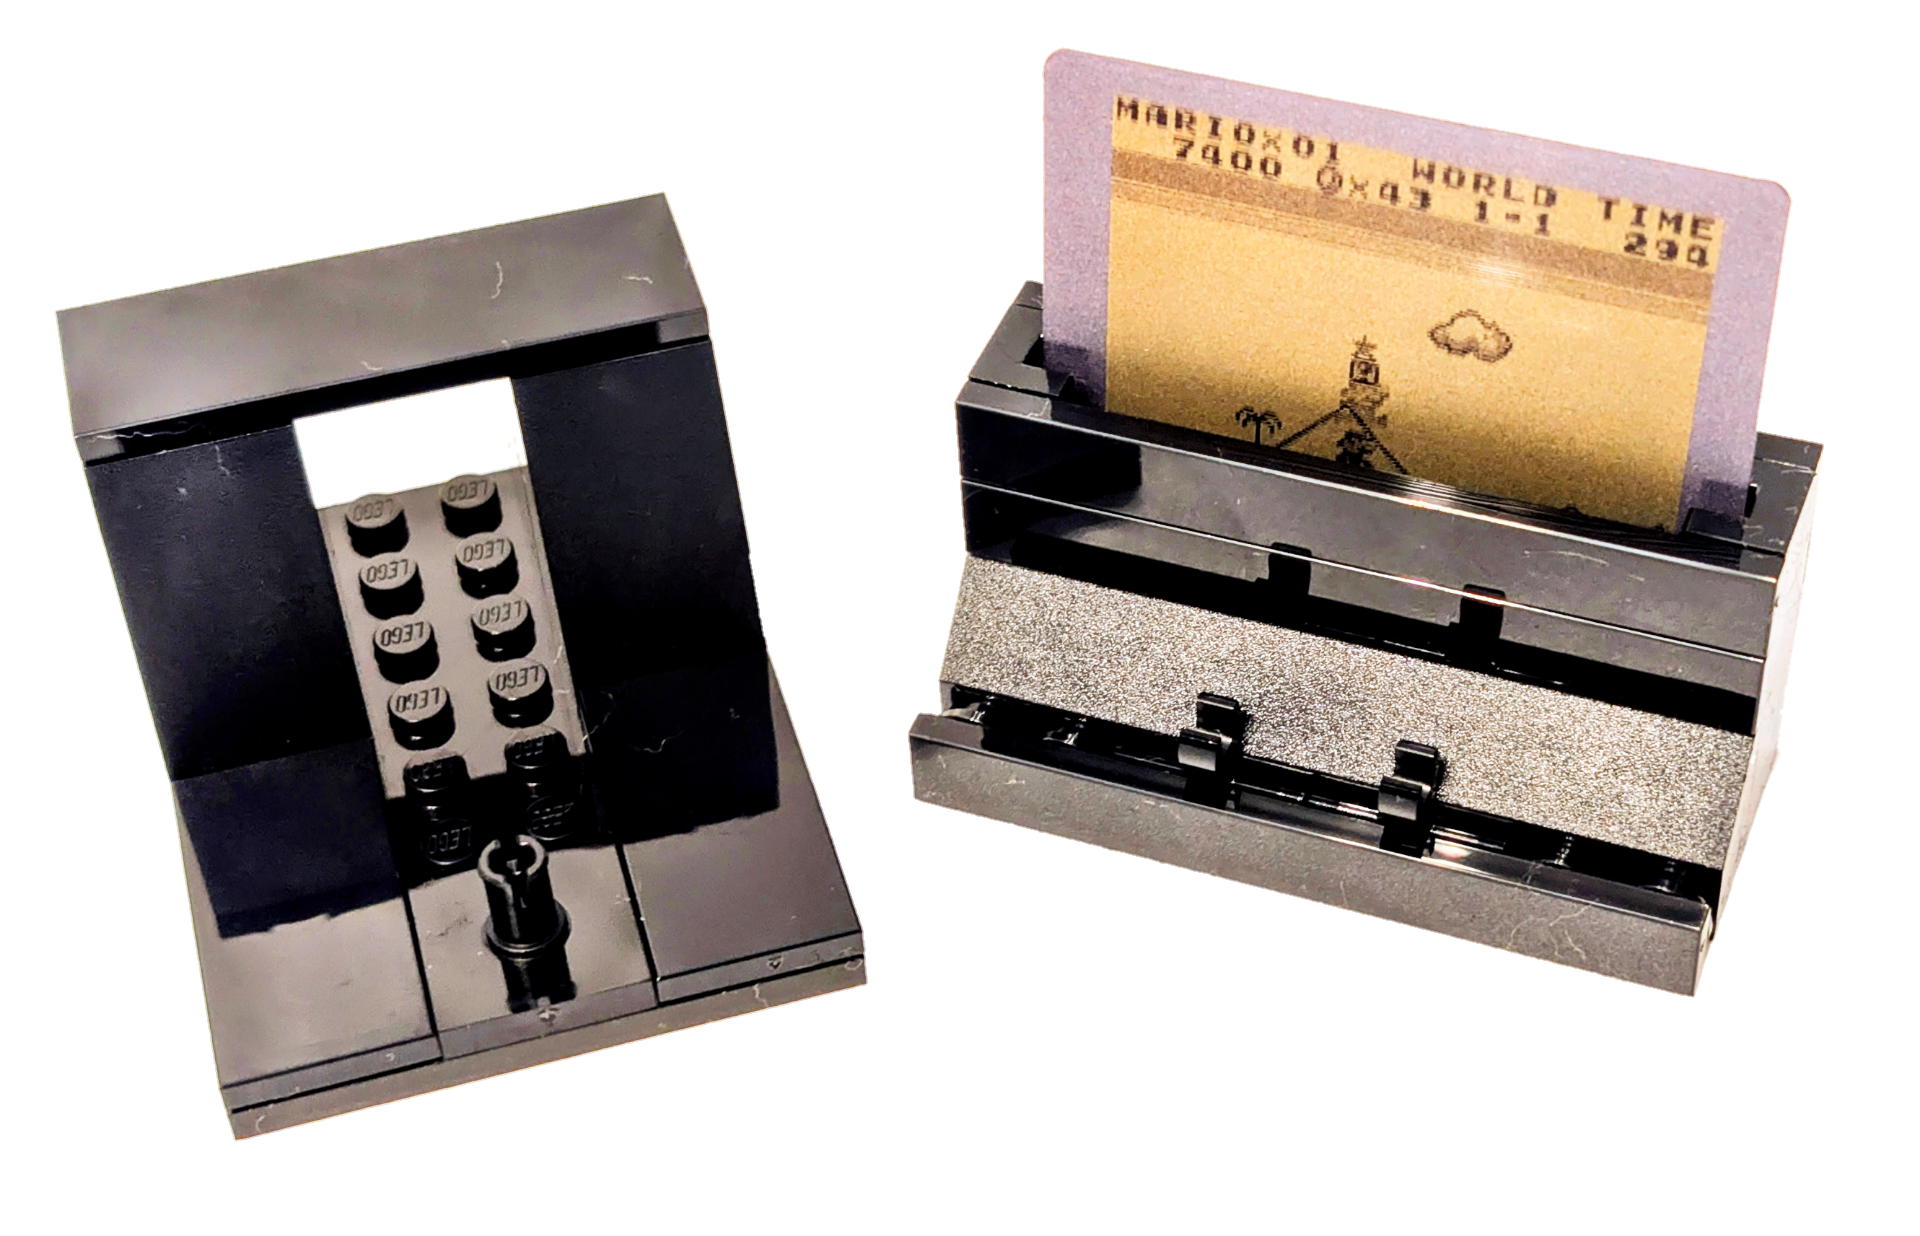
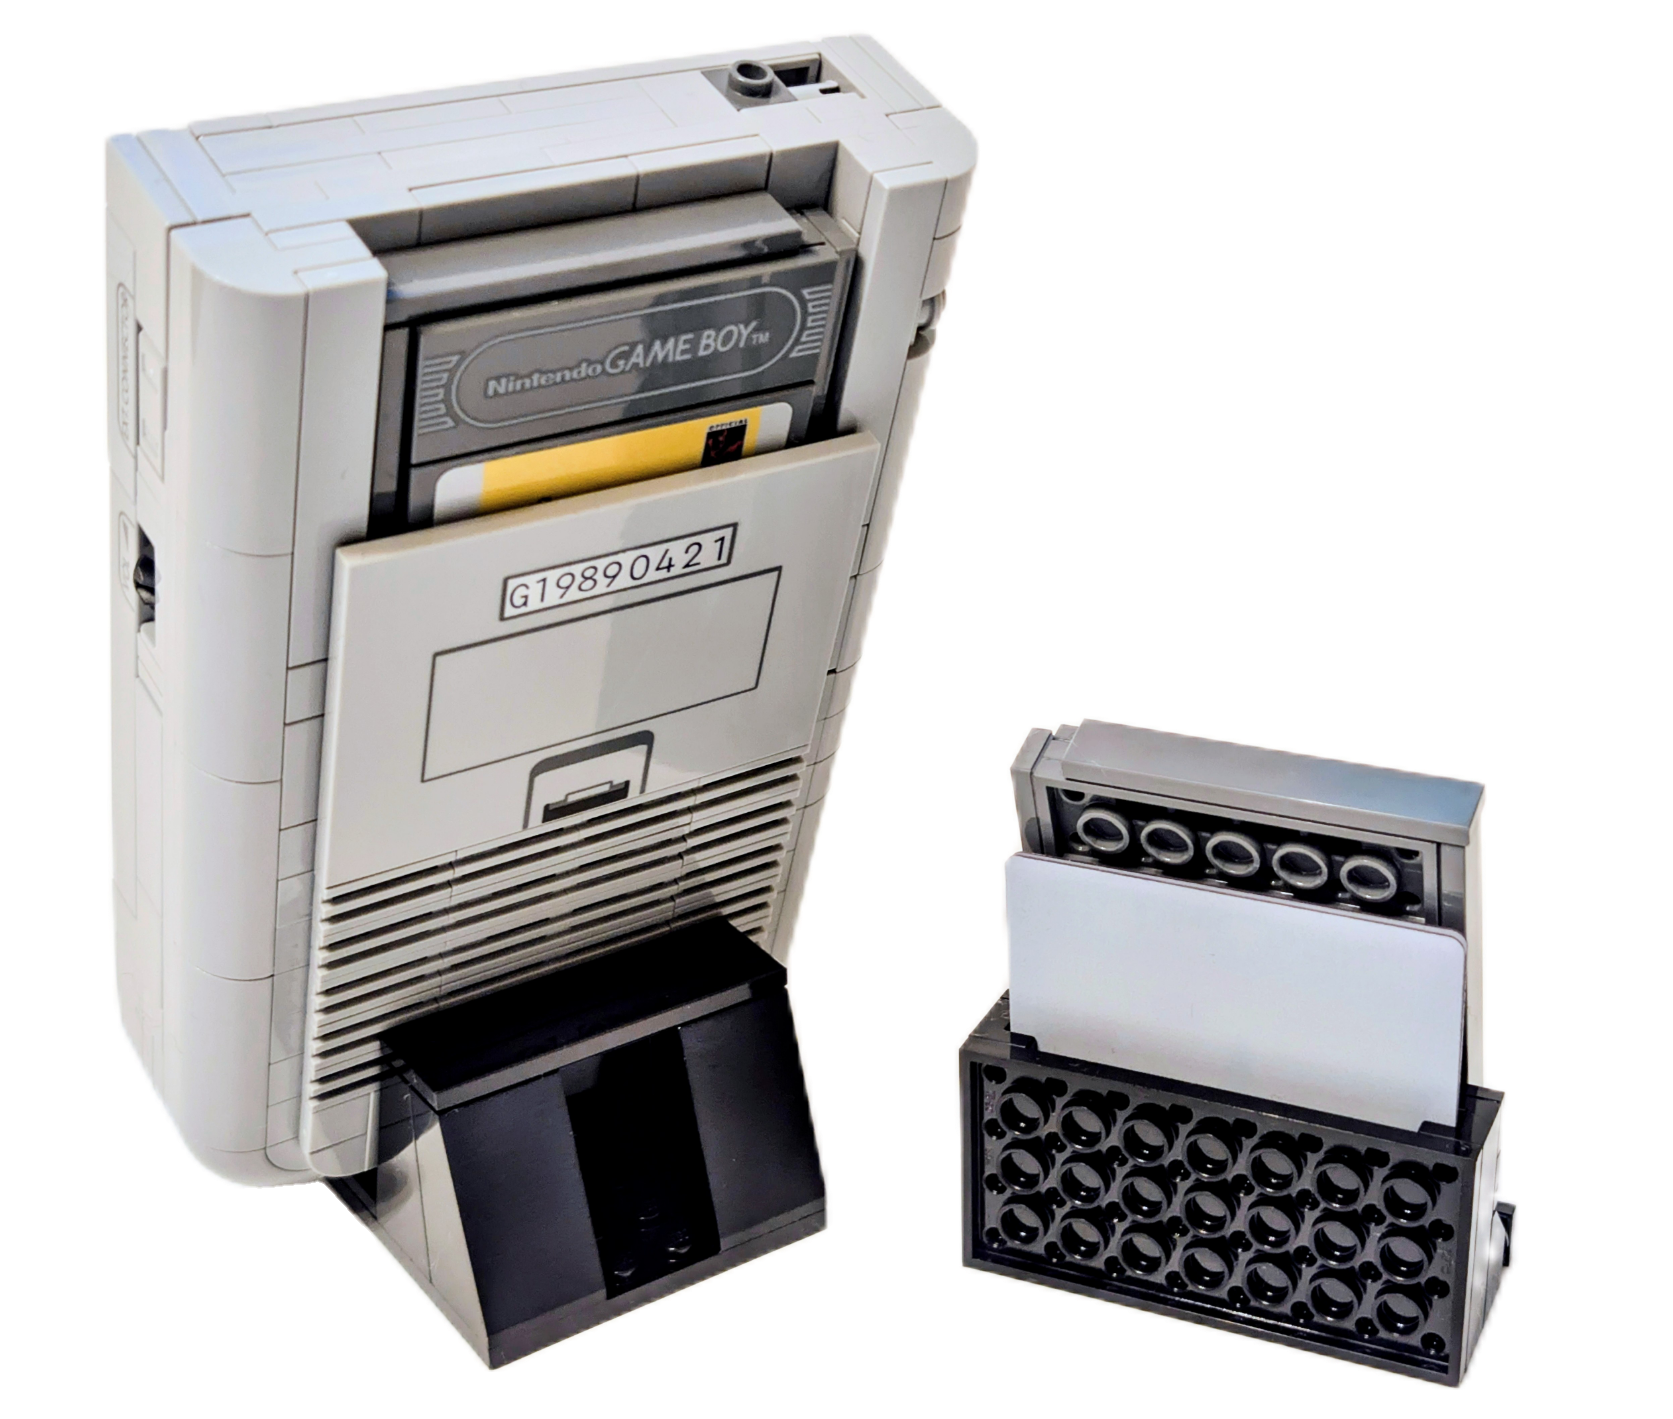
On to the build, which is nothing short of genius, in the techniques used and the way it takes shape over the stages. Bag one is the cartridge display stand and the Zelda game, both are great little builds with the display stand comprising of a handful of parts. You don’t build the Mario cartridge until the very last bag, making for a more varied build process.
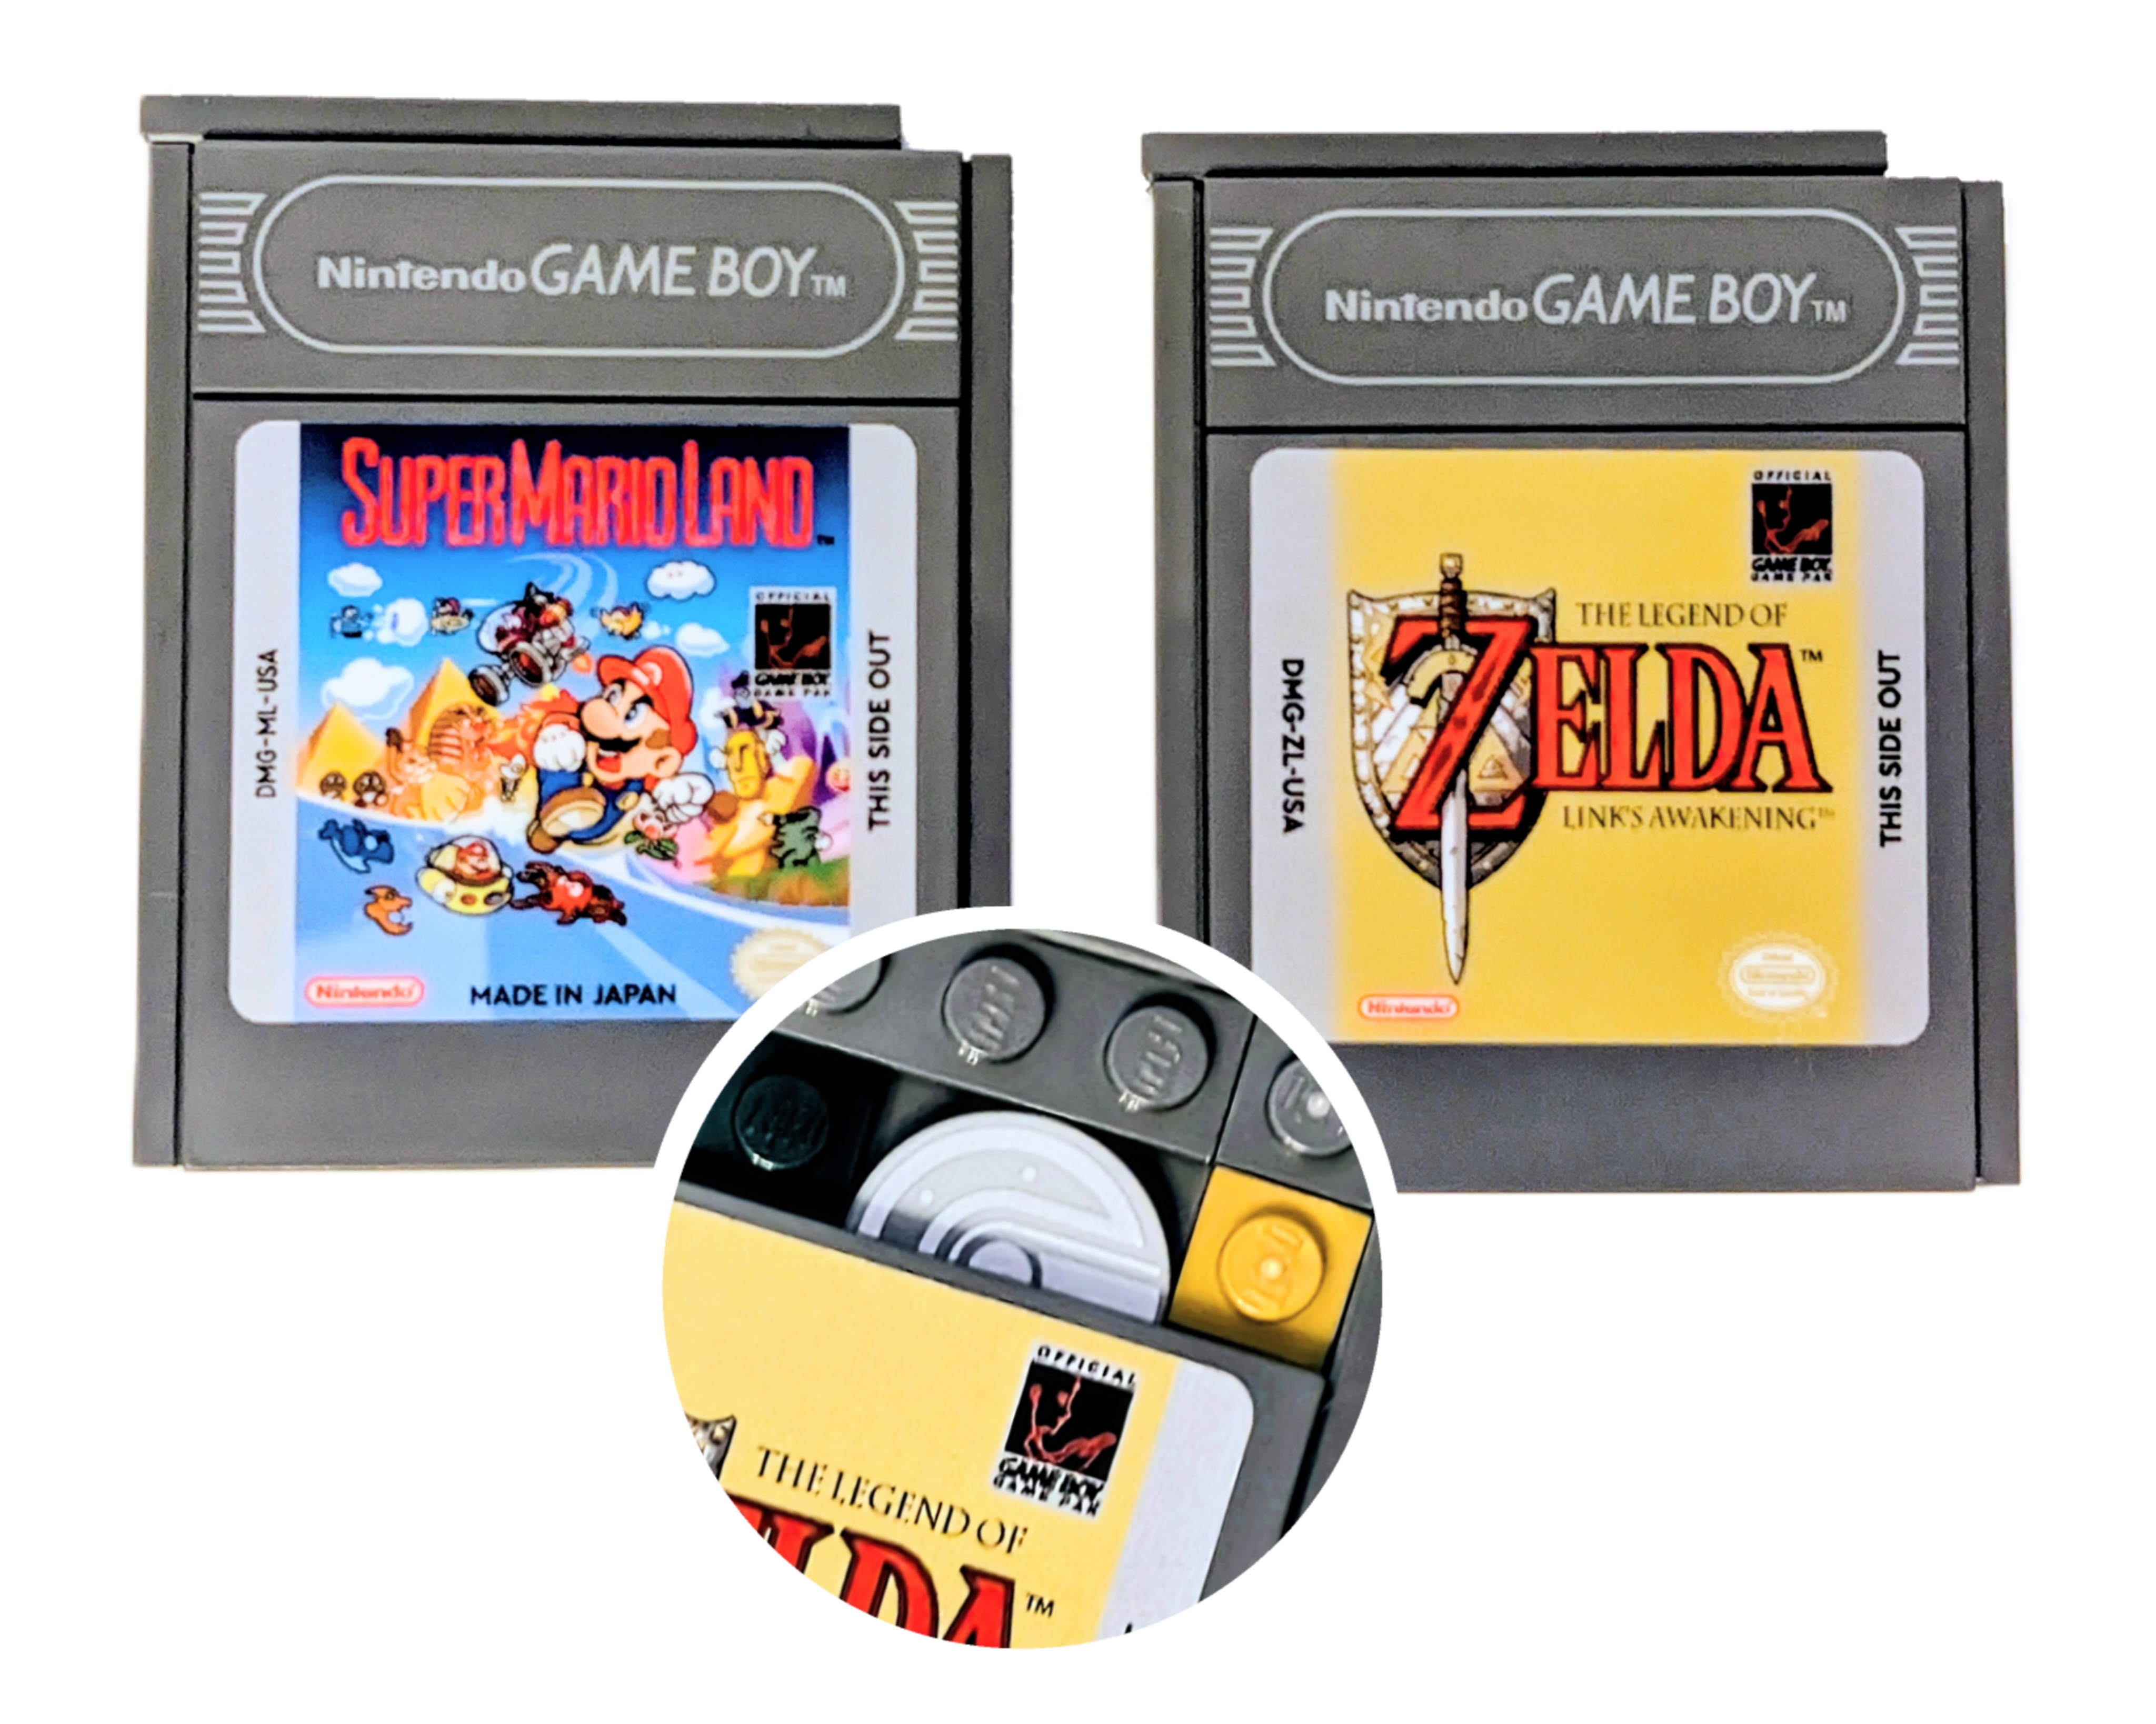
Both cartridges look amazing and are built in a similar way, the only varying factor is the 2×2 round tile that represents a part of the inner workings. I particularly like the 2×6 tiles with the Nintendo Game Boy printing on them, which you get two of, one for each game. As I mentioned before, the stickers are great and do look well done, both have a shine to them especially Zelda, giving it a sort of gold feel.
Bags 2, 3 and 4 construct the Game Boy itself, starting with the back, building up the sides, and finishing with the front. I love how LEGO have kept the size a perfect 1:1 scale, if I had held into my original Game Boy handheld console I’d have done a comparison photo to show you how incredibly similar both look.
Inside the Game Boy, as you build it, looks very colourful indeed, with green plates, lime green 1×1 studs, small red plates, and gold studs. It’s somewhat cheaper to produce certain colours and they are hidden away so it doesn’t matter what colours they use inside. To create a smooth look both front and back, the build is held together with pegs which allow the build to be reversed, making for a very cool and interesting technique.
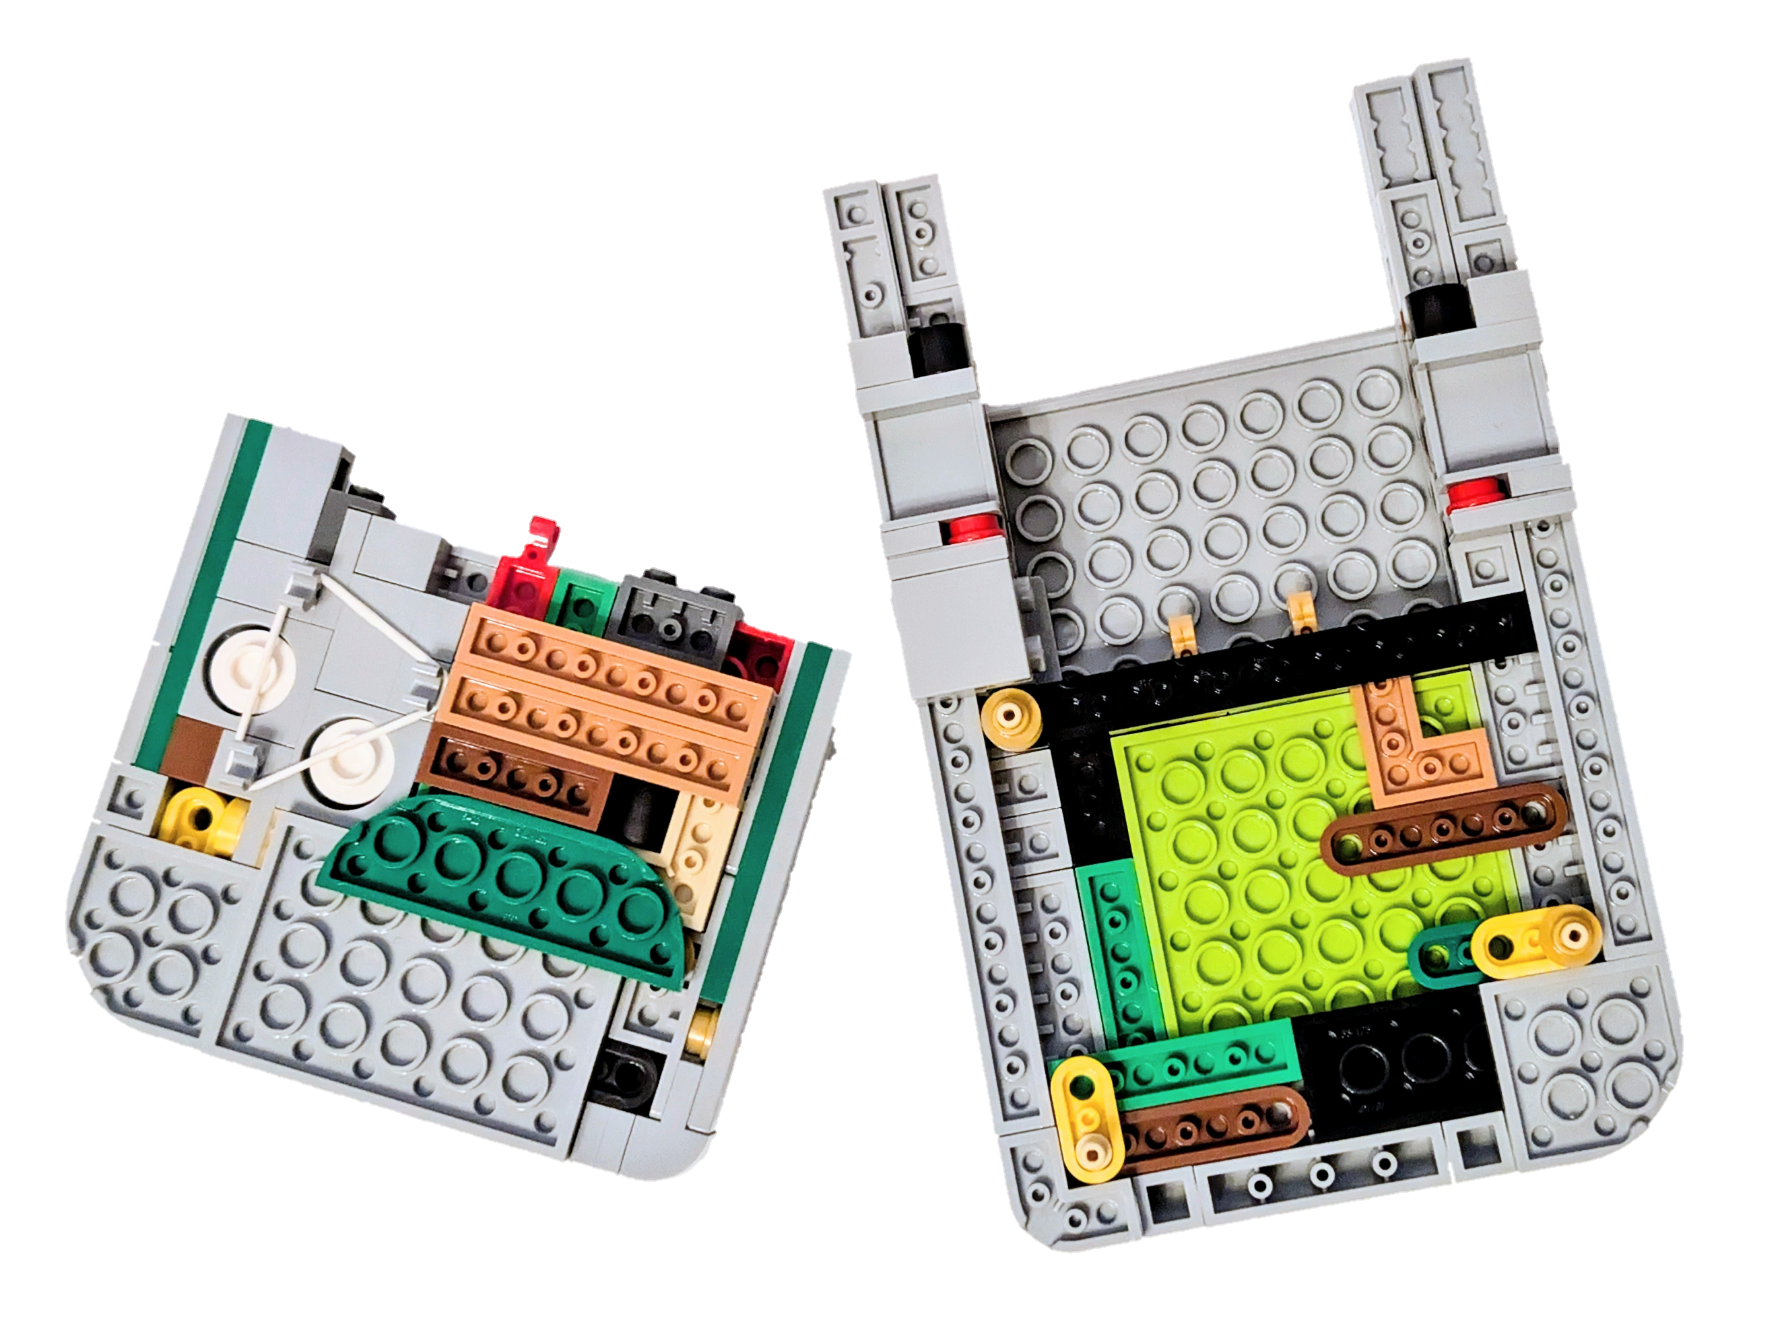
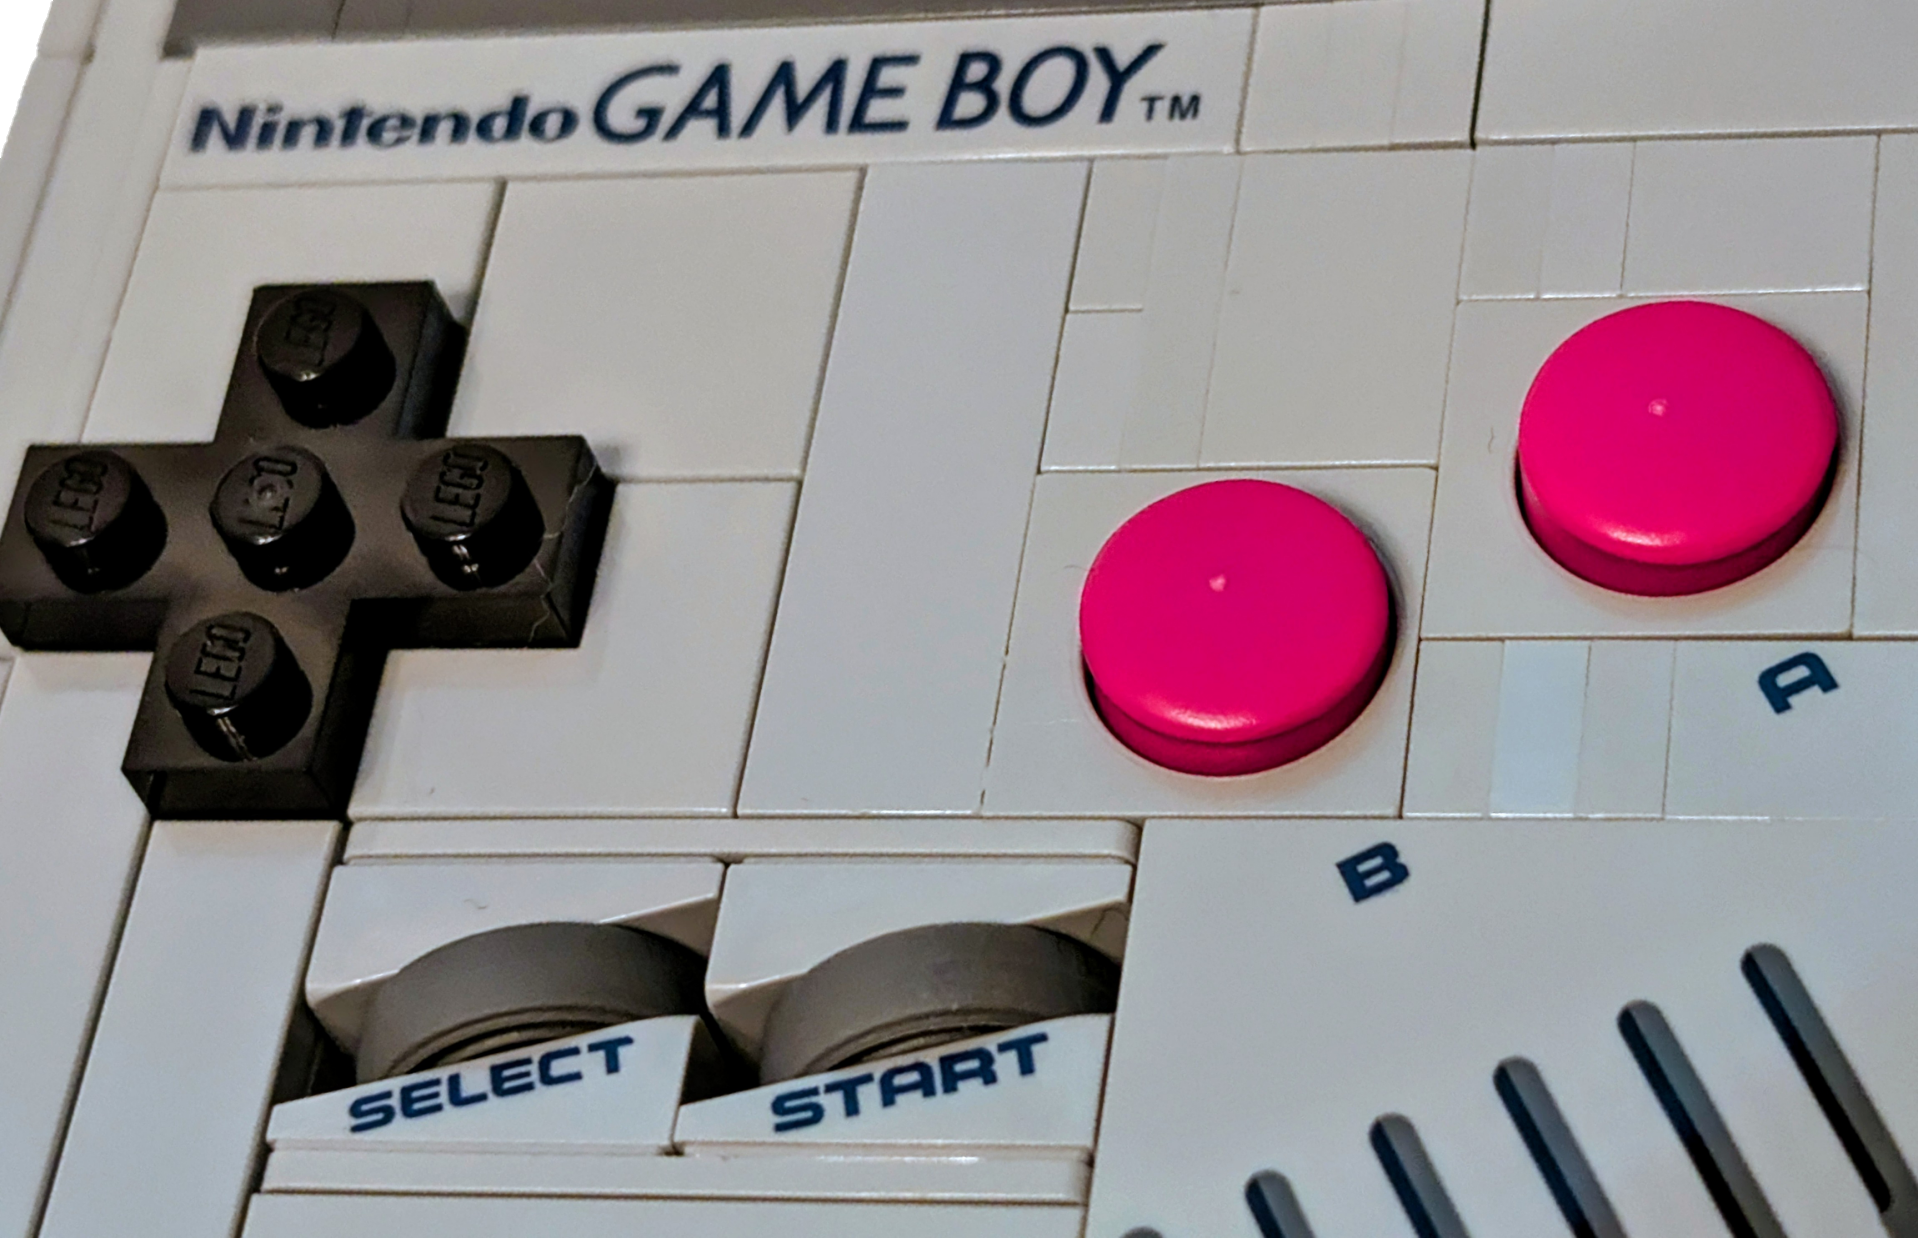
The next mind-blowing techniques are the directional pad and the A and B buttons. As you can see from the image above, the buttons are powered by an elastic band positioned behind them, so when you push the buttons down slightly, they ping back up, genius. The directional pad is a little different, with the use of a rubbery LEGO Technic piece to cushion the 2×2 round tile that the + shaped LEGO element sits on. After pushing a direction on the pad it’ll reset itself thanks to that spongey piece. I’m absolutely rubbish at explaining how these things work but I assure you the finished produced responds just like the original Game Boy in real-life!
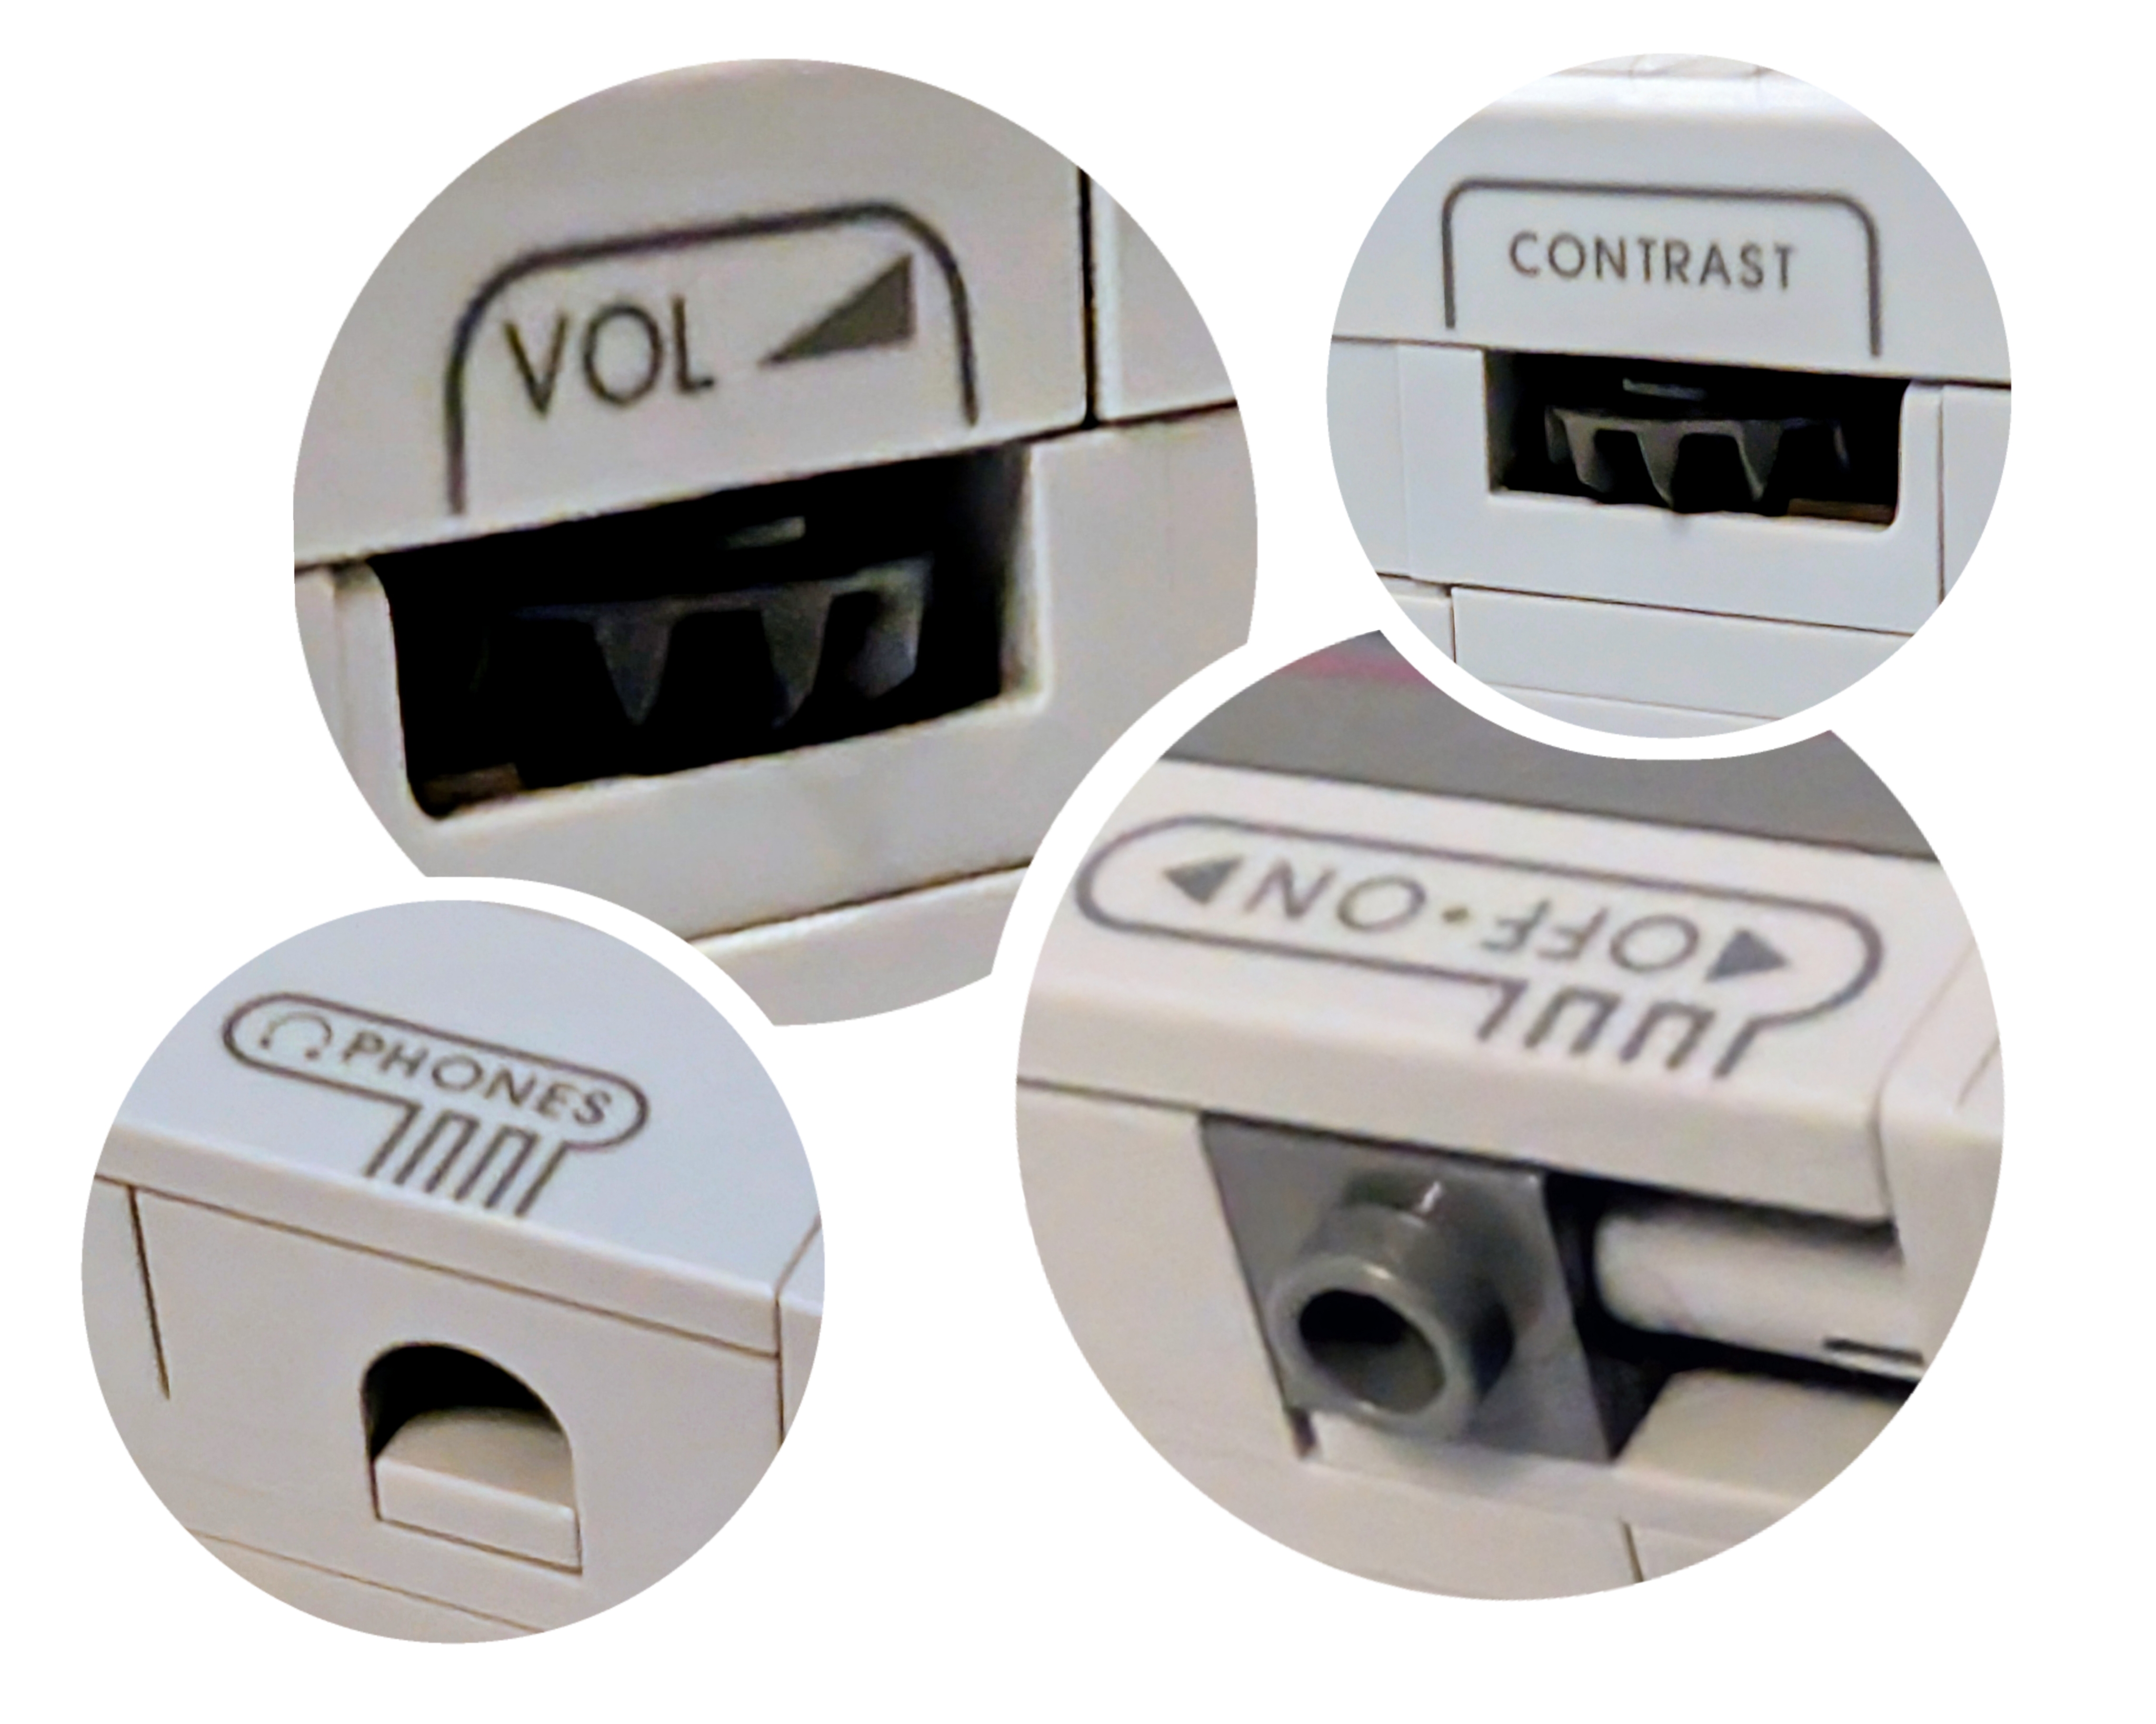
Other impressive features of the set include the volume and contrast dials, the on/off switch and headphone socket. Using small gears, the LEGO design team not only recreated the look and feel of the dials perfectly, but they also turn, giving you the impression they work. The same goes for the on/off switch, you simply slide a 1×1 LEGO Technic brick with a hole over a pin, it slots into place either side simulating a switch, it also gives a very satisfying ‘click‘.
Again the tiles and bricks around the dials are printed to say what they do. The relatively small text looks great and came out clear, some users have reported some printing doesn’t lineup properly as they are printed across multiple surfaces, here though there are no issues, everything lines up nicely.
Building the screen and surrounding area was enjoyable, thankfully my transparent panel wasn’t scratched. Using a large dark grey window frame, you insert the clear panel inside it, then using basic building and SNOT (studs not on top) techniques you build around the window to create a thicker frame and the iconic curve on the bottom right. This then simply slots into place and the tiles you place over the studs holds it in place.
Pop a lenticular screen panel from the back, flick up the brick-built arm to hold it steady and hey-presto, you have finished the LEGO Game Boy (72046).
The Final Thoughts:
Over the build was incredibly enjoyable, with the many interesting and equally as brilliant techniques. The shape, the size, and the feel, are spot on and really does induce a ton of nostalgia. The game packs are also cool, and offer up even more nostalgia, being able to insert them into the Game Boy is very fun and brings back fond memories. As an 18+ set, the display option is fantastic, with the Game Boy stand and the extra game pack stand, they’ll be added to my LEGO Super Mario collection slap-bang in the middle.
Is this worthy of the title Set Of The Year 2025? We certainly think it’s up there, along side the LEGO Mario and Standard Kart (72037) Set, which we gave a 10/10 too early in the year. If you have built this set, what do you think of it? Let us know in the comments below.
LEGO Game Boy (72046)
Pros
- Affordable
- 1:1 scale
- Printed parts
- Techniques
- Lenticulars
Cons
- Stickers (2)
Review
Thank you
Your Review is appreciated
What is your reaction?
 YES!
YES!
 I like it
 It's OK
 Not Sure
 No!
No!